Tankless Water Heater Gas Install: Step-by-Step Guide
Learn how to safely install a gas-powered tankless water heater, including sizing, venting, permits, and maintenance tips from Heater Cost.

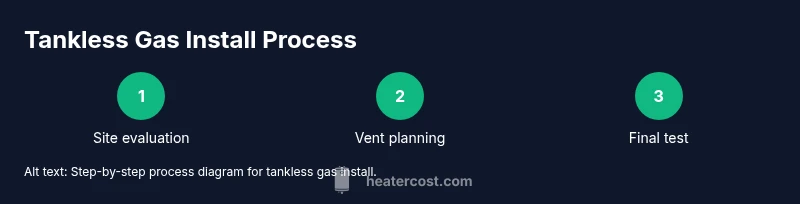
By following this step-by-step guide, homeowners can plan and execute a gas-powered tankless water heater installation with proper venting, gas supply, and code compliance. The process includes site evaluation, vent sizing, gas line considerations, drainage, commissioning, and safety checks. For accuracy and safety, consider professional assessment. According to Heater Cost analysis, 2026, permits and professional labor are common requirements to ensure a compliant, reliable installation.
Why choose a tankless gas water heater
A tankless gas water heater delivers hot water on demand, without keeping a large reservoir hot. This means you don’t run out of hot water during a shower sequence, and the unit’s compact size frees up space in crowded utility rooms. Gas-fired models typically offer strong performance in homes with higher hot-water needs or limited closet space, making them popular in apartments, small houses, and renovations. Because there’s no tank to heat continuously, operating costs can be lower in many scenarios, though actual savings depend on usage patterns, fuel prices, and maintenance.
Sizing and selection matter more with tankless systems than with storage tanks. The right unit must match your peak gallons per minute (GPM) demand, your climate (which affects venting and efficiency), and the number of fixtures you expect to run simultaneously. The Heater Cost team emphasizes that getting this right often requires a professional load calculation and site assessment to avoid undersizing (maintaining comfort) or oversizing (wasted energy and higher upfront cost).
Key performance and sizing considerations
Tankless gas water heaters are sized by peak GPM demand rather than by stored gallons. To choose the right unit, estimate the simultaneous hot-water draw in your home (showers, sinks, appliances) and compare to the unit’s rated capacity. Note climate plays a role: in colder regions you may lose some efficiency and require a larger heater to meet the same demand. Venting requirements, exhaust gas temperature, and condensate management all influence installation cost and long-term reliability. The Heater Cost analysis suggests that mis-sizing or improper venting can erase energy savings and shorten the unit’s life. Therefore, professional load calculations, accurate venting calculations, and correct gas-line sizing are essential parts of a successful install.
Safety and code considerations
Gas installations carry inherent hazards if not done correctly. Ensure compliance with local building codes, manufacturer instructions, and National Fuel Gas Code standards. Many jurisdictions require a permit, an inspection, and possibly a pressure test after installation. Carbon monoxide detectors should be installed in living spaces, and the area around the unit must remain clear to allow safe venting and service. The Heater Cost team notes that improper venting or gas connections can lead to dangerous leaks or inefficient operation, underscoring the need for professional involvement.
Preparing for installation
Begin with a precise assessment of your existing gas supply, venting options, and available space. Confirm whether you will use natural gas or propane, and verify that the location can accommodate venting runs and plumbing connections. Gather required tools and materials, and review the manufacturer's installation manual for clearances and supported configurations. If your home has an older vent system or complex plumbing, a site visit from a licensed professional is highly advisable to avoid costly mistakes later.
What to expect during installation (high-level overview)
Installation typically involves three core tasks: (1) preparing and routing proper venting to exhaust combustion gases, (2) connecting a gas supply with a dedicated shut-off valve and correct piping, and (3) wiring, water connections, and commissioning once all connections are complete. Expect a technician to perform leak tests on gas and water lines, verify vent integrity, and run a functional test of the unit. Clearances, supports, and sealants must meet manufacturer specifications to ensure long-term reliability.
Maintenance and long-term care
Tankless gas heaters require periodic maintenance to sustain efficiency. Regular descaling, especially in hard-water areas, helps prevent mineral buildup that can reduce flow and heat output. Schedule annual professional inspections to verify vent integrity, gas pressure, and condensate management. Keep the area around the unit clean and free of clutter to allow safe service and access for inspections. Regular maintenance can extend the life of the heater and protect your investment.
Budgeting, permits, and next steps
Understand that a tankless gas install involves upfront costs beyond the unit itself, including venting, gas piping, permits, and professional labor. Costs vary by home layout, local code requirements, and whether you’re upgrading an existing vent or adding new lines. Check with your local authority about permit fees and inspection requirements, and consider requesting a written estimate from a licensed contractor that outlines parts, labor, and potential contingencies.
Tools & Materials
- Gas-rated piping (CSST or rigid pipe)(Ensure proper size for the unit and gas type (natural gas or propane).)
- Gas shut-off valve(Accessible and within reach of the appliance.)
- Vent kit and connectors(Follow manufacturer venting requirements; seal joints properly.)
- Vent pipe sizing tool or measuring tape(Measure run length and diameter to size vents correctly.)
- Wrenches (adjustable) and screwdrivers(For fittings, connections, and mounting.)
- Pipe thread sealant / gas-rated Teflon tape(Use yellow PTFE tape on gas joints.)
- Condensate drainage kit(For condensate management from the unit.)
- Leak detector spray or soap solution(Test all gas and water connections for leaks.)
- Drill, rapid mounting hardware, and sealants(Optional depending on mounting surface and local code.)
Steps
Estimated time: 2-6 hours
- 1
Assess site and model
Evaluate space, select a unit that meets peak hot-water demand, and verify venting suitability. Confirm gas type and available clearance per manufacturer instructions.
Tip: Document measurements and keep the manufacturer's manual handy for reference. - 2
Shut off utilities and prepare space
Turn off gas and water supply to the installation area. Clear the workspace and protect nearby surfaces during work.
Tip: Post signage that work is in progress to prevent accidental use. - 3
Plan venting route
Design a vent path that meets code, minimizing length and turns. Prepare any required vent supports and seals.
Tip: Avoid sharp bends and ensure proper slope for condensate drainage. - 4
Run gas line and install shut-off
Install or adapt gas piping with a dedicated shut-off valve near the heater. Ensure proper gas pressure and leak testing before proceeding.
Tip: If you smell gas, evacuate and call emergency services immediately. - 5
Mount unit and connect water lines
Secure the tankless heater to a wall or support, then connect cold and hot water lines with appropriate fittings and seals.
Tip: Use backflow prevention and check for leaks after connections. - 6
Vent, seal, and test
Install vent components, seal joints, and perform a gas leak test followed by a water-pressure test.
Tip: Use a soap solution to verify all joints are leak-free. - 7
Commission and inspection
Power the unit, verify ignition and safety devices, and schedule any required inspections or inspections by the gas company or local authority.
Tip: Have documentation ready for the inspector, including manuals and permit numbers. - 8
Document and plan maintenance
Record model numbers, serials, and service intervals. Plan annual professional checks and routine descaling if you have hard water.
Tip: Set reminders for annual service to protect warranty and efficiency.
Got Questions?
Do I need a permit for installing a tankless gas water heater?
In most areas, a permit is required and inspections are common after installation. Requirements vary by locality, so check with your building department. A licensed installer can handle the permitting process for you.
Most places require a permit and inspection, so check with your local authority or hire a licensed installer to manage it.
Can I install a gas tankless water heater myself?
Gas installations involve gas lines, venting, and code compliance that are best handled by a licensed professional. DIY work can void warranties and create safety risks.
It's not advisable to install it yourself; a licensed technician ensures safety and code compliance.
What venting options are acceptable for a tankless gas unit?
Venting must follow the unit’s manual and local codes. Options depend on your space, heat output, and whether you vent horizontally or vertically. Improper venting can lead to safety hazards.
Vent options depend on your home and the unit; professional sizing and installation are key.
How long does installation typically take?
Time varies with existing setup and permits. A straightforward installation may take several hours, while complex relocations or new venting can extend the timeline.
Most installs take a few hours, but plan for a full day if permitting or major vent work is needed.
What maintenance is required for a tankless gas heater?
Annual professional inspections are recommended, with periodic descaling in hard-water areas. Regular checks help maintain efficiency and prevent mineral buildup.
Keep up with annual checks and occasional descaling to keep it running efficiently.
Is a tankless gas install more expensive upfront than a storage heater?
Upfront costs can be higher due to venting, gas lines, and labor. Over time, energy savings may offset the initial investment, depending on usage and fuel prices.
It can cost more upfront, but long-term savings depend on how you use hot water.
Watch Video
The Essentials
- Plan sizing with a professional load calculation.
- Venting and gas supply must meet manufacturer specs.
- Obtain all required permits before starting work.
- Hire a licensed pro for safety and code compliance.
- Schedule regular maintenance to preserve efficiency and lifespan.