Hot Water Heater Set Up: A Complete How-To Guide
Learn how to safely set up a hot water heater, covering electric and gas options, venting basics, commissioning, and maintenance. This Heater Cost guide helps homeowners navigate codes, permits, and common installation considerations.

This guide explains how to safely set up a hot water heater, covering electric and gas options, sizing, venting basics, connections, and commissioning. It emphasizes planning for space, shutoffs, and permits, then performing installation steps with safety checks to prevent leaks and injury. Following this process helps homeowners, renters, and managers achieve reliable hot water with confidence.
Safety First: Why Proper Setup Matters
Water heater installation involves gas lines, electrical circuits, and venting systems. A flawed setup can lead to gas leaks, carbon monoxide hazards, electrical shocks, or scalding injuries. That’s why codes, manufacturer instructions, and safety practices matter. According to Heater Cost, safe setups begin with correct unit sizing, adequate clearance, and proper venting or exhaust paths. The Heater Cost team also notes that permits and inspections are often required by local authorities to ensure compliance and safety. Before you begin, read the installation manual thoroughly and confirm the chosen location has a stable surface, drainage, and access for maintenance. Consider your household demand; a larger family with several bathrooms typically needs a higher-capacity unit, while smaller homes may benefit from compact or high-efficiency models. If replacing an old unit, ensure the new heater’s energy rating aligns with your energy goals and budget. This section lays the groundwork for a safe, code-compliant installation and introduces the main decisions you’ll make: electric vs gas power, tank size or tankless approach, mounting, venting, and piping routes.
Tools and Materials You’ll Need
Before you start, gather essential tools and materials to avoid mid-project trips. Having everything on hand keeps the project safe and on schedule. Depending on your setup, you may need additional items recommended by the manufacturer. A gas model will require proper venting components and gas-rated fittings, while an electric unit demands the correct wire gauge and circuit provisions. With the right tools, you can work confidently and reduce the chance of leaks, improper connections, or injury. The following list covers the basics you’ll likely use:
- Adjustable wrench — essential for fittings and connectors
- Pipe wrench — for large-diameter pipes and stubborn fittings
- Teflon tape (PTFE) — seals threaded joints
- Pipe cutter or hacksaw — for shortening pipes if needed
- Screwdrivers (flat and Phillips) — for access panels and mounting hardware
- Voltage tester or multimeter — ensures circuits are de-energized before work
- Buckets, towels, and rags — manage spills and drips gracefully
- Gas-rated shutoff wrench (if installing gas) — for gas line connections
- Thread sealant or pipe dope — use only where the manufacturer allows
- Venting components and clamps — maintain proper venting paths
- Expansion tank (if required by local code) — controls pressure fluctuations
Note: Always refer to the unit’s installation manual for model-specific requirements and any local code mandates.
Step-by-Step Installation Basics
A solid installation follows a logical sequence that prioritizes safety and leak prevention. Start by turning off power at the main breaker and shutting off the water supply. Drain the existing tank if you’re replacing an old unit, disconnect water and gas/electric lines, and remove mounting hardware. Prepare the space by ensuring level mounting, proper clearance, and accessible venting. Position the new heater, then connect cold water in, hot water out, and fittings with appropriate Teflon tape. For gas models, install vent piping per manufacturer instructions and code; for electric models, route conductors to a dedicated circuit with the correct breaker size. Finally, verify all connections, fill the tank, bleed air, and test for leaks before energizing.
Pro tip: never energize a unit with an unfilled tank or leaking connections.
Gas vs Electric: Key Differences for Setup
Gas water heaters require proper venting to exhaust combustion gases, a gas supply line sized for the unit, and safe clearance from combustibles. Gas pilots or electronic ignitions must be wired correctly, and gas pressure should meet the manufacturer’s specifications. Electric water heaters require a dedicated circuit with the appropriate gauge wire and a properly sized breaker. Electrical work must follow electrical code, and ground-fault protection may be required in some locations. In either case, ensure a clean, dry, and accessible junction box and routing that avoids pinch points or extreme heat exposure.
Venting, Expansion, and Piping Considerations
Vent piping must be correctly sized and sloped to prevent condensate buildup. For gas units, a proper vent diameter and restraint are essential to meet venting codes and avoid backdrafts. An expansion tank may be required to absorb thermal expansion when water is heated; this prevents pressure buildup that can stress valves and piping. Install anti-siphon valves where applicable, and ensure the discharge from T&P relief valves is directed to a safe location. Use appropriate piping materials (copper, CPVC, or PEX), seal joints with tape or paste as recommended, and avoid cross-threading or overtightening joints.
Testing, Commissioning, and Maintenance
After installation, slowly fill the tank and check every connection for leaks using a soap solution or water spray. Once filled, restore power or gas and perform a careful start-up, monitoring for unusual noises, steam, or odors. Set the thermostat to a safe but efficient temperature and test hot water delivery from multiple fixtures to verify even distribution. Schedule annual maintenance: flush the tank to remove sediment, inspect and test the T&P valve, and verify venting integrity. Keep a maintenance log and address issues promptly to extend the life of your heater.
Common Pitfalls and Troubleshooting
Common issues include leaky fittings, improper venting, inadequate drainage, and incorrect electrical sizing. If you smell gas or notice continuous CO2 alarms, evacuate and call the gas utility or emergency services. Leaks may appear as damp spots, corrosion, or a rusty smell; tighten fittings only to hand-tight plus a quarter-turn and re-test for leaks. If the unit doesn’t heat evenly or takes unusually long to supply hot water, check thermostat settings, ensure correct wiring, and inspect the dip tube and sediment buildup. When in doubt, consult a licensed professional.
Tools & Materials
- Adjustable wrench(For fittings and connectors)
- Pipe wrench(For larger pipe connections)
- Teflon tape (PTFE)(Seal threaded joints)
- Pipe cutter or hacksaw(Needed if you must shorten pipes)
- Voltage tester or multimeter(Verify power is off before touching wiring)
- Screwdrivers (flat and Phillips)(Access panels and mounting hardware)
- Buckets and towels(Contain spills during drainage)
- Gas shutoff wrench(Only for gas installations (per code))
- Thread sealant or pipe dope(Only where manufacturer allows)
- Vent components and clamps(Gas venting path and seals)
- Expansion tank(As required by local code)
- Vent clearance and anti-siphon devices(Ensure safe operation and code compliance)
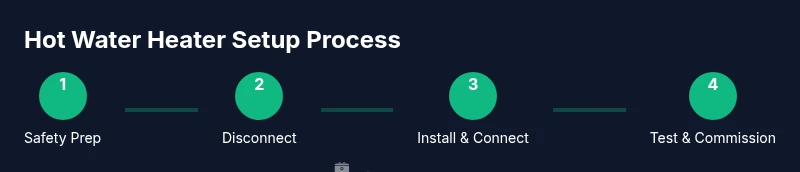
Steps
Estimated time: 2-6 hours depending on model and electrical/gas work
- 1
Safety checks and planning
Turn off power at the main breaker and shut off the cold water supply. Verify the chosen location meets clearance, drainage, and venting requirements before removing the old unit.
Tip: Use a non-contact voltage tester to confirm no live wires. - 2
Disconnect and remove old unit
Drain the tank, disconnect water and gas/electric connections, and remove mounting hardware. Have a helper to safely move the unit.
Tip: Place towels to catch spills; never loosen gas lines while power is on. - 3
Position and mount the new heater
Set the new heater in place, level it, and anchor if required by code. Connect cold water in, hot water out, and fittings per manufacturer instructions.
Tip: Ensure the overflow drain and expansion tank are positioned per local code. - 4
Connect water lines and venting
Attach cold water inlet with proper fittings and Teflon tape. For gas units, install venting through the chimney or approved system.
Tip: Check all joints for leaks with a soap solution before energizing. - 5
Electrical or gas hookups
Electric: connect to the correct circuit with appropriate gauge wiring and a dedicated breaker. Gas: verify gas pressure and seal connections.
Tip: Do not power on until all tests pass and vents are leak-free. - 6
Pressure and temperature relief valve test
Lift the T&P valve stem to ensure it releases water; replace the discharge pipe if necessary.
Tip: Do this slowly to avoid scalding and ensure safe drainage. - 7
Restore power and test run
Fill the tank slowly, bleed air from lines, then run hot water to verify delivery. Monitor for leaks and ensure proper operation for 20-30 minutes.
Tip: Have a water source ready for testing and recheck all fittings after 15 minutes.
Got Questions?
Do I need a permit to install a hot water heater?
Yes, depending on your location, installation may require a permit. Check with your local building department and follow code requirements.
In most areas, a permit is required for new installations; check with your local building department.
Can I install the water heater myself?
A basic installation may be feasible for electric units if you’re comfortable with electrical work, but gas and high-risk tasks should be performed by a licensed professional.
DIY is possible for some electric setups, but gas and venting work should be done by a licensed pro.
How do I know if I need a tankless model?
Tankless heaters save space and energy but require installation by a competent professional. Consider your household hot water demand and budget.
Tankless models save space but need professional installation; evaluate demand and cost.
What maintenance does a new setup require?
Regular inspection, flushing the tank annually, and checking the T&P valve help extend service life and prevent issues.
Schedule annual flushes and valve checks to prevent buildup and leaks.
How long does a typical installation take?
Most residential setups take a few hours, but complex gas or electrical work can extend this. Plan for 2-6 hours.
Most installs take a few hours, plus potential extras for gas or electrical work.
Watch Video
The Essentials
- Plan ahead with space, venting, and permits.
- Shut off power and water before any work.
- Check for leaks and test hot water delivery after the install.
- Consider professional help for gas or complex electrical work.
- Maintain a simple maintenance routine to extend heater life.