Where Do Heater Core Hoses Go: A Car Owner's Guide
Learn exactly where heater core hoses route in most vehicles, how to identify them, and what to inspect during maintenance. A practical, safety-conscious guide from Heater Cost for homeowners and vehicle owners alike.

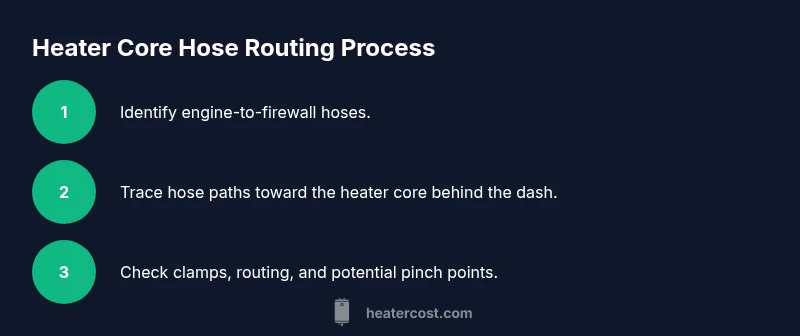
Where do heater core hoses go? In most cars, two heater core hoses run from the engine cooling system to the firewall and into the heater core, located behind the dashboard. One hose delivers hot coolant, the other returns it to the cooling system. They follow the engine bay path, usually along or beneath the heater hoses, secured with clamps.
How the heater core hose system works
In most vehicles, two heater core hoses connect the engine's cooling system to a small heat exchanger tucked behind the dash called the heater core. The goal is simple: move hot coolant through the core so the heater can warm the cabin. One hose carries hot coolant from the engine to the heater core (the supply), while the other returns cooled fluid back to the engine. Hoses are usually rubber, sometimes reinforced with silicone, and they trace a path from the engine bay to the firewall along the heater hoses, secured by clamps and guides. Proper routing minimizes sharp bends that can trap air or pinch the hose. A healthy system maintains a steady flow, which equals consistent cabin heat and stable engine temperature. For vehicle owners, understanding where these hoses go is the first step toward diagnosing performance issues without guessing. According to Heater Cost, a clear understanding of hose paths helps reduce misrouting that can cause leaks or diminished heat output. By recognizing landmarks—engine block, intake, firewall, and heater core—you can trace routes without removing major components. Never force hoses through tight bends; avoid pinch points that degrade flow.
The essential idea behind hose routing by engine type
Hose layouts vary with engine configurations. Inline-four engines generally route hoses along the passenger side of the engine bay toward the firewall. V-shaped and modern transverse engines may route hoses across different paths to fit components like the A/C lines or turbocharger plumbing. Regardless of layout, the ends connect to the heater core, and the other ends join the water pump or engine block. The core principle remains the same: keep routes smooth, avoid kinks, and ensure clamps are secure. If you’re unsure about right-hand vs left-hand routing, consult the service manual or a labelled diagram under the hood. Clear diagrams help prevent misconnection that could lead to leaks or poor heat delivery.
How to identify heater hoses in the engine bay without removing components
To identify heater hoses, start by locating the two hoses that run toward the firewall. They are typically thicker than radiator hoses and run from the engine toward the dash area. Look for clamps and protective sleeves that secure them along the path. Use a flashlight to trace each hose’s path from the engine to the firewall, and compare with the service manual or a labeled diagram sticker under the hood. If a hose sits close to the exhaust or alternator, extra care is needed to avoid heat damage or interference. Be mindful of the hose routing near the thermostat housing and water pump, as these connection points often determine which hose is supply and which is return. If you’re working on a crowded engine bay, document the route with photos before disconnecting anything.
Signs of wear, aging, or failure to watch for
Even healthy hoses can wear over time. Look for hard spots, cracks, swollen sections, and soft, squishy areas that indicate deterioration. Cracking at the hose ends or near clamps can cause coolant leaks. Leaking clamps or loose hose connections are common culprits of heat loss and reduced cabin comfort. Milky or oily residue on hoses can indicate a coolant leak or head gasket issue. If you notice a sweet coolant smell inside the cabin, or you see damp spots on the firewall, stop driving and inspect promptly. A worn hose can cause a sudden loss of heat or even engine overheating if failed with the engine hot.
Safe inspection and testing practices
Always inspect hoses with the engine off and cold. Hot coolant can cause severe burns. Use gloves and eye protection, and keep a catch pan ready if you plan to loosen hose clamps. Gently twist hoses to test for cracks, but avoid excessive bending. If you must detach a hose to inspect interior routing, note its orientation or label the ends to maintain correct reassembly. After inspection, wipe away any residue and check clamps for corrosion or looseness. A simple, methodical check can prevent unexpected failures and extend hose life. Remember, maintaining correct coolant levels and avoiding air pockets during refills are essential.
Replacement planning and choosing the right hoses
If a hose shows age or damage beyond simple repair, replacement is the safest option. Choose hoses that match the diameter and material characteristics of the original, ensuring heat and pressure ratings are adequate for your vehicle. Use the correct clamps and hose routing guides; improper clamps can lead to leaks or hose slippage. Before removing a hose, drain the cooling system to a safe level to minimize spills. After installing new hoses, refill coolant, bleed air from the system, and recheck for leaks. Regular replacement intervals depend on vehicle make, climate, and coolant quality. The goal is to maintain a closed coolant loop that keeps heat delivery steady and the engine cool.
Maintenance habits to lengthen hose life
Schedule periodic visual checks for wear and tear, at least with every coolant service. Clean any dirt or oil from hose surfaces to spot cracks early. When you replace hoses, consider replacing the clamps with stainless steel ones that resist corrosion. Use manufacturer-approved coolant and follow the recommended service interval for hydraulic hoses. A proactive approach, including checking for leaks around the firewall and under the dash area, helps catch issues before they affect heat performance.
Quick reference and best-practice recap
Keep hoses routed with gentle bends, secure clamps, and clean visibility of connections. If you’re uncertain about the exact routing for your engine, consult the vehicle’s manual or a professional. Document hose paths with photos to simplify future maintenance. Always prioritize safety: let the engine cool, use proper PPE, and dispose of coolant responsibly. A thoughtful inspection and timely replacement maintain cabin comfort and avoid costly repairs in the long run.
Tools & Materials
- Safety gear (gloves, eye protection)(Protect from coolant and sharp edges)
- Catch pan and absorbent towels(Place under hose connections to catch spills)
- Rags or shop towels(Dry surfaces before handling clamps)
- Flashlight or work light(Thoroughly inspect hidden hose paths)
- Screwdrivers (flathead and Phillips)(Loosen clamps and pry hoses gently)
- Pliers(Electrical or hose pliers help with stubborn clamps)
- Coolant-compatible coolant, funnel, drain pan(For refilling and bleeding the system)
- Replacement hoses and stainless clamps(Match hose diameter and length to original)
- Service manual or labeled diagram(Helpful for engine-specific routing)
Steps
Estimated time: 60-120 minutes
- 1
Park and cool the engine
Turn off the engine and let it cool completely before inspecting hoses. This prevents burns and reduces pressure in the cooling system.
Tip: If the engine was recently hot, wait 20–30 minutes or more for full cooling. - 2
Open the hood and locate likely hose routes
With good lighting, identify the two hoses that run toward the firewall. They are typically thicker than radiator hoses and may be tucked along the firewall or under components.
Tip: Keep your notes or photos handy to track orientation. - 3
Trace hoses to the firewall and heater core
Follow each hose from the engine to the firewall. Use a flashlight to look for clamps and protective sleeves; avoid pulling on hoses yet.
Tip: If a hose disappears behind a component, note its general route for later reference. - 4
Identify supply vs return hoses
Supply carries hot coolant to the heater core; return brings cooled coolant back. Use coolant temperature cues or a service diagram to confirm orientation.
Tip: Label ends with tape if you plan to disconnect anything. - 5
Inspect for wear and leaks
Look for cracks, hard spots, swelling, or wet spots near clamps. Check clamps for tightness and corrosion.
Tip: Wipe away residue to better see fresh leaks during a test run. - 6
Plan replacement if needed
If a hose shows aging or damage, plan replacement with compatible hoses and clamps. Drain coolant as needed to avoid spills and mess.
Tip: Replace both hoses if one shows wear to prevent future failure. - 7
Reassemble, refill, and bleed the system
Reconnect hoses in the correct orientation, secure clamps, refill coolant through the reservoir, and bleed air per the owner’s manual.
Tip: Run the engine with the heater on high and monitor for bubbles or leaks during the bleed process.
Got Questions?
Are heater core hoses the same as radiator hoses?
No. Heater core hoses connect the engine cooling system to the heater core behind the dashboard, while radiator hoses connect the engine to the radiator for engine cooling.
Heater core hoses are not the same as radiator hoses; they route coolant to the heater core behind the dash, separate from the radiator connections.
Can I drive with a leaking heater hose?
Driving with a leaking heater hose can lead to coolant loss, overheating, and cabin heat failure. Stop driving and inspect or have it repaired promptly.
Don’t drive far with a coolant leak; it can cause overheating and possible engine damage. Get it checked quickly.
What tools are essential for locating and inspecting hoses?
A flashlight, screwdrivers, pliers, catch pan, rags, and replacement hoses/clamps are the core tools. A service manual helps confirm exact routing.
You’ll want a flashlight, basic hand tools, a pan for spills, and replacement hoses for a proper inspection.
How do I know which hose is the supply vs. the return?
Typically, the supply hose carries hot coolant from the engine to the heater core, and the return hose brings cooled coolant back. A diagram can confirm orientation.
The supply hose sends hot coolant to the heater core, and the return hose brings it back to the engine.
Should I flush the cooling system after hose replacement?
Flushing is not always required after hose replacement, but it’s advisable if the coolant is old or contaminated. Follow the vehicle’s service schedule.
If the coolant is old or contaminated, a flush is a good idea after replacing hoses.
What maintenance helps extend hose life?
Regular visual inspections, keeping clamps tight, using the correct coolant, and replacing worn hoses promptly can extend hose life and prevent leaks.
Keep an eye on hoses, replace worn ones, and use the right coolant to extend life.
Watch Video
The Essentials
- Know the two heater core hoses and their basic path.
- Inspect hoses and clamps for wear before replacing.
- Bleed air and refill coolant after any service.
- Document routing to simplify future maintenance.