How to replace heater hose: A step-by-step guide
Learn how to replace heater hose safely in your car's cooling system with a clear, step-by-step guide, essential tools, safety tips, and practical maintenance insights from Heater Cost.

This quick guide shows you how to replace heater hose in a car cooling system. It identifies safety steps, the essential tools, and the broad steps you’ll follow. Expect 60–120 minutes and proper coolant disposal. The goal is to prevent engine overheating and costly failures. Follow these steps carefully to minimize spills and protect sensitive engine components.
Why replacing heater hose matters
A failing heater hose can leak coolant, cause overheating, and lead to expensive engine damage if ignored. Replacing a worn hose early helps preserve the cooling system’s integrity and protects you from roadside breakdowns or unexpected repair bills. According to Heater Cost analysis, even small leaks can escalate quickly, especially in aging vehicles where hose material degrades due to heat cycles and exposure to coolant additives. Recognize signs early: bulging or cracked hose surfaces, coolant staining along hose paths, spongy or soft feel, and coolant odor inside the engine bay. When you notice these indicators, planning a replacement sooner rather than later saves time and money, and reduces the risk of overheating during hot weather or traffic delays. This section sets the stage for a safe, effective replacement by outlining what you’re trying to protect and how to approach the project with confidence.
Signs of hose wear you should not ignore
Hose wear often starts small and progresses quickly. Look for visible cracks, splits, or soft spots along the length, particularly near clamps or bends where flexing is greatest. If you notice coolant on the ground after a drive or a sweet smell around the engine bay, you may have a leak. A brittle, stiff, or crusty hose is a red flag—these symptoms indicate aging material that may fail under pressure. Routine checks during oil changes or pre-trip inspections can catch issues early. If you’re in a high-mileage vehicle, plan a hose inspection as part of seasonal maintenance. The goal is to replace preemptively, rather than reactively after a failure occurs.
Tools and materials you’ll need
Before you begin, gather the essentials to minimize trips to the parts store. You’ll need a replacement heater hose that matches your vehicle’s hose diameter and length, hose clamps or spring clamps, fresh coolant (pre-mixed or concentrate as specified by your vehicle), a drain pan to catch spills, rags or paper towels, gloves, eye protection, and basic hand tools (screwdrivers, pliers, and a wrench or socket set). Having everything on hand reduces time under the hood and keeps the coolant contained. Refer to your owner’s manual for hose size and clamp type recommendations, and set out a sturdy workspace with good lighting.
Safety precautions before you start
Working around hot coolant and pressurized systems can cause burns or injuries. Always work with the engine cool and the vehicle on a level surface. Wear protective gloves and safety glasses, and use eye protection when removing clamps or loosening hoses. Coolant is toxic and can irritate skin and eyes; have a spill kit or absorbent material ready and dispose of waste coolant through your local recycling program. If your vehicle has alarms or Warning lights related to coolant temperature, ensure they’re reset only after the system is secure and the engine runs normally. Keep children and pets away from the work area. Heed manufacturer warnings and never shortcut safety steps.
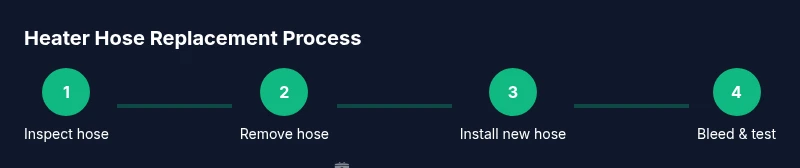
Step 1: Prepare the vehicle and workspace
Park on a level surface, engage the parking brake, and chock the wheels. Open the hood and locate the heater hose paths in the engine bay. If you’re working on a vehicle with a plastic engine cover, remove it for clearance. Disconnect the negative battery terminal to avoid any accidental electric shorts while you’re around sensors or fans. Set a drain pan beneath the hose route to catch any residual coolant. Having a clean, organized workspace reduces mistakes and speeds up the process.
Step 2: Relieve pressure and drain coolant
If your system is not completely cool, wait before touching hoses. Remove the radiator cap only when the engine is cool to avoid steam burns. Loosen hose clamps at both ends, then gently release pressure and allow coolant to drain into the pan. If your vehicle uses a drain valve on the radiator, use it to empty the system according to the manual. Collect the drained coolant in a labeled container for proper disposal or reuse if your shop accepts it. This step prevents forceful sprays and protects nearby components.
Step 3: Remove the old heater hose
Carefully detach both ends of the old hose from the heater core and the engine side, using pliers to loosen spring clamps or a screwdriver for screw clamps. Take note of the hose’s routing path to replicate it with the new hose. Inspect the pipe connections for signs of damage or corrosion; if you see pitting or crust, you may need to replace clips or even nearby fittings. Remove the hose fully and set it aside for disposal or recycling. Keeping clamps intact helps you compare sizes when selecting a replacement.
Step 4: Install the new hose and secure clamps
Measure or confirm the new hose matches the old one in diameter and length. Slide clamps onto the hose ends before connecting to the heater core and engine fittings. Gently push the hose onto each fitting until it seats fully. Reinstall clamps and tighten to the manufacturer’s recommended torque, avoiding overtightening which can damage hose ends or clamps. Visually inspect for clearance from belts, pulleys, and moving parts to prevent future wear.
Step 5: Refill coolant, bleed air, and test
Reinstall the radiator cap only after the coolant reservoir is topped up. Refill the coolant through the reservoir or radiator as specified by your vehicle manual, then start the engine and allow it to reach operating temperature with the heater on. Use the bleed screw or follow the manufacturer’s bleed procedure to remove air pockets. Watch for leaks at hose connections and clamps while the engine runs. If you see any sign of leakage, shut down and re-tighten clamps or reseat the hose. Finally, check the coolant level and top off if needed. Take a short drive to ensure the system stabilizes and temperature gauges read normal.
Step 6: Final checks and disposal
Inspect the ground for fresh coolant after test drives and wipe up any spills promptly. Recheck for leaks after the engine cools and the system has cycled. Reset any dashboard temperature warnings if applicable. Dispose of old hose and coolant in accordance with local regulations; never pour used coolant down the drain or onto soil. By following these steps, you protect your engine and maintain efficient cooling performance. Remember to update your home maintenance log so you don’t miss future inspections.
AUTHORITY SOURCES
For further reading and safety guidelines, you can consult reputable sources such as government and educational sites that cover consumer safety, coolant handling, and general vehicle maintenance. These references provide additional context on coolant materials, disposal practices, and safe shop procedures. Always prioritize official guidance when working on a vehicle’s cooling system.
From Heater Cost: Practical guidance and next steps
Replacing a heater hose is a common maintenance task that pays off by preventing stubborn leaks and overheating. This section recaps the critical steps, emphasizes safety, and points to credible external references for further study. By planning, gathering the right parts, and following the proper bleed and fill procedure, you minimize risk and maximize your vehicle’s reliability. Regular inspections can catch issues before they become expensive repairs, and keeping coolant levels stable protects your engine from thermal stress.
Video resources and next steps
To visualize the process, watch a step-by-step demonstration with close-ups on hose routing, clamp placement, and bleeding techniques. See the recommended video query below to find relevant tutorials and visuals: how to replace heater hose car cooling system tutorial.
Tools & Materials
- New heater hose (matched to vehicle)(Check part number or measure inner diameter and length; ensure correct routing for heater core.)
- Hose clamps (spring or screw type)(Replace with new clamps if possible; use OEM clamps if recommended.)
- Coolant (pre-mix or concentrate)(Select type per vehicle manual; prepare enough to refill system after bleed.)
- Drain pan(Large enough to hold several quarts of coolant; place under hose route.)
- Rags or paper towels(Use for spills and cleanup during hose removal and installation.)
- Gloves and eye protection(Protect hands from coolant and sharp edges; goggles recommended.)
- Screwdrivers and pliers(For clamps and hose removal; have both flat and Phillips on hand.)
- Wrench or socket set(Needed to loosen hose fittings or clamps if required by your vehicle.)
- Funnel(Helpful for precise coolant pouring into reservoir.)
Steps
Estimated time: 60-120 minutes
- 1
Prepare the vehicle and workspace
Park on level ground and chock the wheels. Remove any engine covers if needed for clearance and disconnect the negative battery terminal. Gather all tools and place coolant catch container within reach.
Tip: Always work with the engine cool to prevent burns from hot coolant or hoses. - 2
Relieve pressure and drain coolant
Loosen the radiator cap only when the engine is cold. Loosen clamps at both hose ends and drain coolant into the pan. If your car has a drain valve, use it to help empty the system without spillage.
Tip: Keep a rag ready to catch drips and avoid skin contact with coolant. - 3
Remove the old heater hose
Detach hose clamps and slid the old hose off both fittings. Note routing for the replacement hose and inspect the fittings for rust or damage. Remove the hose completely and clean the area before installing the new part.
Tip: Take a quick photo of the routing to reference during installation. - 4
Install the new hose
Slide clamps over ends, fit the new hose to each fitting, and ensure seats are fully seated. Tighten clamps to specified torque and verify clearances from moving parts.
Tip: Do not overtighten clamps; this can damage hose ends. - 5
Refill coolant and bleed air
Refill coolant through reservoir or radiator as per manual. Start engine with heater on, run to operating temperature, and open bleed points to remove air pockets. Stop if you observe leaks and recheck clamps.
Tip: Bleeding removes air gaps that cause overheating and noisy operation. - 6
Test and observe
Take a short drive and monitor temperature gauge. Check for leaks after cooling down. Refill coolant if necessary and ensure the system remains at proper level.
Tip: Keep a close eye on the temperature gauge during initial drive. - 7
Final cleanup and disposal
Wipe up any spills and recycle or dispose of coolant according to local regulations. Reinstall any engine covers and reconnect the battery. Update your maintenance log with the hose replacement date.
Tip: Avoid letting old coolant contaminate soil or water sources. - 8
Additional checks
Inspect surrounding hoses for wear and consider replacing adjacent hoses if they show signs of aging. Confirm there are no symptoms of leaks around clamps and fittings.
Tip: Replacing worn hoses prevent future leaks and save on labor costs later. - 9
Know when to call a pro
If you observe persistent leaks, severe cooling-system failure signs, or you’re uncomfortable with the procedure, consult a professional to avoid consequential engine damage.
Tip: When in doubt, a pro can verify the system integrity and perform a pressure test.
Got Questions?
When should I replace a heater hose?
Replace when you notice cracks, bulges, leaks, or coolant staining on the hose. If a hose feels soft or shows signs of aging, swap it before a failure occurs to avoid overheating and towing.
Replace the hose if you see cracks or leaks, and do it before it fails to prevent overheating.
Can I drive with a leaking heater hose?
No. A leaking heater hose can lead to coolant loss, engine overheating, and severe damage. It’s best to address leaks promptly and not drive long distances until corrected.
No—driving with a leak risks overheating and engine damage. Get it fixed soon.
Do I need to replace both heater hoses at the same time?
If both hoses show wear signs or are close to lifetime, replacing both at once can prevent repeated service visits. If only one shows damage, you can replace just that hose, but inspect nearby hoses for aging.
Replace both if both show wear; otherwise, inspect the other hose for aging.
How long does a heater hose replacement take?
Most replacements take about an hour to two, depending on access and how much coolant needs to be drained. Larger or newer vehicles may require more time.
Expect about 60 to 120 minutes, depending on access and coolant handling.
Is there a risk of air entering the cooling system?
Bleeding the cooling system after refilling is important to prevent air pockets that can cause overheating. Follow the bleeding steps outlined in your manual for best results.
Bleed the system after refilling to remove air pockets.
Watch Video
The Essentials
- Plan ahead with the right parts and tools.
- Relieve pressure and drain coolant safely before removal.
- Secure clamps properly to prevent leaks after installation.
- Bleed air from the system and check for leaks after the test drive.