How to Block a Heater Hose: A Step-by-Step Guide
Learn how to block a heater hose safely with a practical, step-by-step approach. This guide covers tools, methods, safety cautions, testing, and when to seek professional help for your cooling system.

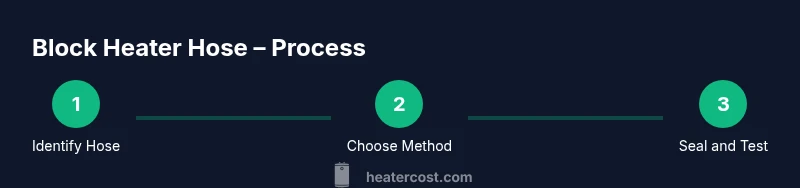
By following these steps, you'll learn how to block a heater hose safely and temporarily or for a repair. You will identify the hose and junctions, select an appropriate method (cap, plug, or valve), install with proper seals, and test for leaks while preserving coolant system integrity. Safety and reassembly considerations included.
What blocking a heater hose means and when it's needed
Blocking a heater hose is a specialized repair task typically performed to diagnose a heater core issue, bypass the heater circuit during coolant work, or to run the engine without the heater circuit intact for short diagnostic tests. It is not intended as a permanent modification, and incorrect blocking can cause overheating, pressure buildup, or hose damage. According to Heater Cost, blocking should only be used as a temporary measure under guidance from a qualified technician. You must understand where the hose connects to the engine and to the heater core, and know that multiple routing configurations exist depending on vehicle design. Before you proceed, confirm the risk with your vehicle’s service manual. Gather the right tools, ensure the engine is completely cool, and plan to monitor coolant temperature after any modification. Always plan to restore the original configuration as soon as practical. This approach helps you learn without compromising safety or performance. The Heater Cost Team emphasizes that any temporary bypass should be removed as soon as diagnostic goals are reached or repairs are completed, to maintain proper cooling system function.
Methods to block a heater hose
There are several common methods to block a heater hose, each with its own pros and cons. A simple end-cap method, using a snug end cap or plug, is fast but may require the right diameter to seal effectively. A more robust approach uses a hose-cap reducer with a sealing gasket to prevent coolant leaks. In some cases, a short-term bypass valve can be installed to allow controlled flow while work is underway. For many vehicles, clamps and locking pliers can secure a temporary cap while you verify that no leaks are present. When choosing a method, consider hose diameter, temperature, coolant type, and how easily the setup can be removed. Heater Cost analysis shows that the best option balances a solid seal with ease of reassembly. Always ensure the chosen method does not introduce new leak paths or create pressure points that could damage the radiator or engine. After installation, gently test the seal for leaks before fully pressurizing the cooling system and always have a drain pan ready for any unexpected spills.
Safety considerations and risks
Blocking a heater hose interrupts part of the cooling or heating circuit and can create hot coolant exposure or air pockets in the system. Always work with the engine cool to avoid scalding, and wear eye protection and gloves to guard against splashes. Do not drive long distances with the hose blocked; this is typically a temporary diagnostic measure and should be reversed as soon as possible. Verify that sealants or end caps you use are rated for automotive coolant temperatures and chemical exposure. If you notice any cracking, slippage, or discoloration of the hose material after blocking, stop and reassess the repair. In rare cases, blocking can influence engine temperature readings or radiator flow, so frequent monitoring after the modification is essential. The risk to coolant system integrity underscores the importance of proper torque on clamps and using components designed for automotive use.
Step-by-step overview and post-block testing
After you complete the blocking, you must verify the system is still functioning correctly. The goal is to prevent leaks while preserving the ability to restore the heater circuit later. Planning ahead helps you avoid mistakes that could lead to overheating, air locks, or reduced heater core performance. In many cases, a temporary block is used only during diagnostic work or while replacing a stuck heater control valve. Throughout the process, refer to your vehicle’s service manual for specific hose sizes and recommended components. If a cap or plug is not available in the correct size, consider temporarily bypassing the heater core with a professional solution rather than forcing a fit that could damage hoses or clamps.
Post-block testing and reassembly considerations
Once the block is in place, start the engine and let it reach normal operating temperature while observing the coolant system for leaks around the cap or plug. Check for any changes in radiator temperature and ensure that the engine reaches operating temperature without overheating. If the system holds steady and no leaks appear, proceed to bleed any trapped air in the cooling system as needed and refill coolant to the recommended level. Plan to remove the block promptly after diagnostic work or completed repairs. When reassembling, revert to the original heater hose configuration and ensure all connections are clean, dry, and torqued to specification. Keep records of the temporary modifications and the date of restoration for future maintenance.
When to seek professional help
If you’re unsure about hose sizing, seal integrity, or the overall safety of blocking a heater hose, stop and consult a certified mechanic. Professional technicians can perform a controlled bypass or a heater-core service without risking engine damage. In vehicles with complex routing or integrated heater cores, a professional approach can prevent costly mistakes and ensure warranty compliance. The Heater Cost Team recommends seeking expert help if you encounter any signs of leakage, coolant puddles, or unexplained temperature fluctuations after attempting a block.
Tools & Materials
- Locking pliers (vise-grips)(Adjustable jaws for securing clamps or end caps)
- End cap or hose end cap(Sized to fit the heater hose diameter)
- Hose clamps(Stainless steel preferred; choose correct size)
- Rubber stopper or plug (engine coolant rated)(Non-reactive with coolant)
- Radiator hose repair tape or silicone sealant (coolant-safe)(Optional for added seal)
- Drain pan(To catch coolant as you drain a small amount)
- Protective gloves and safety glasses(Prevent skin splashes and eye injuries)
- Coolant-compatible cleaner(For cleaning hose ends before sealing)
- Torque wrench or driver with proper bit(If re-torquing clamps to spec)
Steps
Estimated time: 60-120 minutes
- 1
Park and cool engine
Park the vehicle on a level surface and turn off the engine. Allow the cooling system to fully cool to avoid scalding by hot coolant under pressure. Gather all tools before starting to minimize interruptions.
Tip: Always wear gloves and eye protection; coolant salts can irritate skin. - 2
Locate heater hose and ends
Identify the heater hose route and locate both ends (engine side and heater core side). If you’re unsure, consult the service manual or a repair guide for your exact vehicle model. Mark or photograph placements to aid reassembly later.
Tip: Take high-resolution photos from multiple angles to avoid confusion. - 3
Decide blocking method
Choose a sealing method compatible with your hose size and material. A cap-and-clamp method is common, while a rubber stopper can work for small hoses. Avoid improvising seals that could fail under pressure.
Tip: Prefer components rated for automotive coolant temperatures. - 4
Relieve pressure and drain coolant
Place a drain pan under the hose area and carefully loosen a hose clamp to relieve any residual pressure. If you must drain coolant, drain a small amount to reduce splash, then reseal the system.
Tip: Do not open while the engine is hot; coolant under pressure can cause burns. - 5
Prepare cap/plug
Prepare the end cap or plug by cleaning the hose end and ensuring a tight fit. If using a sealant, apply a coolant-safe sealant thinly around the contact area.
Tip: Dry fit first to confirm alignment and fit before applying sealant. - 6
Install end cap or plug
Place the cap or plug on the hose end and secure with a hose clamp. Ensure the seal is snug and there’s no visible gap where coolant could seep through.
Tip: Leave slight slack in the hose clamp to accommodate thermal expansion. - 7
Secure and inspect
Tighten clamps to manufacturer-recommended torque (or snugly by feel if not specified). Inspect for any clear misalignment or potential pinch points that could cause leaks when the engine runs.
Tip: Double-check clamp orientation and ensure there’s no interference with other components. - 8
Test for leaks
Start the engine and let it reach operating temperature. Observe the hose area for leaks and monitor coolant level. If any leak appears, power down and re-seat the cap or choose a different method.
Tip: Keep a diagnostic flashlight handy to spot small drips. - 9
Bleed and restore coolant level
If your system air-locked, bleed according to your manual and top off coolant to the correct level. Recheck after a short drive once the system cools again.
Tip: Record the date and method used for future maintenance notes.
Got Questions?
Is it safe to block a heater hose?
Blocking a heater hose is not generally recommended for daily driving. Use it only as a temporary diagnostic measure with a plan to restore the original configuration promptly.
Blocking a heater hose is usually temporary and diagnostic only. If in doubt, seek professional help.
Will blocking affect engine temperature?
Blocking can influence cooling and heat distribution. Monitor engine temperature closely and revert once diagnostics or repairs are complete.
Blocking can affect cooling, so watch the temperature and remove the block when done.
How long can I leave a heater hose blocked?
Only for the shortest practical period needed for diagnostics or repairs. Prolonged blocking increases risk of overheating and system damage.
Only keep it blocked as long as you absolutely need for tests, then restore the line.
What tools are needed to block a heater hose?
You typically need end caps or plugs sized to the hose, hose clamps, pliers, a drain pan, and coolant-safe sealant if used as a backup.
You’ll need a cap, clamps, and basic hand tools to seal the hose.
Can I drive with a blocked heater hose?
No, driving long distances with the hose blocked can cause overheating or cooling system issues. Keep the block temporary and plan to restore soon.
Don’t drive long distances with the block in place.
What should I do if coolant leaks after blocking?
If leaks appear, stop the engine, re-check seals, and remove the block. Consider seeking professional help to avoid engine damage.
If you see leaks, stop and check the seal or contact a professional.
Watch Video
The Essentials
- Block only as a temporary diagnostic measure
- Choose a sealed method compatible with coolant temperatures
- Test thoroughly for leaks and bleed to prevent air locks
- Plan to revert and reassemble to original configuration