How to Install a Tankless Water Heater: A Complete Guide
Learn how to install a tankless water heater with a safety-first, expert guide. Coverage includes sizing, venting, permits, costs, and maintenance for homeowners, renters, and property managers.

Installing a tankless water heater involves sizing for peak demand, securing gas or electric supply, venting for gas models, and obtaining any needed permits. Start by assessing hot-water needs, then follow a safe sequence: shut off utilities, mount the unit, run water lines, connect fuel or power, install venting, test for leaks, and commission with a professional if required. This guide covers steps, tools, safety, and costs.
Why install tankless water heater: benefits and trade-offs
Tankless water heaters heat water on demand rather than storing hot water in a tank. For many homes, this approach can reduce standby energy losses and provide endless hot water during busy mornings or evenings. The compact footprint is another obvious advantage: wall- or closet-mounted units free up precious utility space and reduce the risk of a tank failure spilling water through a home. The Heater Cost team notes that energy-cost savings vary by climate, fuel type, and actual hot-water usage. In moderate climates with typical household demand, a properly sized tankless system can lower operating costs over time and offer notable space savings.
But there are trade-offs to weigh. Upfront costs for equipment and professional installation are usually higher than for a traditional storage tank. Some homes require electrical service upgrades or gas-line work to support a new unit, and gas models may need venting, which adds complexity and cost. If your needs are modest or you expect only occasional hot-water use, a tankless unit may not pay back quickly. Finally, performance depends on correct sizing; undersized units struggle to meet simultaneous demand, while oversized units can waste energy. The Heater Cost analysis also reminds readers to consider maintenance, part longevity, and the potential for seasonal efficiency differences in colder climates.
Sizing and performance: how to estimate your needs
To choose the right tankless unit, you must size it to meet your peak hot-water demand and account for the temperature rise from incoming cold water. Start by listing the fixtures that might run at the same time: showers, faucets, dishwashers, washing machines. Each fixture has a typical flow rate, and you combine them to estimate a minimum GPM requirement. Since incoming water temperature varies by climate and season, you also estimate the expected temperature rise (how hot you want the water to be versus its starting temperature). A unit's rating is given as GPM at a given temperature rise; look for a model that meets or exceeds your calculated requirement at the expected rise. For households with multiple bathrooms, you may need two smaller units or a model designed for higher simultaneous demand. The Heater Cost team suggests consulting a professional to perform an accurate load calculation and verify electrical or gas-service capacity before buying.
Gas vs electric tankless: choosing the right fuel type
Gas-powered tankless water heaters typically offer strong hot-water capacity and are well-suited to colder climates, but they require venting, a gas supply, and professional installation. Electric tankless units avoid venting and can be simpler to install if your electrical panel can support the load; however, they demand a substantial electrical service and can be more sensitive to incoming water temperatures. The choice between gas and electric depends on your home’s energy mix, utility rates, and the existing infrastructure. The Heater Cost team recommends evaluating both upfront costs and long-term operating costs, then consulting a licensed technician to confirm compatibility with your home’s wiring or gas lines.
Location, venting, and clearance considerations
Begin by selecting a location that provides easy access for service and allows sufficient clearance around the unit for safe operation and maintenance. For gas models, plan for venting routes that meet local building codes and avoid obstructions that could reduce vent efficiency. Vent materials must be appropriate for the type of venting used (gas or direct-vent configurations). Ensure nearby walls, cabinets, and combustibles have the required clearance and that you can reach shut-off valves and service ports. In cold climates, avoid placing the heater where freezing temperatures could affect piping, and consider insulating exposed lines. The right location minimizes heat loss and simplifies future maintenance.
Permits, codes, and safety: what to expect
Most jurisdictions require permits when replacing a storage tank with a tankless system, and gas installations typically trigger additional inspections for venting and gas lines. Before breaking ground, contact your local building department to confirm required permits and inspection steps. Working with natural gas or propane involves safety risks, including potential gas leaks; never bypass venting or pressure-relief devices. The Heater Cost approach emphasizes using licensed professionals for gas connections and venting to ensure code compliance and occupant safety. Always document changes for future resale or insurance purposes.
Cost considerations: upfront vs operating costs
The total cost of installing a tankless water heater includes the unit, any necessary venting or electrical upgrades, and labor. Electric models often require a dedicated high-capacity circuit, while gas models may necessitate new gas piping and venting runs. In addition to the hardware, plan for mounting hardware, permits, and possible changes to the electrical panel or gas-meter location. Although the upfront cost is higher than a storage-tank system, the Heater Cost analysis suggests that operating costs can be lower over time for households with substantial hot-water usage. Remember to factor in maintenance costs, replacement parts, and potential savings from energy efficiency and extended unit life. Tax credits or utility rebates may apply depending on your region.
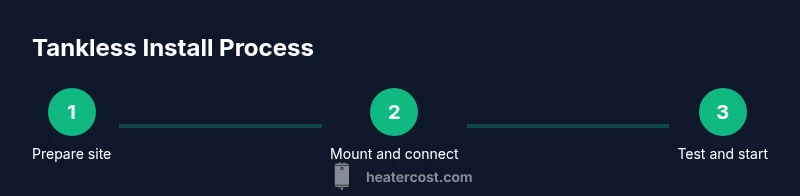
Installation overview: the typical workflow
A successful install follows a clear workflow from planning to startup. Start with a site assessment and confirm permitted scope. Then remove the old equipment if present, mount the new unit, and run supply lines (hot and cold) to the unit. Connect the fuel source (gas line or electrical supply) and install any required venting or, for electric models, ensure the electrical panel can handle the load. After all connections are made, perform leak tests on all water and gas lines, pressure-test the system, and verify vent integrity. Finally, commission the unit by triggering a controlled heat-up and confirming that hot water is delivered at the expected temperature without fluctuations. If any step seems beyond your comfort level, contact a licensed professional—safety is the top priority.
Maintenance, troubleshooting, and long-term care
Tankless water heaters require less interior storage space than tanks but still need regular maintenance to preserve efficiency. Schedule annual or semi-annual service to flush the heat exchanger and inspect filters, vents, and combustion air supply. Keep an eye on water quality; mineral buildup in hard water can reduce efficiency and shorten life if not addressed. If you notice inconsistent hot water, reduced flow, unusual noises, or frequent flame outages (gas models), consult a pro rather than attempting risky troubleshooting. The Heater Cost team reiterates that preventing leaks and corrosion through proper installation and routine maintenance helps protect your investment and ensure consistent comfort.
Authority sources
- U.S. Department of Energy: Water Heating and Efficiency (https://www.energy.gov/energysaver/water-heating)
- ENERGY STAR: Tankless Water Heaters (https://www.energystar.gov/products/water_heaters)
- Environmental Protection Agency (EPA) Green Homes: Water Heaters Guide (https://www.epa.gov/greenhomes/green-home-guide-water-heaters)
Notes: These sources provide official guidance on energy efficiency, installation considerations, and safety practices that complement the practical steps outlined above. Always cross-check local codes and consult a licensed professional for your specific installation scenario.
Tools & Materials
- Adjustable wrench(6–12 inch adjustable wrench for fittings and mounting)
- Pipe wrench(8–12 inch for rigid piping connections)
- Teflon tape (PTFE)(Gas and water lines; ensure proper threading seal)
- Pipe cutter(For copper piping or replacement sections)
- Pex tubing or copper piping(Select based on existing plumbing network)
- Gas vent kit(For gas models; include fittings and supports)
- Vent piping and elbows(Appropriate material for venting type)
- Gas shut-off valve(Must meet local code for fuel supply)
- Electrical wiring and conduit(Per local code; may require a dedicated circuit)
- Drill and bits(For mounting and clearance adjustments)
Steps
Estimated time: 4-8 hours
- 1
Turn off utilities
Begin by turning off power to the old water heater and shut off the gas supply if applicable. Close the cold-water supply and drain the old tank to relieve pressure. This step protects you from shocks, leaks, and accidental releases while you work.
Tip: Double-check that the power and gas are truly off at the breaker and shut-off valve before you touch pipes. - 2
Disconnect old system
Carefully disconnect water and fuel lines from the existing unit. Cap lines to prevent debris from entering the plumbing. Remove the old mounting and prepare the wall for the new tankless unit.
Tip: Keep track of screws and mounting hardware to ensure a clean install of the new unit. - 3
Verify space and routing
Measure the installation area to confirm there is adequate clearance and access for future service. Plan the routing of water lines, venting (for gas), and electrical cables so they won’t conflict with cabinets or appliances.
Tip: Create a simple path for future maintenance and avoid tight bends in piping. - 4
Mount the tankless unit
Secure the mounting bracket or wall plate to a solid wall stud or suitable surface. Ensure level mounting and leave space for service ports and vent connections if required.
Tip: Use a level and confirm the unit is firmly anchored before proceeding. - 5
Connect cold and hot water lines
Attach the cold inlet and hot outlet to the unit using approved piping. Seal threads with tape or appropriate sealant and test each connection for leaks before continuing.
Tip: Pressure-test small sections first to catch leaks early. - 6
Install venting or electrical connections
For gas models, install the venting run per code and connect the gas line with proper sealing. For electric models, route conductors to the tight-load panel and install any required breakers.
Tip: Follow manufacturer instructions for vent sizing and electrical clearances. - 7
Make fuel or power connections
Complete the gas line connection or electrical service entry. Ensure shut-off valves are accessible and that conduit is properly secured.
Tip: Never bypass shut-off valves or pressure-relief devices. - 8
Test connections and venting
With coolant draining and water reconnected, perform a leak test on water and gas lines. For gas models, check vent integrity and flame stability.
Tip: Use soapy water on joints to quickly identify leaks. - 9
Initial startup and calibration
Power up the unit and perform a controlled heat-up. Verify hot-water delivery, temperature stability, and overall system operation. Adjust settings as needed for comfort and efficiency.
Tip: Record starting temperatures and adjust to minimize drastic swings. - 10
Finalize permits and documentation
If required, obtain final inspections and keep all manuals, receipts, and permit clearance for future reference or resale.
Tip: File away documentation in a known location for easy access.
Got Questions?
Do I need a permit to install a tankless water heater?
In most jurisdictions a permit is required for installation or significant alteration. Always check with your local building department before starting and plan for inspections.
Most places require a permit for tankless installs; check with your local building department first.
Can homeowners install tankless water heaters themselves?
Electric models may be feasible for experienced homeowners, but gas models typically require a licensed plumber or gasfitter due to venting and gas-line work.
Gas models usually need a licensed professional for safe venting and gas connections.
How long does installation take?
Typical installations can take several hours to a full day depending on electrical or gas upgrades and venting requirements.
Most installs take a few hours to a day, depending on system changes.
Are tankless heaters more expensive to repair than traditional tanks?
Repairs depend on the component. Tankless units can have higher replacement costs for specialized parts, but service intervals are often less frequent with proper maintenance.
Repair costs depend on the part, but regular maintenance helps prevent surprises.
Will a tankless heater supply hot water to two showers at once?
If correctly sized for your peak demand, a tankless unit can handle multiple simultaneous uses; an undersized unit may show reduced flow.
A properly sized unit can usually handle two showers at once; undersized units may struggle.
What maintenance do tankless heaters require?
Regular maintenance includes flushing the heat exchanger and inspecting vents and filters. Water quality can affect efficiency, so plan accordingly.
Annual flushing and filter checks keep tankless heaters efficient.
Watch Video
The Essentials
- Size the unit to match peak hot-water demand
- Gas venting requires permits and professional installation
- Electric tankless may need a larger electrical service
- Budget for installation and potential upgrades
- Regular maintenance extends unit life