When to Open Heater: A Seasonal Start-Up Guide
Learn when to open your heater for fall and winter with essential safety checks, a practical startup sequence, and energy-smart maintenance tips from Heater Cost.

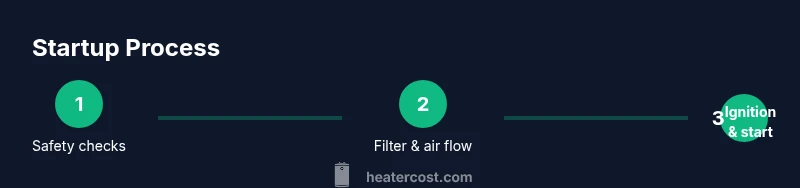
Begin your seasonal heating with a safe, planned startup. This quick guide helps you time the season, perform a basic safety check, and set up your thermostat and filters so you know exactly when to open heater and start warming your home. Follow these steps to avoid waste and trouble.
When to open the heater: timing cues and seasonal readiness
Deciding when to open the heater is a practical planning question, not a fixed date on the calendar. In many climates, the right moment comes when overnight temperatures consistently dip and daytime highs stay cool for several days. The exact timing depends on your home’s insulation, local weather patterns, and how comfortable you want to be indoors. When to open heater should be guided by real-world conditions, not by an arbitrary schedule. According to Heater Cost analysis, the startup window usually follows a period of reliably cool weather, giving the system time to acquire warm air without overshooting. Before you flip any switches or press a thermostat button, do a quick readiness check: verify fuel supply if you have a gas or oil furnace, ensure exterior vents and exhausts are clear, and confirm safety devices (carbon monoxide detectors and smoke alarms) are functioning. With these basics in place, you can plan a controlled first run that protects equipment and keeps your home comfortable through the first cold snaps. This approach also reduces waste and unnecessary wear on components.
Safety-first starter checks
Safety comes first when opening a heater after a long idle period. Begin with a visual inspection of the unit, its accessibility, and surrounding clearances. Check for signs of pest damage, moisture intrusion, or corrosion on electrical connections. Test safety devices: CO detectors should be in the path of combustion byproducts, and smoke alarms should alert you to any ignition issues. Verify that the gas valve is in the off position before you begin any inspection, then confirm that the fuel line is intact and free of leaks using a soap-and-water solution. If you detect a strong gas smell, evacuate immediately and call your utility or emergency services. Finally, confirm the thermostat is responsive and that the wiring is intact, with no loose terminals. A cautious, methodical approach reduces risks and makes the first startup smooth.
Preparing for season startup: filters, circuits, and thermostat
Your heater's air filter, burner assembly, and thermostat are the three anchors of a reliable startup. Start by locating and inspecting the air filter, replacing it if it looks dirty or clogged. A fresh filter improves airflow and reduces energy consumption over the season. Next, inspect the burner area and ignition system for soot or debris; clean gently if safe to do so, and consult the manual for any disassembly steps. Check the blower compartment for loose wiring or unusual noises. Review the thermostat and zoning controls: confirm the temperature setting is comfortable, the schedule is correct, and the thermostat responds promptly when you adjust it. If your system has a service panel or access door, open it only after turning off power to avoid shocks, and re-close securely after inspection. Finally, test the safety limits and pressure switches according to the manufacturer’s instructions to ensure safe operation when the system starts.
Startup sequencing and monitoring: what to do first
This stage describes a safe, controlled startup sequence to avoid cold drafts and equipment strain. Begin by turning on the power and setting the thermostat to a comfortable initial temperature. If your system uses a pilot light or electronic ignition, let it energize for a few minutes while you listen for the normal burner cycle. Observe the air coming from vents to confirm warm air is circulating, and watch for unusual noises, vibrations, or smells that might indicate a problem. If CO or gas alerts activate, shut down immediately and seek professional help. Monitor the first cycles closely: the burner should light smoothly, the blower should push warm air, and the system should reach the set temperature within a reasonable timeframe. Record any odd behavior and be prepared to reset if necessary.
Efficiency, energy costs, and long-term planning
Starting your heater at the right time influences energy costs and indoor comfort across the season. Early startups can lead to higher energy use if you haven’t optimized insulation, while late startups may require more frequent short cycles that wear components. Focus on improving air sealing, ductwork, and thermostat programming to maximize efficiency. Consider upgrading to a programmable or smart thermostat that learns your patterns and adjusts heat output to match occupancy. If you notice frequent cycling or high fuel bills, consider scheduling a professional inspection for burner efficiency, venting, and heat exchanger integrity. The Heater Cost team notes that proactive seasonal startup, paired with annual maintenance, can extend equipment life and reduce surprise outages. With careful planning, you’ll turn the first cold snaps into a smooth, efficient heating season.
Common mistakes and maintenance reminders
New homeowners often rush the first startup and overlook small maintenance tasks. Common mistakes include skipping a filter change, ignoring unusual odors, and attempting to restart after a partial shutdown without a safety check. Keep a simple log of each startup, noting the date, outdoor temperature, and any anomalies. Schedule an annual professional inspection to verify burner operation, venting safety, and electrical connections. Store emergency contacts and a basic toolkit in a reachable place. Doing these small tasks now saves time and money later and helps your system perform reliably when the temperature drops.
Tools & Materials
- Digital multimeter(For testing electrical connections and controls)
- Soap-and-water solution(To check for gas leaks on connections)
- Replacement air filter(Choose the correct size from the unit manual)
- Torx/flathead screwdriver(For service panel screws)
- Carbon monoxide detector batteries(Fresh cells for reliable alarm operation)
- Flashlight(Inspecting dark corners and ignition areas)
- Owner’s manual(Specific startup instructions and torque specs)
- Notebook or app log(Record startup times and observations)
Steps
Estimated time: 45-60 minutes
- 1
Verify safety devices
Power down the system and test all safety devices, including CO detectors and smoke alarms. Check battery levels and place units within their recommended locations. This ensures immediate alerts if a problem arises during startup.
Tip: Replace batteries before the season begins; log the date of the test. - 2
Inspect filters and air paths
Remove the filtering element and examine it for dirt, debris, or mold. Replace the filter if it looks clogged, and inspect ducts for obvious blockages. Clean the blower housing if you see dust buildup.
Tip: A dirty filter reduces efficiency and can trigger premature cycling. - 3
Check thermostat and zones
Verify thermostat settings and schedules reflect current occupancy. If you use zoning, confirm each thermostat communicates correctly with the control panel. Calibrate if needed according to the manual.
Tip: Set a moderate initial temperature and adjust after the system stabilizes. - 4
Secure gas and electrical connections
Visually inspect gas lines for obvious leaks using the soap solution and check electrical connections for loose terminals. Do not operate if you detect a strong gas odor or a crackling ignition issue.
Tip: Never use matches or lighters near the gas line; call emergency services if smell persists. - 5
Power on and initiate a controlled start
Restore power and switch the thermostat to heat. Allow the system to initiate ignition and monitor for a smooth burner cycle and proper air flow. Listen for abnormal noises and watch for any irregular odors.
Tip: If the burner fails to light within a few cycles, shut down and consult a technician. - 6
Monitor first operating cycles
Run the system through its first warm-up cycle and verify warm air delivery to all zones. Note cycle lengths, vent temperatures, and any vibration or smell issues. Document results for future reference.
Tip: Keep a simple log; track outdoor temps and indoor performance.
Got Questions?
When is the best time to open the heater for the first use this season?
The best time aligns with reliably cool weather and safe system readiness. Don't rush; perform safety checks and a gentle startup once you can expect consistent cool nights. If you’re unsure, use the seasonal window described in guidance here.
Open the heater when outdoor temperatures are consistently cool and safety checks are complete.
What safety devices should I test before startup?
Test carbon monoxide detectors, smoke alarms, and any gas shut-off mechanisms. Ensure detectors have fresh batteries and audible alerts. If any device fails, replace or service before starting the heater.
Test CO detectors and alarms; replace batteries if needed.
Can I open the heater if I smell gas?
No. If you smell gas, evacuate and call your gas utility or emergency services immediately. Do not operate electrical switches or the thermostat until professionals confirm safety.
If you smell gas, leave the area now and call for help.
What maintenance should I perform before startup?
Replace or clean the air filter, inspect the burner and ignition area, verify wiring and terminals are tight, and check vents for blockages. Regular maintenance reduces startup problems and extends equipment life.
Clean the filter and check the burner before starting.
How can I tell if my heater is running efficiently after startup?
Look for consistent warm air and a steady burner cycle without frequent cycling. Unusual noises, smells, or high energy bills indicate further inspection may be needed.
If warm air is steady and cycles are smooth, efficiency is good.
Watch Video
The Essentials
- Plan startup around reliable seasonal cues
- Prioritize safety checks before lighting the system
- Maintain clean filters and clear ducts for efficiency
- Record startup data to guide future seasons