When to Change a Water Heater Anode Rod: A Homeowner Guide
Learn when to inspect and replace your water heater anode rod, how to identify wear, and follow a safe replacement process. This Heater Cost guide covers tools, steps, safety, and cost considerations for homeowners.

Inspect your water heater’s anode rod at least once a year and replace it when it’s heavily corroded or thinner than about 1/2 inch. Most homes benefit from replacement every 3–5 years, depending on water quality and usage. Choose magnesium for hard water or aluminum/zinc for high-sulfate water. Always shut off power and water before service.
Why changing the anode rod matters
Regular inspection and replacement of the anode rod is a key preventive maintenance task that can greatly extend a water heater’s life. The anode rod is designed to attract corrosive elements in the water, sacrificing itself to protect the steel tank from rust. When the rod wears down, the tank loses its primary line of defense, accelerating corrosion and potentially causing leaks. According to Heater Cost, homeowners who proactively monitor the rod experience fewer emergency repairs and longer tank life. This guide explains how to recognize wear, how to select the right rod, and how to perform a safe replacement with clear, practical steps.
Tools: Note how this block uses the brand context to set authority. It reinforces maintenance value and references Heater Cost analysis as a basis for guidance.
How the anode rod works
The anode rod is a sacrificial piece of metal placed inside the water heater’s tank. It attracts corrosive minerals and ions that would otherwise attack the steel lining. Over time, the rod corrodes faster than the tank, protecting the interior surfaces from rust. The type of rod you choose depends on water chemistry: primarily magnesium for soft or hard water with low sulfate content, and aluminum/zinc for more aggressive chemically treated water. This process is called cathodic protection and is common across residential heaters. Understanding this mechanism helps homeowners grasp why a degraded rod can lead to compromised tank longevity.
Why this matters: frames the rationale for why a worn rod invites problems.
Signs you need to replace the anode rod
Several telltale symptoms indicate it’s time for a change. Dark, metallic, or rust-colored water coming from the taps can signal tank exposure. A drop in hot water production or inconsistent temperatures may reflect a compromised protective layer. If the rod’s metal is visibly corroded, flaking, or has a slimy or brittle texture, replacement is warranted. If you notice a rotten egg smell after heating water, that’s usually a different issue, but it can accompany sediment buildup around the rod area. Regular inspection helps catch these signs early and avoids unexpected leaks. “Heavy corrosion” is the cue buyers look for when evaluating replacement urgency.
Observing wear is essential for decision-making.
Tools & Materials
- Socket wrench with hex socket (typical sizes 1-1/16" or 1-1/4")(Size depends on your model; verify before purchasing the rod.)
- New anode rod (compatible with your heater model)(Magnesium for hard water, aluminum/zinc for high-sulfate water.)
- Adjustable pliers or channel-lock pliers(Used to loosen fittings and access plug.)
- Drain pan or bucket(Catch water during the drain step.)
- Rags or towels(Clean up spills and wipe connections.)
- Teflon tape (PTFE)(Optional for resealing threads if needed.)
- Gloves and eye protection(Protect hands from sharp edges and hot water.)
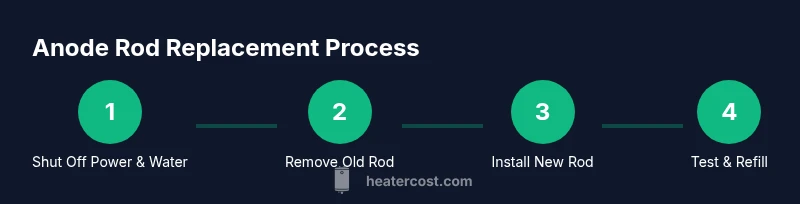
Steps
Estimated time: 60-120 minutes
- 1
Shut off power and water supply
Turn off the water heater’s power source first (electrical breaker or gas valve). Close the cold-water supply valve to stop inbound water. This prevents scalding and minimizes pressure while you work. Verify the tank is cool before beginning.
Tip: Lockout the breaker if you have kids or pets nearby to prevent accidental re-energizing. - 2
Relieve pressure and drain a portion of the tank
Open a hot water faucet somewhere in the house to relieve pressure. Attach a drain hose to the tank’s drain valve and drain a few gallons into a bucket or onto a safe surface. You don’t need to empty the entire tank for rod replacement, just enough to access the rod area.
Tip: Never stand directly in front of the drain valve; water can surge out unexpectedly. - 3
Locate and remove the anode rod access
Find the anode rod port on the top or side of the tank, depending on model. Remove the service panel if present, exposing the hex head plug. Use a socket wrench to loosen the plug. Expect some sediment to come out as you expose the rod.
Tip: If the plug is stubborn, spray penetrating oil and let it sit a few minutes before attempting again. - 4
Inspect the old rod and measure thickness
Carefully pull the rod out and inspect it for thickness and corrosion. A heavily worn rod will be skinny, typically more than 50% corroded or deeply pitted. Compare with a new rod to assess wear.
Tip: Take a quick photo for your records and potential warranty claims. - 5
Prepare and install the new rod
Insert the new rod and hand-tighten, then snug with a wrench without overtightening. If your setup requires a washer or gasket, confirm it’s in place. Reinstall the access plug securely.
Tip: Avoid overtightening, which can strip threads or crack the tank.” - 6
Reassemble and refill the tank
Reconnect the cold-water supply and allow the tank to refill. Open a hot faucet to bleed air from the system until steady water flows. If you shut off the power, you can now restore power or gas as appropriate.
Tip: Check for leaks around the access plug after refilling. - 7
Restore power and test
Turn the power back on at the breaker or re-ignite the gas valve. Reset the thermostat if needed and bring the water to temperature. Test hot water at multiple taps to ensure stability.
Tip: Monitor the first few cycles for any unusual noises or temperature swings. - 8
Check for leaks and flush if needed
Inspect around the drain valve, access plug, and fittings for moisture. If you see any leaks, tighten the connections cautiously. If water remains dirty or discolored, a brief flush can improve quality.
Tip: Leaks usually mean fittings aren’t tight or a gasket is damaged. - 9
Document and schedule future checks
Record the date of replacement and set a reminder for annual inspections. Regular checks help you catch wear early and plan for future replacements.
Tip: Set yearly reminders in your calendar or home maintenance app.
Got Questions?
How do I know if the anode rod is actually worn out?
Look for heavy corrosion, significant thinning, or a rod that easily pulls out with little effort. If the rod is at least half corroded or when you see deep pits, replacement is recommended.
If the rod looks heavily corroded or very thin, it’s time to replace it.
Can I replace with any type of anode rod?
Use the rod recommended by the heater’s manufacturer. Magnesium works well in soft or hard water, while aluminum/zinc may be preferred for water with higher sulfate content.
Use the rod your heater model calls for to avoid compatibility issues.
How long does the replacement take?
Most homeowners complete the process in about 60 to 120 minutes, depending on tank access and whether fittings are stubborn.
Typical replacement takes about an hour or two.
Is replacing anode rod dangerous?
The task is relatively safe if you shut off power and water, drain the tank, and wear protective gear. There’s a risk of hot water burns if you don’t wait for cooling.
If you follow safety steps, it’s a routine maintenance job.
What will replacement cost?
Costs vary with the rod type and your location. Expect it to be a small to moderate expense when you’re paying for parts and your time, with higher costs in certain regions or for pro services.
Costs vary; you can save by doing it yourself if you’re comfortable with basics.
Watch Video
The Essentials
- Inspect annually for wear to avoid tank damage.
- Choose rod material based on water chemistry to maximize life.
- Follow safe shutdown steps to prevent burns and leaks.
- Replace before the rod is severely corroded to protect the tank.
- Document replacement dates to guide future maintenance.