Anode Rod Water Heater Replacement: A Step-by-Step Guide
Learn how to inspect, choose, and replace the anode rod in a residential water heater. This step-by-step guide covers safety, materials, common pitfalls, and maintenance tips to extend tank life.

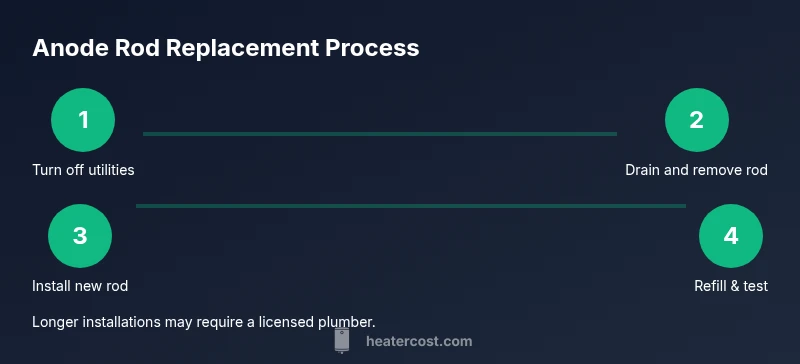
You can replace an anode rod in most residential water heaters by shutting off power or gas, draining the tank to below the rod, removing the old rod with a wrench, threading in a correctly sized replacement, re-filling the tank, and testing for leaks. Follow the manufacturer’s torque specs and safety guidelines. Plan for about an hour.
What is anode rod water heater replacement and why it matters
Anode rods are sacrificial components designed to protect the water heater tank from corrosion. They attract corrosive elements in the water, sacrificing themselves to preserve the steel tank. Over time, the rod corrodes and loses effectiveness, increasing the risk of leaks and sediment buildup. Regular replacement is a key maintenance task for homeowners aiming to maximize longevity and reduce replacement costs. According to Heater Cost analysis, maintaining the anode rod is one of the most cost-effective upkeep steps for a typical residential heater. By acting before rust penetrates the tank, you can extend service life and delay a full heater replacement. This is a fundamental part of the anode rod water heater replacement process that homeowners should understand to avoid costly failures.
How to choose the right anode rod for your heater
Anode rods come in magnesium, aluminum, and zinc-coated steel variants. The right choice depends on your water chemistry and the heater manufacturer’s guidance. Magnesium rods offer strong corrosion protection for many city-water supplies but can produce more dissolved minerals in hard water. Aluminum or zinc-based rods can perform well in aggressive water chemistries or where magnesium might accelerate odors. Always check your heater’s manual for the recommended type, length, and thread size. If in doubt, contact the manufacturer or a licensed plumber. The Heater Cost team suggests starting with a rod type that your model explicitly supports and replacing at the first sign of significant thinning, pitting, or if your water shows unusual taste or color.
Safety and prep: essential steps before you begin
Safety is the top priority when performing a water heater maintenance task like anode rod replacement. Shut off the power (electric) or gas supply and close the cold-water shutoff to the tank. Relieve pressure by opening a hot-water tap in a sink or tub. Gather your tools and wear gloves and eye protection. Place a bucket and towels to catch any drips. If you’re not comfortable with heating-element work or gas work, consider hiring a licensed pro. According to Heater Cost, using proper PPE and following the steps carefully reduces risk and ensures a safer, more reliable replacement.
Common mistakes and troubleshooting during replacement
DIY replacement can go smoothly when you avoid common errors: using the wrong rod type or length, overtightening threads, or failing to purge air from the tank. Do not force the rod; if it’s stuck, apply steady, perpendicular force, rotate slightly, and back off. If corrosion is extensive, or if you notice rust on the tank, stop and call a professional. Check for leaks at the tank and inlet/outlet connections after re-filling. The Heater Cost analysis notes that neglecting proper drainage or returning to service too quickly are frequent issues that lead to leaks and early tank wear.
Aftercare and maintenance to extend life
After replacement, re-fill the tank slowly, bleed air from a hot-water tap, then restore power or gas. Run hot water to ensure even circulation and check for leaks around the rod and connections. Document the replacement date in your maintenance log and schedule a future inspection based on water quality and household usage. Regularly testing your water heater’s performance can help catch issues early and maximize efficiency. Heater Cost emphasizes that a simple maintenance log can dramatically improve long-term outcomes and guide future replacements.
Heater Cost's Verdict
Our verdict: for most homes, replacing the anode rod as part of routine maintenance is a smart, cost-effective step that can dramatically extend tank life and reduce emergency outages. Use the correct rod type, follow safety best practices, and maintain a simple log of replacements. If you’re unsure about water chemistry or rod selection, hire a licensed plumber to avoid damaging the tank. The Heater Cost team believes that proactive maintenance pays for itself over time through fewer leaks, lower replacement costs, and steadier hot water supply.
Authority Sources
- Energy.gov: Water Heating and Maintenance: https://www.energy.gov/energysaver/water-heaters
- EPA WaterSense: Efficient Water Heating: https://www.epa.gov/watersense
- National Renewable Energy Laboratory (NREL) Resources: https://www.nrel.gov/docs/fy10osti/ (consult manufacturer specs first)
Tools & Materials
- Replacement anode rod (compatible with your heater)(Select by manufacturer spec, length and thread size.)
- Adjustable wrench(For loosening and tightening the rod.)
- Socket wrench or pliers(Helpful for stubborn rods.)
- Bucket(Catch water during drainage.)
- Rags or towels(Mop spills and protect flooring.)
- Plumber's tape (Teflon tape)(Seal threaded connections on the new rod.)
- Gloves and eye protection(Safety first.)
- Torque wrench (optional)(If you want to torque to manufacturer specs.)
- Shutoff tools (water, power, or gas)(Ensure utilities are safely isolated.)
Steps
Estimated time: 60-90 minutes
- 1
Turn off utilities
Shut off the power (electric) or gas supply to the heater. Then close the cold-water supply valve to the tank. This prevents energy input and stops more water from entering the tank during the procedure.
Tip: Double-check the breaker is off or the gas valve is fully closed before touching wiring or burners. - 2
Relieve pressure and drain
Open a hot-water faucet to vent pressure and let air in. Attach the bucket beneath the drain valve and drain enough water to below the anode rod so you can access it safely.
Tip: Draining a portion first minimizes splashing and reduces scald risk. - 3
Loosen and remove old rod
Use the adjustable wrench to loosen the anode rod. Once loose, back it out by hand if possible. Some rods may be stiff due to mineral deposits; work slowly to avoid twisting the tank.
Tip: If the rod is gunky, pause and wipe the threads clean before reattempting. - 4
Inspect and choose replacement rod
Compare the old rod to the replacement: ensure correct type (magnesium or aluminum), length, and thread size. If the old rod is deeply corroded, replace promptly and dispose of it properly.
Tip: Always use a rod that your heater’s manufacturer supports. - 5
Install new rod
Thread the new rod in by hand first, then snug with the wrench. If a torque specification is provided by the manufacturer, apply it with a torque wrench to avoid over-tightening.
Tip: Avoid overtightening, which can damage the heater fittings. - 6
Re-fill and purge air
Re-close the drain valve and slowly refill the tank by opening the cold-water supply. When water flows steadily from the hot-water tap, close it and bleed remaining air from the lines.
Tip: Keep the hot-water tap open a bit until steady flow returns to avoid air pockets. - 7
Restore power/gas and test for leaks
Turn the power back on or re-light the pilot if needed. Check around the rod and connections for leaks and monitor the heater for a few hours.
Tip: If you see moisture around the rod, re-tighten the threads and inspect seals. - 8
Document and monitor
Record replacement date in your home maintenance log and schedule the next inspection based on water quality and usage.
Tip: Note the rod type and any observations to guide future replacements.
Got Questions?
What is an anode rod and why does my water heater need one?
An anode rod is a sacrificial component that protects the steel tank from corrosion by attracting corrosive elements in the water. Replacing it when it wears down helps prevent leaks and prolongs the heater’s life.
An anode rod protects your tank by attracting corrosive elements; replace it when it wears out to keep your heater lasting.
How do I know when the anode rod needs replacement?
If the rod is significantly thinned, heavily corroded, or has a strong rotten egg odor in water, it’s time to replace. Visual inspection during routine maintenance is common.
Look for thinning, heavy corrosion, or unusual water odor to determine replacement.
Can I replace it myself, or should I hire a professional?
Many homeowners can replace anode rods with basic tools by following manufacturer instructions. If you’re unsure about gas lines, electrical connections, or tank condition, hire a licensed plumber.
You can usually do it yourself, but hire a pro if anything looks unsafe.
What rod material should I choose for my water quality?
Magnesium rods are common for many city-water supplies, while aluminum or zinc-based options may perform better in particular water chemistries. Check your heater’s guidance for the recommended material.
Choose the material your heater manual recommends based on your water.
Will replacing the anode rod fix sediment buildup?
Replacing the rod helps protect the tank but doesn’t remove built-up sediment. If you have heavy sediment, a professional water heater flush may be needed.
It helps prevent tank damage but doesn't scrub sediment.
How often should I replace the anode rod?
Most households replace every 3-5 years, but the interval depends on water chemistry, usage, and tank quality. Inspect annually for signs of wear.
Typically every few years, but check annually.
Watch Video
The Essentials
- Shut off utilities before any work.
- Choose the correct rod type based on your water and heater specs.
- Drain, replace, and re-fill with care to avoid leaks.
- Test for leaks and document maintenance for future visits.