When to Change Heating Element: A Practical Guide
Learn when to change heating element in your electric water heater, how to test it, and safe replacement steps. Practical maintenance tips from Heater Cost.

By following this guide, you'll know when to change heating element in your electric water heater, how to test it, and how to replace it safely. Key signals include a drop in hot water, frequent tripping of the breaker, and inconsistent water temperatures. Always verify with a multimeter and consult a professional if you’re unsure.
What is a heating element and why it fails
Electric water heaters rely on immersion heating elements to heat water. Over time, mineral buildup, sediment, and normal wear can cause elements to work harder, overheat, or fail entirely. Common failure modes include reduced hot water output, uneven heating, tripping breakers, and unusual noises near the tank. Understanding how the element operates helps homeowners decide whether repair or replacement is the best course. In most households, a failed element is a clear sign that the tank’s performance is degraded, and proactive replacement can prevent longer outages. This section explains how the element functions, common causes of failure, and the situations that mean it’s time to inspect or replace.
From Heater Cost’s perspective, regular checks can prevent costly breakdowns and ensure you’re not paying more for energy than necessary. Keeping a close eye on water temperature consistency and heat recovery rates helps catch issues before they escalate. A well-timed replacement often restores efficiency and comfort without the guesswork of trial-and-error repairs.
Signs that you may need to change the heating element
If you’re wondering when to change heating element, start by noting how the heater behaves compared with its early days. Common signs include: hot water that runs out quickly or gradually loses heat after standbys, water temperature that seems to fluctuate, or longer-than-usual heating cycles. A frequent tripping of the circuit breaker or a blown fuse is another important clue, indicating the element may be shorted or drawing excess current. Corrosion around the exposed element port or gasket is a red flag that the heat exchanger is near failure. Sediment buildup at the bottom of the tank can also impede heat transfer and reduce efficiency, which sometimes masquerades as a failing element. Finally, any visible leaks around the element port merit immediate attention. Recognize these symptoms early: replacing the heating element can prevent more serious tank damage and keep running costs in check.
How to test your heating element safely
Testing should start with safety: power must be off, and the water heater should be isolated from the power source. Use a non-contact voltage tester to confirm there is no live current on any exposed conductors. Then drain the tank to below the level of the heating element so you can remove the element without a flood. Use a multimeter to check continuity between the element’s terminals; a reading of infinite resistance or a very high reading indicates a failed element, whereas a healthy element shows a stable resistance within the manufacturer’s spec range. When in doubt, compare your reading to the tank’s service manual or consult a professional. Remember: inaccurate testing can lead to improper replacements or safety hazards.
Replacement options: repair vs. replace
In many cases, replacing the faulty heating element is the simplest and most cost-effective option. If your tank shows signs of widespread corrosion, significant sediment buildup, or if the gasket is compromised, replacement becomes more sensible. A fan of DIY repair will typically choose a compatible replacement element with the same wattage and length as the original. It’s important to replace both the element and its gasket to ensure a proper seal and avoid leaks. If the tank is older or the element has failed multiple times, you may want to evaluate whether upgrading the entire water heater makes more sense in terms of efficiency and reliability.
Cost considerations and when to hire a professional
Costs vary based on your location, tank size, and whether you replace an element yourself or hire a pro. Parts generally cost less than labor, and a replacement element with gasket is a common, affordable component. Labor can vary widely, especially if additional issues like mounting hardware wear or electrical wiring are involved. If you’re uncertain about electrical work, or if you encounter corrosion around the port, it’s prudent to hire a licensed plumber or electrician. Professional installation reduces the risk of leaks and ensures code compliance. Heater Cost recommends obtaining multiple quotes and asking about warranty coverage on parts and service.
How to extend heating element life: maintenance tips
One of the best ways to avoid premature element failure is to keep the tank clean and free of sediment. Regularly flushing the tank to remove mineral buildup improves efficiency and prolongs element life. Hard water areas benefit from using a water-softening solution or periodic service flushes. Check anode rod condition and replace it every few years to slow tank deterioration. Monitor water temperature settings; consistently high temperatures can shorten element life due to increased stress. Finally, schedule an annual inspection, especially for older systems, to catch corrosion and buildup before they cause a failure.
Safety reminders and common pitfalls
Working around water and electricity is inherently risky. Always shut off power at the breaker before you touch any wiring, and never rely on a single safety check. Use appropriate PPE, such as insulated gloves and eye protection. Never work alone if you’re uncertain about your ability, and never bypass safety features or tests to speed the job. A common pitfall is overtightening or under-tightening the element, which can cause leaks or damage the gasket. Always follow the manufacturer’s torque specifications and replace worn gaskets. If you notice burning smells, unusual hum, or scorching marks, stop and call a professional.
Troubleshooting quick checks after replacement
After installing a new element and re‑filling the tank, verify there are no leaks around the element port or gasket. Restore power and run hot water for several minutes to ensure the element heats properly and no air pockets impede performance. If you still experience inadequate hot water temperature or erratic heat after replacement, re-check the electrical connections and ensure the thermostat is functioning correctly. Keep monitoring for several days to confirm stable performance and comfort.
toolsMaterials
Tools & Materials
- Safety gear (gloves and eye protection)(rubber gloves rated for electrical work)
- Voltage tester (non-contact)(to confirm circuit is off)
- Insulated screwdriver set(for removing panels and screws)
- Adjustable wrench(to loosen fittings)
- Bucket or drain pan(to catch draining water)
- Replacement heating element (with gasket)(match model, wattage, and length to tank)
- Teflon tape or thread sealant(to seal threads and prevent leaks)
- Channel-lock pliers(for grips and adjustments)
- Towel or rags(cleanup and dry surfaces)
- Manufacturer’s service manual(verify element size and torque specs)
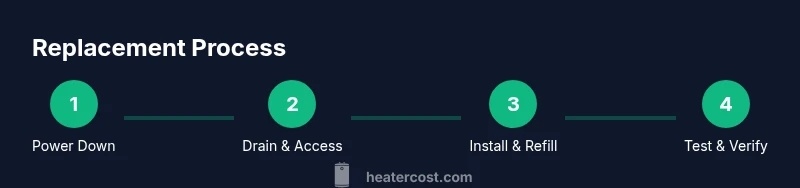
Steps
Estimated time: 60-120 minutes
- 1
Shut off power
Turn off the circuit breaker dedicated to the water heater and verify with a voltage tester that no live current remains. This step prevents electrical shock during the replacement.
Tip: Double-check the power is off at the panel before touching any wires. - 2
Close water supply
Rotate the cold-water inlet valve clockwise until fully shut to stop water inflow while you work. This minimizes leaks and makes draining easier.
Tip: Have towels ready to catch any drips during valve closure. - 3
Drain the tank
Connect a hose to the drain valve and run it to a floor drain or outside area. Open the drain valve and allow water to lower to below the element level to safely remove the old part.
Tip: Open a hot-water tap at sink to vent air and speed draining. - 4
Access the heating element
Remove the access panel and insulation to expose the heating element and its gasket. Keep track of screws and avoid damaging the tank wall.
Tip: Label parts to avoid reassembly confusion. - 5
Remove the old element
Disconnect wires from the element terminals and unscrew the element from the tank. Gently pull it free and inspect the gasket seat for damage.
Tip: Take a photo of wire connections for reference. - 6
Install the new element
Apply new gasket, thread the replacement element into the tank, and snug it with a wrench. Reattach wiring according to the reference photo.
Tip: Do not over-tighten; use torque spec if provided. - 7
Refill and purge air
Close the drain valve, remove the hot-water tap, and gradually open the cold-water inlet to refill. Once full, bleed air from any taps until water streams smoothly.
Tip: Keep an eye on the drain for leaks during refill. - 8
Restore power and test
Turn the breaker back on and run hot water to verify heating element works. Check for leaks around the port and monitor performance for the next several cycles.
Tip: If the water never gets hot, recheck connections or call a pro.
Got Questions?
What are common signs that the heating element needs replacement?
Look for reduced hot water, fluctuating temperatures, and longer heating times. If the circuit trips or you notice corrosion around the element port, replacement is likely needed.
Common signs include weak hot water and breaker trips. If you notice corrosion, plan for replacement.
Can I replace a heating element myself?
Yes, with the right tools, parts, and safety precautions. If you’re unsure about electrical work or encounter corrosion, hire a pro.
You can DIY if you’re comfortable with electrical work; otherwise, call a professional.
How long does a heating element typically last?
Lifespan varies by water quality and usage, but most elements require replacement after several years if sediment buildup is high.
Element life depends on water quality and usage; expect replacements after a few years in hard water areas.
What causes heating element failure?
Sediment buildup, mineral scaling, corrosion, and improper installation can lead to element failure. Regular flushing helps reduce risk.
Sediment and corrosion are common culprits; regular maintenance helps prevent failure.
Is replacing the heating element expensive?
Costs vary by location and whether you DIY or hire a pro. Parts are affordable; labor can be more variable depending on tank access and health of surrounding components.
Parts are usually affordable; labor costs depend on your area and access.
Do I need to flush the water heater after replacing the element?
Flushing after replacement helps remove air and sediment, ensuring proper heat transfer and preventing future buildup.
Flushing helps remove air and sediment after replacement.
Watch Video
The Essentials
- Identify symptoms early before leaks occur.
- Use proper tools and parts matched to your tank.
- Shut off power and water, then test thoroughly after replacement.
- Consider professional help for complex installations.
- Regular maintenance reduces long-term costs.