What to Set Water Heater Temperature At: A Homeowner Guide
Learn the safe, energy-saving temperature to set your water heater. This guide explains the baseline (120°F), safety considerations, testing methods, and step-by-step adjustments for 2026.

Goal: Set your water heater to a safe, energy-saving temperature and understand the trade-offs. This guide explains the baseline temperature (commonly about 120°F), how to test and adjust it, the safety considerations, and practical tips for households with kids, seniors, or high hot-water demand in 2026.
What to set water heater temperature at: baseline and intent
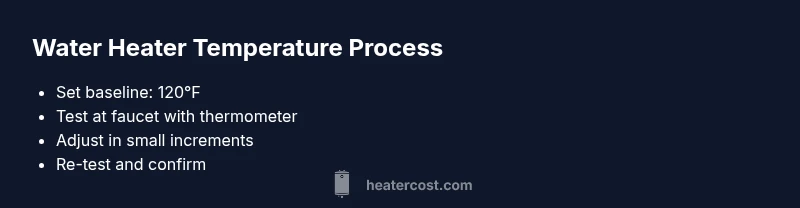
If you're asking what to set water heater temperature at, the baseline many homeowners start with is 120°F. This temperature balances energy efficiency with adequate hot water for most households. According to Heater Cost, setting the thermostat around this level reduces standby losses while still providing comfortable showers and dishwashing. In 2026, this guidance remains a practical starting point for most single-family homes, though your needs may shift based on family size, climate, and appliance mix. We'll unpack why 120°F works for many homes, and when you might want to tweak it up or down. Before you touch the thermostat, consider safety devices, usage patterns, and any local recommendations. This article will guide you through choosing a target temperature, testing accuracy, and implementing changes safely.
How temperature influences energy bills and efficiency
Temperature settings directly influence energy use because the heater must maintain a higher temperature when the stored water is hotter. While it might be tempting to push for the hottest water for quick showers, doing so increases standby losses and energy consumption. Conversely, lowering the setting reduces energy use, but you may notice longer wait times for hot water and reduced flow in households with high simultaneous demand. The goal is to find a balance that provides reliable hot water without wasting energy. In practice, many homeowners see meaningful savings by staying around the commonly recommended baseline, adjusting only after testing actual performance at fixtures. Heater Cost analysis highlights that the real impact comes from matching temperature to usage patterns and system design rather than chasing a single number.
Tools & Materials
- Screwdriver (flathead or Phillips, depending on model)(Access panel screws; have both types on hand)
- Water temperature thermometer (in-tank or faucet-mounted)(Accurate reading at the faucet is essential for validation)
- Protective gloves(Handle hot components safely)
- Towels or a small pan(Catch drips when opening panels)
- Owner's manual for your water heater model(Helpful for model-specific steps)
- Anti-scald device (thermostatic mixing valve or anti-scald shower head)(Recommended for homes with children or elderly residents)
Steps
Estimated time: 40-60 minutes
- 1
Power down and prep the unit
Turn off the power supply to the water heater at the breaker panel, or set the gas control to off if you have a gas unit. This prevents accidental scalding while you access the thermostat. Wait for the unit to cool, especially if you recently used hot water.
Tip: If you’re unsure about the power source, consult the manual or a licensed plumber before touching wiring. - 2
Open the access panel and locate the thermostat
Remove the insulation and panel cover to expose the thermostat. Take note of how the thermostat is secured and whether there are warning labels. Some models have two thermostats (upper and lower) or a single dial.
Tip: Take a photo of the current setting before changing anything so you can revert if needed. - 3
Adjust the temperature setting
Using the appropriate screwdriver, turn the thermostat dial or adjust the digital setpoint in small increments (5–10°F at a time). Avoid large jumps. This helps prevent overshoot and reduces the risk of scalding.
Tip: Record each adjustment so you can track how changes affect performance. - 4
Replace panel and restore power
Carefully reattach the panel and insulation, then restore power at the breaker or gas supply. Do not force components; ensure everything sits flush.
Tip: Wait a few minutes for the thermostat to initialize after power is restored. - 5
Test the water temperature at a faucet
Run hot water at a faucet for 30–60 seconds and measure the outlet temperature with your thermometer. If it’s not at the target, make a minor adjustment and re-test.
Tip: Use a thermometer that reads within a few degrees for accuracy. - 6
Fine-tune the setting if needed
If the measured temperature is consistently higher or lower than target, adjust by 2–5°F and re-test after 20–30 minutes of use to allow the system to stabilize.
Tip: Avoid chasing a perfect number; aim for a reliable range at common fixtures. - 7
Document the final setting
Record the final thermostat setting and the verified faucet temperature for future reference. This makes it easier to compare changes over time and during seasonal use shifts.
Tip: Update household notices or a home maintenance log for quick future checks. - 8
Consider safety devices and maintenance
Install or verify anti-scald devices if not already present. Schedule periodic inspection of the thermostat and heater for sediment buildup or wear.
Tip: Sediment can insulate and alter temperature readings, affecting safety and efficiency. - 9
Plan a follow-up check
Recheck the temperature after a warm week of use, especially if you experience seasonal changes or increased hot water demand. Refine as needed.
Tip: Seasonal changes can shift heating behavior; a quick quarterly check is wise.
Got Questions?
What is the recommended water heater temperature?
Most guidelines suggest 120°F (49°C) as a balance between safety and energy efficiency. This temperature minimizes scald risk while providing adequate hot water for typical households.
The recommended starting point is 120 degrees Fahrenheit for a safe, efficient balance of hot water and energy use.
Will lowering the temperature save energy?
Lowering the temperature reduces the energy the heater must use to maintain hot water. The actual savings depend on how often hot water is used and the size of the tank. It’s worth testing the impact at your fixtures.
Yes, turning the temperature down can save energy, especially if you use hot water sparingly.
How often should I test the temperature after adjustment?
Test the temperature after you’ve adjusted by 5–10°F and allow the system to stabilize for at least 30 minutes. Re-test at a faucet to confirm it’s within your target range.
Test after a short wait, then re-check at a faucet to confirm the temperature.
What safety devices should I use?
Install anti-scald devices such as thermostatic mixing valves or anti-scald shower heads. These help maintain safe outlet temperatures even if the heater setting changes.
Anti-scald devices are a smart safety addition for households with kids or seniors.
Can I have different temperatures for different fixtures?
Most water heaters provide a single outlet temperature. For varied needs, use mixing valves or point-of-use heaters, but that adds complexity and cost.
Usually, one temperature is used for all fixtures; for varied needs, consider mixing valves.
Watch Video
The Essentials
- Set a baseline around 120°F for safety and efficiency
- Test actual temperature at a faucet after adjustments
- Use anti-scald devices in homes with kids or seniors
- Document changes and recheck periodically