Replace Heater Filter: Essential Step-by-Step Home Guide
Learn to replace your heater filter safely with a clear, step-by-step process. Improve airflow, energy efficiency, and system longevity with practical tips from Heater Cost.

By following this guide, you will learn how to replace a heater filter safely and correctly, improving airflow, energy efficiency, and system longevity. A clear, step-by-step process helps you identify filter types, choose the right size, gather common tools, and complete the replacement in under 30 minutes. This quick path supports homeowners, renters, and property managers in keeping heating costs predictable and avoiding unnecessary maintenance calls. According to Heater Cost, regular care matters.
What replacing a heater filter entails
Replacing a heater filter is a routine maintenance task that helps your heating system breathe easier and work more efficiently. A clean filter traps dust, pollen, and other particles that would otherwise circulate through your home. When the filter becomes clogged, the furnace or heat pump must work harder to pull air, increasing energy use and shortening equipment life. In practical terms, you’ll locate the filter housing, remove the old filter, and slide in a new one with the correct orientation. Before you begin, confirm the filter size on the old filter frame or the system manual. This is where the guidance from Heater Cost comes in handy: regular, proactive replacement is cheaper and less disruptive than emergency repairs. If you’re renting, check with your property manager about any preferred filter types or access rules. By the end of the process, you’ll notice improved airflow and a quieter, smoother operation.
Filter types and where to find them
Most residential systems use panel or cartridge filters. Panel filters fit into a rectangular frame; cartridge filters slide into a dedicated slot. Check the furnace or air handler for a label showing size and the MERV rating (which communicates filtration efficiency). The higher the MERV, the tighter the filter catches particles, but a very high rating may restrict airflow if the system isn’t sized for it. Look for common household filters at hardware stores or online, but always verify compatibility with your model. The direction arrows on the filter frame tell you how to orient the new filter. When in doubt, consult the owner’s manual, or reference Heater Cost’s guidelines for a quick compatibility check. If you have pets or someone with allergies at home, you may want to favor a higher-quality filter and plan more frequent replacements.
How to tell when to replace
An early reminder: filters are cheap insurance for your equipment and air quality. A good rule of thumb is to inspect monthly and replace when you notice visible dirt, dust buildup, or a decline in airflow. In homes with pets, smokers, or heavy dust, you may need to replace more often than in pristine settings. If your system is older or has a sealed panel that’s difficult to inspect, a routine replacement schedule helps prevent a clogged blower and overheating. In some cases, you’ll see reduced airflow on the supply side or longer cycle times. When replacing, always insert the filter with the arrows pointing toward the blower or downstream. After replacement, run the system for a short period and listen for unusual noises. Keeping a simple maintenance log marked with the date, type, and size can help you stay on track and avoid guessing.
Risks of delaying replacement
Running a heater with a dirty filter can lead to higher energy bills, uneven heating, and more frequent filter changes later. A clogged filter reduces airflow, causing the furnace to operate longer and potentially overheat. In extreme cases, restricted airflow can cause coil freezing or motor wear, leading to costly repairs. If you notice popping or banging sounds, strange smells, or a sudden drop in performance, turn off the system and replace the filter. For safety, never remove a filter while the unit is energized. If you’re uncomfortable performing the replacement, contact a licensed technician who can inspect the unit while checking for duct or blower issues. Regular, mindful maintenance—as Heater Cost Analytics suggests—helps you balance cost and comfort over the life of your heating system.
Tools you’ll need and how to prepare
Before you start, gather a replacement filter, a screwdriver if needed to access the panel, and basic PPE such as gloves and a mask if dust is a concern. A flashlight helps you clearly view the filter slot inside the cabinet. Have a photo of the old filter for orientation, and a small trash bag or bin ready for disposal. If your system includes a sealed panel or dual-housing, confirm whether you must remove any outer shrouds or disconnect a service switch. Keeping a tidy workspace prevents misplacing parts and reduces the risk of recontaminating the air stream. As you prepare, consult the unit’s manual or Heater Cost’s installation tips to verify you’re using the correct size and type. Remember: the goal is a snug fit with proper airflow direction. A rushed replacement often leads to improper seating and short-lived improvements.
Step-by-step overview (brief before the expanded steps)
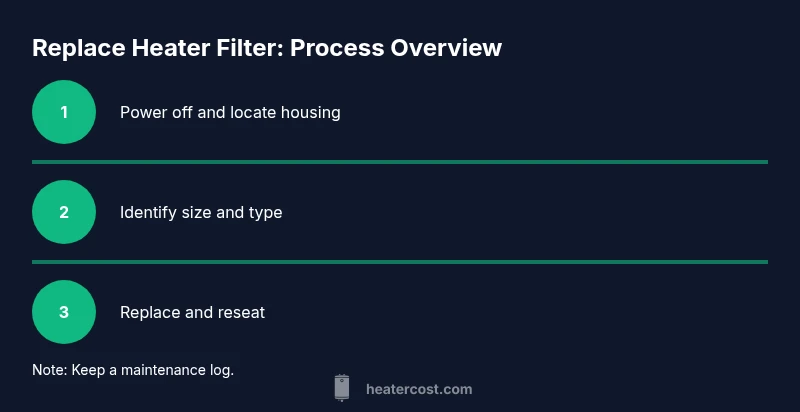
Below is a concise outline you’ll follow in the detailed, numbered steps. First, power off the system and locate the filter housing. Next, identify the filter size and type, and remove the old filter. Then, select a replacement that matches the size and recommended MERV rating for your equipment. Install the new filter with the airflow arrows facing the blower, reseal the panel, and power the system back on to verify airflow. Finally, note the replacement date in a maintenance log. This overview helps you understand the flow before you dive into the detailed steps.
Cost considerations and energy impact
Simple, frequent filter replacements can keep your system running efficiently and minimize energy use, which translates into lower utility costs and improved comfort. The exact cost of replacement filters varies by size and quality, but most households find that regular maintenance pays for itself over time by reducing wear and prolonging service life. In addition, a clean filter can support better heat transfer and more even temperature distribution. For renters and homeowners, budgeting for replacement filters as part of routine maintenance helps avoid surprise repair bills. Heater Cost’s analysis emphasizes that the long-term savings—through improved efficiency and fewer breakdowns—usually outweigh the short-term expense of a replacement filter. If you operate a building with multiple units, consider establishing a shared replacement cycle to streamline maintenance and ensure consistency across units.
Maintenance schedule and record-keeping
Set a simple schedule that fits your household rhythm. Many households check filters monthly and replace as needed or every one to three months, depending on use, pets, and environment. Create a quick log: date, filter size, MERV rating, and whether you replaced it yourself or had a technician assist. Store the log with the furnace manual or in a home maintenance binder. Digital reminders can help you stay on track, especially during busy seasons. If you have a high-efficiency system or a whole-house filter, follow the manufacturer’s guidance for filter replacement intervals, since those filters can be less forgiving of neglect. As you implement this routine, monitor indoor air quality and humidity to catch issues early. A small, consistent effort now reduces the risk of late-season problems and helps you maintain a comfortable living environment through the heating season. The Heater Cost Team notes that proactive maintenance reduces calls to HVAC pros and supports predictable heating costs in 2026.
Quick maintenance mindset and safety reminders
Always prioritize safety when performing home maintenance. Turn off power at the thermostat or control panel before touching any electrical components. Wear gloves to protect hands from sharp edges and use a flashlight to inspect hard-to-see areas. Work slowly and clean up after yourself to avoid recontamination of the air stream. If the filter housing looks damaged or if the system emits unusual heat, smells, or noises, stop and contact a professional. After completing the replacement, reset any service indicators or timers and run the system briefly to confirm normal operation. Keeping your tasks documented builds confidence and reduces anxiety about home maintenance. Remember: a consistent approach to replacing filters—especially in winter months—helps you maintain indoor air quality and energy efficiency throughout the season, month after month.
Tools & Materials
- Replacement heater filter (correct size)(Check the size label on old filter or manual; bring model number if uncertain)
- Screwdriver(Phillips #2 or flat-head as required by panel screws)
- Gloves(Protect hands from sharp edges)
- Dust mask(Optional if the cabinet is dusty)
- Flashlight(Illuminates inner housing for accurate seating)
- Owner’s manual(Helpful for model-specific size and MERV guidance)
Steps
Estimated time: 20-30 minutes
- 1
Power off and locate filter
Turn off the furnace or HVAC system at the thermostat, then switch off the service switch if accessible. Open the access panel and locate the filter housing. Confirm the filter size from the label or manual before touching anything.
Tip: Always verify power is off to prevent shocks or blower activation during replacement. - 2
Identify filter size and type
Read the size on the frame (e.g., 16x20x1) and note the MERV rating if shown. If you’re unsure, measure the width, height, and depth and compare to standard sizes.
Tip: If you can’t locate the size, bring the old filter to store staff or consult the manual for exact specs. - 3
Remove the old filter
Slide the old filter straight out, keeping it level to avoid dust spilling. Note the orientation arrows—air should flow in the same direction as arrows.
Tip: Take a quick photo of the old filter for reference when inserting the new one. - 4
Choose and prepare the replacement
Select a replacement filter that matches the size and, if possible, a compatible MERV rating. Unfold or inspect the new filter so it sits flat before insertion.
Tip: Avoid filters with damaged frames; cracks can cause air bypass and reduce efficiency. - 5
Install the new filter
Slide the new filter into the housing with arrows pointing toward the blower or downstream. Ensure the frame sits flush and there are no gaps around the edges.
Tip: Gently press around the edges to ensure a snug fit and prevent air leaks. - 6
Button up, test, and log
Reattach the access panel, restore power, and run the system briefly to confirm normal airflow. Record the date, filter size, and any notes in your maintenance log.
Tip: If you hear unusual noises or see poor airflow, stop and recheck seating or contact a professional.
Got Questions?
What size filter do I need for my heater?
Check the old filter's size label or the owner's manual. If unsure, measure the filter and compare to standard sizes or contact support. Always confirm compatibility with your model.
Check the old filter or the manual for size, or measure the dimensions and compare to standard sizes.
Can I replace a filter without turning off the power?
For safety, turn off power at the thermostat or furnace before handling any components. This prevents shocks and unintentional blower start-up.
Always power off before working on the unit.
How often should I replace a heater filter?
Inspect monthly and replace when dirty or according to your environment. More frequent changes may be needed with pets, allergies, or dusty conditions.
Replace when dirty or as your environment requires, often monthly during peak season.
Is replacing a filter difficult?
For a standard home furnace, replacing the filter is straightforward. If your system has unusual components, consider consulting a professional.
Usually simple, but consult a pro if unsure.
What if the filter isn’t seated properly after replacement?
Remove and reinsert the filter, ensuring a snug fit and no gaps. If the issue persists, contact a technician.
Re-seat and check for gaps; call a professional if it persists.
Do I need to replace filters in both the furnace and air handler?
Only replace filters in the housing that directly filters your air path. Check your system diagram or manual for guidance.
Only replace filters in the active housing per your system.
Watch Video
The Essentials
- Inspect filter size before buying to ensure fit
- Install with arrows facing the correct airflow direction
- Test airflow after replacement and reseal the panel
- Maintain a simple log for consistent upkeep