Safe Replacement for Water Heater Anode Rod (2026)
Discover why making a water heater rod at home is unsafe, and learn safe, cost-effective replacement and maintenance steps to protect your tank and plumbing.

Do not try to make a water heater rod at home. Anode rods are specialized components designed to control corrosion, and DIY fabrication can compromise safety and warranty. The recommended approach is to replace with an approved factory-made anode rod and schedule professional maintenance if needed.
Why you should not try to make a water heater rod at home
If you're curious about how to make water heater rod at home, this guide starts with a clear answer: do not attempt it. Anode rods are engineered metal components designed to control corrosion inside the tank, and crafting your own version can create unseen risks. Improper materials, unknown galvanic potentials, and uncertain coating can accelerate rust, damage seals, or even compromise the tank. Beyond safety, DIY fabrication can void manufacturer warranties and violate local codes. The result is higher repair costs and greater disruption to hot water availability.
According to Heater Cost, the most effective way to protect your water heater is to replace a depleted rod with a factory-made replacement and schedule regular inspections. A purpose-built anode rod is designed to corrosion preferentially, drawing corrosive elements away from the steel tank. When you attempt to improvise a substitute, you may introduce incompatible metals, incorrect thread sizes, or improper sealing that leaks or corrodes connections. Even if the rod seems to fit, hidden weaknesses can cause microfractures or galvanic reactions under pressure and heat.
This is why many professional technicians emphasize safety and standardization. If you suspect corrosion, you should shut off power or gas supply, consult your owner's manual, and call a licensed plumber or a certified technician. A proper replacement is quick, uses approved parts, and preserves your warranty and insurance coverage. In short: avoid DIY fabrication and invest in a proven, commercially made anode rod and a qualified installation.
note”:null},
What is an anode rod and why it's essential
Anode rods are sacrificial elements installed inside water heaters to protect the steel tank from corrosion. They are made from metals that corrode preferentially to the tank material, thereby extending tank life by attracting corrosive elements in the water. There are different types of rods, such as magnesium, aluminum, and zinc alloys, each with specific advantages depending on water chemistry, temperature, and mineral content. Understanding the role of the rod helps homeowners make informed maintenance choices and avoid risky DIY fabrications that could void warranties or cause leaks. A properly selected rod works in concert with regular flushing and inspection to slow mineral buildup and prolong the heater’s usable life. The key is to match rod type to your water conditions and to replace before the rod is fully consumed, not after metal degradation becomes visible.
Safety and warranty concerns with DIY rods
Working on a water heater involves electrical, gas, and plumbing systems that can pose serious safety hazards if mishandled. Creating a DIY rod can introduce incompatible alloys, poor threading, or improper sealing that leads to leaks or galvanic corrosion. These issues may not be immediately obvious, yet they can culminate in expensive repairs or dangerously high pressure if the tank is compromised. Additionally, most manufacturers require the use of approved, OEM parts to maintain warranty coverage; deviating from this standard often voids coverage and could affect insurance. If safety or warranty are priorities, rely on factory-made anode rods and certified technicians rather than attempting improvised solutions. Regular maintenance, proper part selection, and professional replacement are the best protections for your water heater.
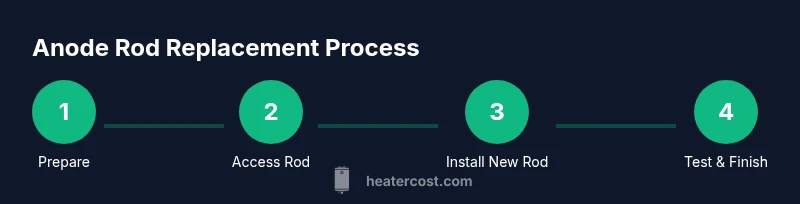
Safe replacement workflow
While you should never fabricate a rod at home, you can follow a safe, manufacturer-recommended replacement workflow when the rod reaches the end of its life. Begin by turning off power or gas and closing the cold-water supply. Relieve pressure and drain a small amount of water to the level of the drain valve, then remove access panels to reach the anode rod port. Unscrew the old rod with a proper wrench, inspect the port for corrosion, and measure the thread size to ensure compatibility with a new rod. Install a fresh, compatible rod with proper thread sealant, re-seat the tank, and refill while checking for leaks. Finally, restore power or gas and test the system for proper hot water delivery and safe operation. Following these steps with the correct parts helps protect your investment and keeps your warranty intact. Pro tip: always verify the replacement rod is the correct length and material for your model and local water chemistry.
How to choose the right replacement rod for your water type and heater
Choosing the right anode rod depends on your water composition and the heater model. Magnesium rods are common for fresh, soft water but may deplete quickly in hard water conditions. Aluminum or aluminum-zinc blends can be more durable in harder water and reduce the risk of galvanic reactions, though they may be less effective at suppressing bacterial growth in some cases. Consider your water hardness, the presence of sulfur smells, and the manufacturer’s recommendations in your owner’s manual. The right rod size and thread type are essential for a proper seal and performance. Always source rods from reputable suppliers and avoid generic substitutes that do not meet the heater’s specifications. If you’re unsure, contact a licensed plumber for a quick assessment and guidance on the best rod for your situation.
Maintenance routines to extend tank life
To maximize the life of your water heater, integrate anode rod maintenance into your regular schedule. Plan periodic inspections of the rod and the tank interior, especially if you notice metallic tastes in water, unusual water discoloration, or a drop in hot water capacity. Pair rod checks with routine tank flushing to reduce mineral buildup and maintain efficiency. Store a spare replacement rod and the correct tools so you’re ready for a quick swap when needed. Document your maintenance actions to track wear patterns and plan future replacements. Effective maintenance minimizes corrosion risk and preserves your heater’s efficiency and reliability over time. The Heater Cost analysis shows that proactive, proper replacement practices contribute to longer service life and fewer unplanned outages.
Tools and safety considerations before working on a water heater
Safety first: working with water heaters involves electricity, gas, and water under pressure. Before starting, gather the essential tools and PPE: adjustable wrench, gas or electric shutoff keys, phillips and socket bits, a bucket, towels, protective gloves, and safety glasses. Have a flashlight and a magnetic tray for small parts. Read the owner’s manual for model-specific instructions and always ensure the power is off and the cold-water supply is closed before you touch the system. Keep a partner nearby in case of an emergency and never work alone when dealing with gas-powered units. If you smell gas or suspect a leak, evacuate immediately and call the gas company or emergency services. These precautions reduce the risk of burns, scalding, or gas-related hazards. Pro tip: keep a spare anode rod and the right tools on hand so you can perform a quick replacement when necessary.
Common pitfalls and troubleshooting
Many homeowners encounter issues when replacing anode rods, from choosing the wrong rod type to over-tightening fittings that cause leaks. Common mistakes include not cleaning the rod port, failing to apply thread sealant where required, and neglecting to fully re-fill and purge air from the tank, which can leave you with air pockets and noise. If you notice leaks after replacement, recheck threads, gaskets, and seals; inspect the tank for visible signs of corrosion or cracking; and verify that the heater is not over-pressurized. If you still experience issues, consult a licensed plumber to assess potential internal corrosion or tank damage. Troubleshooting should focus on ensuring a secure seal and proper water flow rather than attempting further DIY modifications.
When to call a professional and cost expectations
If you observe persistent leaks, unusual noises, or a drop in hot water performance after replacement, contact a licensed plumber. Professionals can diagnose tank integrity, validate rod compatibility, and ensure a proper seal without risking damage to the unit. Costs vary by region, unit type, and required service, so ask for a written estimate before work begins. Routine maintenance may help prevent expensive repairs, and some manufacturers require professional service to maintain warranty eligibility. The goal is to preserve system safety, efficiency, and longevity by combining approved parts with qualified hands.
Tools & Materials
- Owner’s manual for water heater(Model-specific guidance and safety warnings.)
- Adjustable wrench(For loosening/tightening rod port and fittings.)
- Socket set(Spare sockets for rod removal/installation.)
- Bucket and towels(Catch drips when draining water.)
- Protective gloves and safety glasses(Personal protection during service.)
- Thread seal tape (PTFE)(Optional, depending on rod threads and seals.)
- Replacement anode rod (correct type/size)(Ensure compatibility with model and water chemistry.)
- Permanent marker and flashlight(Marking tools and visibility.)
Steps
Estimated time: 30-60 minutes
- 1
Power and water shutoff
Turn off power or gas to the water heater and close the cold-water supply to prevent further water flow. This prevents accidental energization and reduces the risk of scalding or leaks during the procedure.
Tip: Always verify power/gas is off using the appropriate indicator on the unit. - 2
Relieve pressure and drain slightly
Open a hot water faucet to relieve pressure and drain a small amount of water from the tank. This makes the valve and port easier to access and reduces the chance of splashing.
Tip: Do not drain all water at once; move in small increments if needed. - 3
Expose and remove the old rod
Remove any access panel, locate the anode rod, and use the correct wrench to unscrew it. Gently back the rod out until it comes free; inspect the port for corrosion or debris.
Tip: Use a magnet or cloth to catch the rod and keep threads clean. - 4
Inspect and decide
Check the old rod for consumption and inspect the port for corrosion. If the rod is significantly depleted or port shows damage, plan for replacement with a compatible new rod.
Tip: If you see heavy corrosion, stop and call a pro. - 5
Install the new rod
Thread the new rod carefully by hand first, then tighten with a wrench to the manufacturer’s specification. Recheck for alignment and ensure the gasket or seal remains intact.
Tip: Avoid over-tightening to prevent thread damage. - 6
Refill and restore service
Close the drain valve, open the cold-water supply, and allow the tank to refill. Restore power or gas and verify there are no leaks and that hot water flows normally.
Tip: Run a few minutes of hot water to clear air pockets.
Got Questions?
Can I make a water heater rod at home?
No. Fabricating a rod at home risks safety, compatibility, and warranty coverage. Use a factory-made rod and seek professional help if unsure.
No—it's not safe or advisable to make your own rod. Use a factory-made rod and get professional help if needed.
How often should I replace the anode rod?
There isn’t a universal schedule; inspect the rod during regular maintenance and replace when it shows significant wear or depletion. Water chemistry and usage influence timing.
There isn’t a fixed schedule. Check the rod during maintenance and replace when worn out.
What type of rod should I buy?
Choose based on your water chemistry: magnesium for softer water, aluminum or aluminum-zinc blends for harder water. Always follow the heater manufacturer’s recommendations.
Pick the rod type based on water chemistry and the heater’s manual.
Can I replace the rod myself?
If you have the right tools and follow the manual, a DIY replacement is possible, but if you’re unsure, hire a licensed plumber to avoid damage or leaks.
You can if you’re confident and have the right tools; otherwise, hire a professional.
Will replacing the rod fix leaks?
Replacing the rod addresses corrosion control, not leaks from other parts. If you detect leaks, have a pro assess the tank and fittings.
Replacing the rod helps corrosion, but leaks may require other repairs.
Is inspection required after replacement?
Yes, inspect for leaks and verify proper refilling, then test hot water output to ensure correct operation.
Inspect for leaks and confirm the system is working after replacement.
Watch Video
The Essentials
- Do not fabricate a water heater rod at home.
- Replace only with a factory-made anode rod.
- Follow manufacturer guidance for rod type and installation.
- Schedule regular maintenance to protect tank life.