Where to Put Heater in Sump: A Practical Guide
Learn where to place a heater in an aquarium sump for safe, stable temperatures. This guide covers sump layouts, safety, and maintenance to keep your aquatic life healthy.

To correctly place a heater in an aquarium sump, position it in the return chamber away from the pump outlet and inflow pipes. Submerge the unit fully, attach a protective guard, and connect a reliable thermostat. Avoid proximity to inlets, probe the bottom, and keep cables tidy to prevent snagging. According to Heater Cost, proper placement improves temperature stability and reduces stress on livestock.
Understanding sump heater placement basics
Placing a heater in a sump isn’t just about keeping water warm; it’s about creating a stable thermal environment without creating dead zones or stress points for your livestock. In most freshwater and mixed-aquarium setups, the majority of heat transfer occurs through the water column, but the sump contains several micro-environments where heat can accumulate or dissipate unevenly. The safest rule is to keep heating devices away from high-flow zones and impellers that can cause rapid temperature swings or physical damage to the heater. According to Heater Cost, the most reliable sump placements leverage the return chamber to distribute heat evenly while protecting heater elements from direct contact with moving water. When you place the heater in the sump, you also gain easier access for maintenance and a cleaner display tank.
Before you decide where to put heater in sump, map your system’s flow path: water exits the display tank, enters the sump, passes through filtration and heaters, then returns to the tank. Each section presents a different thermal profile. A well-placed heater will sit within the flow path, ideally downstream of the return pump so warm water circulates through the return line and toward the display. This reduces cold spots near the bottom and ensures consistent temperatures across the tank. A key nuance is to avoid placing the heater in a direct jet path from the return line, which can create hot pockets near one area while leaving other zones cooler. By thinking in terms of flow, you’ll minimize heat loss and maximize stability for corals, fish, and plants.
In addition to placement, consider the heater’s size and rating. Match the heater to your total water volume, not just the display tank’s size. A heater that’s too small will struggle to maintain a steady temperature during cold nights or water changes, while an oversized unit can cause overshooting and fluctuations. Finally, select a model with a built-in thermostat and a protective guard. These features reduce the risk of contact with delicate equipment or curious aquatic life and make calibration simpler over time. The Heater Cost team emphasizes that thoughtful placement balances efficiency, safety, and long-term reliability across all sump configurations.
note:
Tools & Materials
- Aquarium sump with return chamber(Ensure the chamber is accessible for heater placement and maintenance.)
- Aquarium heater (submersible, rated for aquarium use)(Choose a heater with an integrated thermostat and appropriate wattage for your system.)
- Heater guard or shield(Optional but recommended to prevent contact with livestock and cables.)
- Aquarium thermometer (digital preferred)(Place in multiple locations to monitor heat distribution.)
- Cable clips or zip ties(To secure cords and prevent snagging or accidental pulls.)
- GFCI-protected outlet(Adds a safety layer against electric shock in wet environments.)
- Silicone sealant (aquarium-safe, optional)(Only if your sump requires sealing around fittings or components.)
Steps
Estimated time: 20-45 minutes
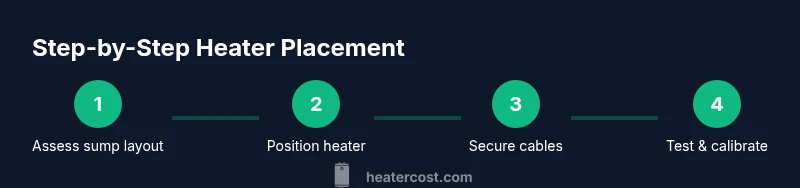
- 1
Assess sump layout
Inspect the sump interior and identify the best region in the return chamber for stable heat distribution. Note any zones with high flow, near inlets, or cables that could snag the heater. This step sets the foundation for a safe, effective installation.
Tip: Take photos or sketch the sump to plan cable routing before touching equipment. - 2
Power down and drain area
Turn off all power to the sump system and unplug the heater. If possible, drain a small portion of the sump to reduce splash risk while you position the heater.
Tip: Always unplug power before handling electrical devices in or near water. - 3
Position the heater in the return chamber
Place the heater downstream of the return pump but away from direct jet streams. Ensure it is fully submerged and oriented so the heater’s intake won’t draw air or create air pockets.
Tip: Avoid isolating air pockets around the heater, which can affect temperature sensing. - 4
Secure the heater and route cables
Use clips or zip ties to secure the heater and keep cords away from moving parts and filtration intakes. Attach a guard if available and verify there’s no tug risk on the heater with water movement.
Tip: Leave enough slack for expansion and occasional maintenance. - 5
Calibrate and test
Plug the system back in and set the thermostat to the desired target. Wait 15–30 minutes and check temperature across multiple points in the sump.
Tip: If readings vary by more than 2–3°C, adjust placement or add a secondary thermometer for better monitoring. - 6
Document setup and safety checks
Record the placement, wattage, and target temperature. Confirm all connections are secure, cords are tidily managed, and there are no leaks.
Tip: Maintain a simple diagram for future maintenance or upgrades.
Got Questions?
Is it safe to place a heater directly in the sump’s return chamber?
Yes, placing the heater in the return chamber is common and safe when the unit is rated for aquarium use and submersed properly. Ensure it’s away from direct jet streams and protected by a guard if available.
Yes, the return chamber is a common spot for a sump heater as long as you submerge it and guard it.
Should the heater be before or after the pump in a sump?
Place the heater after the pump so warm water circulates from the heater through the system, helping to distribute heat evenly. Avoid placing it directly upstream of the pump outlet to prevent thermal shocks to equipment.
Put the heater after the pump to distribute heat evenly.
What are signs of an improper heater placement?
Frequent temperature fluctuations, hot spots near one area, or the heater tripping due to overheating can indicate poor placement. Adjust position or add ventilation to improve heat distribution.
Watch for temperature swings and hot spots; reposition if you see them.
Can I use more than one heater in a sump?
Using multiple heaters can stabilize temperatures in larger systems, but each heater must have its own thermostat and be carefully balanced to avoid overshoot.
Multiple heaters can help, but each needs its own thermostat and careful balancing.
What safety checks should I perform before powering on?
Confirm all connections are dry, cords secured, and guards in place. Check for cracks in the heater housing and ensure the sump lid is in good condition to minimize spill risk.
Do a final, dry visual check before turning the system on.
How does placement affect temperature stability over time?
Good placement reduces micro-variations in temperature across the sump, leading to more stable conditions in the display tank and healthier aquatic life.
Proper placement helps keep temperatures steadier over time.
Watch Video
The Essentials
- Plan placement before wiring and routing
- Keep heater away from pump outlets and inlets
- Use a thermostat and verify temperature stability
- Inspect seals and cables regularly