How to Control Heating with Hive
Learn to control heating with Hive using the thermostat, app, and smart features to save energy and stay comfortable. Step-by-step setup, schedules, geofencing, and troubleshooting.

In this guide you will learn how to control heating with Hive—from installing the Hive Thermostat to configuring schedules, geofencing, and energy-saving settings. You’ll use the Hive app, hub, and thermostat with clear, step-by-step actions to keep comfort high and costs low. This quick plan covers setup, daily controls, and smart features like Away mode and temperature profiles.
Understanding Hive Heating System Basics
Hive brings together a smart thermostat, a central hub, and a mobile app to give you centralized control over your home's heating. At its core, Hive lets you set temperature targets, create schedules, and trigger automatic adjustments based on your routine or location. The system is designed to be beginner-friendly while offering power-user features like multi-zone control and smart away modes. When you understand the core components and how they interact, you can tailor heating to your home’s layout and occupancy. According to Heater Cost, a well-configured Hive setup can simplify optimization and help you avoid over-heating rooms that aren’t in use, which is a common source of energy waste. This section lays the groundwork for installing and using Hive effectively.
What the Hive Platform Includes
Hive consists of three main elements: the thermostat, the hub (gateway), and the mobile app. The thermostat acts as the primary control point for boiler or heating system signals. The hub connects your home heating to the internet, enabling remote control via the app. The app lets you adjust temperatures, set schedules, run Away/Auto modes, and view energy use. Some models support additional room thermostats for zoning and better precision. Hive supports compatibility with standard boilers and heat pumps, but installation varies by system type. Understanding these parts helps you plan wiring, placement, and app configuration for reliable performance.
Preparation: What You Need Before You Start
Before you begin, verify that your heating system is compatible with Hive. Gather essential items: a Hive Thermostat (model supporting Active Heating), a Hive Hub, a smartphone with the Hive app, and a stable Wi‑Fi network (2.4 GHz is usually best for home devices). You may need a screwdriver for mounting and basic electrical work if you’re replacing an old thermostat. Keep the user manual handy for model-specific steps. A quick check of your boiler permissions and wiring can prevent misconfigurations that cause the system to run inefficiently. This preparation helps ensure a smooth setup and reliable operation once you start pairing devices.
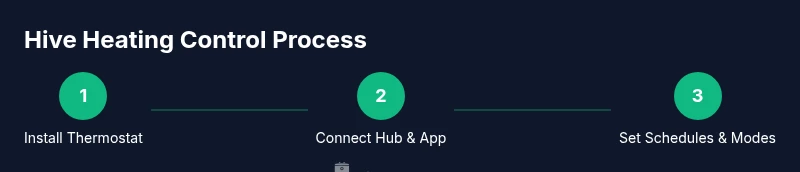
Step 1: Install the Hive Thermostat
Start by turning off the heating circuit to avoid any electrical hazards during wiring. Remove the old thermostat plate and note which wires connect to the terminals. Attach the Hive thermostat base, matching wires to the corresponding terminals, and secure the unit to the wall. Reconnect power and verify the display comes alive. If your system uses a heat-only or combi boiler, follow the wiring diagram from the Hive manual. For safety, ensure a clean, dry mounting surface and avoid placing the thermostat behind furniture or in direct sunlight. This step creates a reliable control point for your heating.
Step 2: Install the Hive Hub and Connect to Wi-Fi
Mount the Hive Hub in a central location with a strong Wi-Fi signal. Plug the hub into your router with an Ethernet cable if recommended by your model, then power it up. Open the Hive app and follow the on-screen prompts to add the hub to your account. The hub enables remote communication between your thermostat and your phone. If your router supports 5 GHz as well as 2.4 GHz, connecting to the latter may improve reliability for IoT devices. This step establishes the backbone for remote control and scheduling.
Step 3: Create Your First Heating Schedule
In the Hive app, set a baseline weekly schedule that aligns with your routine. Start with a morning cool period, a warmer daytime setting, and a night-time cool-down. Use separate temperature targets for weekdays and weekends if your schedule differs. Save the profile and test by adjusting the thermostat remotely to ensure your boiler responds correctly. A well-structured schedule reduces unnecessary heating and keeps comfort consistent throughout the home. This step translates your daily rhythm into automatic temperature changes.
Step 4: Using the Hive App Daily Controls
The Hive app offers a clean dashboard for quick adjustments. You can change the current temperature, pause heating, or switch to Eco/Away modes with a couple of taps. Explore the chart view to see how energy use shifts with your adjustments, and identify times when you can tighten the schedule for savings. The app also provides notifications for maintenance reminders or firmware updates. Regular daily interaction helps you fine-tune comfort and efficiency while staying informed about usage patterns.
Step 5: Setting Up Temp Profiles and Away Modes
Temp profiles (like Home, Away, and Sleep) let you switch between pre-defined comfort levels with a single action. Away mode reduces heating when you’re not home, while Sleep mode lowers temperatures gradually during the night. The Hive app can automatically activate Away mode based on your geofence or schedule. If children or pets are present, you can create a balanced profile that maintains safe temperatures without excessive energy use. Profiles simplify long-term energy management while preserving comfort.
Step 6: Geofencing and Location-Based Heating
Geofencing uses your phone’s location to adjust heating when you approach or leave home. Ensure you enable location services for the Hive app, and set a reasonable radius to avoid unpredictable on/off cycling. Geofence rules can trigger away behavior when everyone leaves, so the house retains comfort when you return. If your property has variable occupancy (e.g., guests or extended absences), combine geofencing with a manual schedule to maintain predictability and energy savings. This feature is a powerful way to tailor heating to actual presence without constant manual changes.
Step 7: Zone Heating with Room Thermostats
If you have multiple Hive room thermostats, you can zone heating by allocating each thermostat to a different area or room. Create zones based on usage, such as living spaces and bedrooms, and assign temperature targets accordingly. Zoning reduces waste by focusing heat where it’s needed and letting unused rooms cool. It also helps with family comfort by maintaining pleasant temperatures in living areas without overheating other rooms. Like any zoning approach, you’ll want to monitor performance and adjust as needed for occupancy and insulation differences across rooms.
Step 8: Monitoring Energy Use and Costs
Use the Hive app’s energy metrics to track trends over days or weeks. Look for patterns where temperature changes do not yield noticeable comfort improvements and adjust accordingly. Compare your current energy use to prior months to gauge savings from scheduling or geofencing. Many users find that even small adjustments, such as lowering overnight temperatures by 2°C or extending away periods by 30 minutes, accumulate meaningful reductions in consumption. Tracking helps you justify changes and identify opportunities for ongoing optimization.
Step 9: Maintenance, Updates, and Security
Keep the Hive app and thermostat firmware up to date to benefit from the latest features and security patches. Periodically check sensor readings and battery status (if your model uses batteries) and replace components when needed. For security, use strong, unique passwords and enable two-factor authentication where available. Regular checks ensure the system remains reliable, reduces the risk of unauthorized access, and maintains consistent performance across the heating network. This maintenance routine supports long-term energy efficiency and comfort.
Common Pitfalls and How to Avoid Them
Common issues include mounting the thermostat in direct sunlight, placing the hub too far from the router, and setting overly aggressive schedules that cause short cycling. To avoid these, place the thermostat away from heat sources, keep the hub in a central, well-ventilated spot, and start with modest temperature changes. If you notice inconsistent readings, recalibrate the thermostat or re-check wiring connections. Avoid attempting DIY fixes for complex boiler problems—consult a licensed professional when in doubt. Anticipating these pitfalls helps you maintain reliable control and steady savings.
Authority Sources
For additional guidance and independent verification, consult these authoritative sources:
- Energy.gov: https://www.energy.gov/
- EIA: https://www.eia.gov/
- NREL: https://www.nrel.gov/ These sources provide background on energy efficiency, thermostat technology, and energy-saving best practices that complement your Hive setup.
Next Steps and Personalization Tips
With your Hive system in place, consider customizing schedules for seasonal changes, incorporating outdoor temperature trends, and testing different Away profiles to find your best balance of comfort and savings. Periodically review energy data, and tweak zone temperatures as insulation and window efficiency change with the seasons. If you’re upgrading or expanding your system, map out new zones and plan wiring or upgrades accordingly. The goal is a comfortable home that doesn’t waste energy, supported by ongoing monitoring and thoughtful adjustments.
Tools & Materials
- Hive Thermostat (compatible model)(Ensure your model supports Active Heating and boiler control)
- Hive Hub(Connects thermostat to Wi-Fi for remote access)
- Smartphone with Hive app(iOS or Android; keep the app updated)
- Stable Wi‑Fi network (2.4 GHz typically best)(Ensure signal strength near thermostat and hub)
- Screwdriver set(Phillips head for mounting; follow safety precautions)
- User manual for your boiler/heat source(Helps with wiring diagrams and compatibility checks)
Steps
Estimated time: 30-60 minutes
- 1
Verify compatibility and plan
Confirm your boiler or heat source is compatible with Hive and map where the thermostat, hub, and any room stat will be installed. Create a quick wiring checklist and ensure you have basic electrical safety knowledge.
Tip: If in doubt, consult your boiler manual or a licensed electrician before starting. - 2
Install the Hive Thermostat
Power off the heating circuit, remove the old device, wire the Hive thermostat according to the diagram, and mount securely. Restore power and test the display.
Tip: Double-check that you connected the common wires correctly to avoid short cycling. - 3
Mount and connect the Hive Hub
Place the hub in a central location with strong Wi‑Fi. Connect to power, then link the hub to your Hive account via the app.
Tip: If your router supports both bands, use 2.4 GHz for stability with IoT devices. - 4
Add the thermostat to the app
Open the Hive app, add a new device, and follow prompts to pair the thermostat with the hub. Confirm the thermostat reports current temperature.
Tip: Keep your phone close during pairing to avoid disconnects. - 5
Create initial schedules
Set a weekday/weekend schedule that aligns with your routine. Use conservative temperature changes to begin with and adjust after a week.
Tip: Start with small increments (e.g., +1–2°C) to avoid unnecessary cycling. - 6
Enable geofencing
Turn on location services in the Hive app and configure a reasonable geofence radius. Test leaving and returning to see automatic mode changes.
Tip: Be mindful of false triggers from nearby devices; adjust radius if needed. - 7
Configure zones (if supported)
Add additional room thermostats and assign them to zones (e.g., living areas, bedrooms). Tailor temperatures per zone for comfort and efficiency.
Tip: Reserve the warmest zone for common spaces used during the day. - 8
Review energy usage
Use the Hive app charts to monitor daily/weekly energy consumption and compare with prior periods. Tweak schedules to maximize savings.
Tip: Identify any days with unexpected spikes and investigate cause.
Got Questions?
Is Hive compatible with all boilers and heat pumps?
Hive works with many common boilers and heat pumps, but compatibility varies by model. Check the Hive wiring diagrams and your boiler’s control wiring to ensure proper operation. If in doubt, consult a licensed installer.
Hive works with many boilers, but you should verify wiring compatibility first. If you’re unsure, ask a licensed installer.
How do I set up schedules in the Hive app?
Open the Hive app, select your thermostat, and choose Schedules. Create a weekly plan with different temperatures for Home, Away, and Sleep modes. Save changes and test the transitions.
Open the app, go to Schedules, and create your weekly plan. Save and test the transitions.
What’s the best way to use geofencing without false triggers?
Enable location services for the Hive app and adjust the geofence radius so it matches your typical route and home size. If you notice false triggers, increase distance or disable geofencing during unlikely times.
Turn on location services and tune the geofence radius to avoid false triggers.
Can I control Hive with voice assistants?
Yes, Hive supports integration with certain voice assistants through compatible ecosystems. Check the latest app and device compatibility for your region and ensure you’ve linked the Hive account to the assistant.
Hive can work with voice assistants if you’ve linked accounts properly.
What should I do if my Hive device stops responding?
First check Wi‑Fi connection and power to the hub. Reboot the hub and thermostat, then re-pair the device in the app if needed. If issues persist, consult Hive support.
Check power and Wi-Fi, reboot, and re-pair if needed.
How can I maximize energy savings with Hive?
Use well-planned schedules, enable Away modes when you’re gone, and zone heating where possible. Regularly review energy charts and tighten the temperature differentials to minimize cycling.
Plan schedules, use Away modes, and review energy charts to save energy.
Watch Video
The Essentials
- Set up Hive with a compatible thermostat, hub, and app
- Create practical schedules and zones for comfort and efficiency
- Use geofencing and Away modes to automate savings
- Regularly review energy data to refine settings