How to Replace a Heater Control Valve
Learn how to replace a heater control valve safely with our comprehensive, practical guide. Follow clear steps, gather the right tools, and test for leaks to restore efficient heating.

Learn how to replace a heater control valve safely and efficiently. This guide covers identifying the valve, gathering the right tools, isolating the system, removing the old part, installing the new valve, and testing for leaks. You’ll also see safety steps, common mistakes to avoid, and practical time and cost expectations.
Why replacing a heater control valve matters
A stuck, leaking, or unresponsive heater control valve can cause uneven heating, energy waste, and damage to your heating system. If you notice zones that won’t heat evenly, temperature swings, or unusual noises near the boiler or furnace, it may be time to replace the valve. According to Heater Cost, replacing a faulty valve can restore performance and prevent energy waste. In homes with older boilers or hydronic systems, a failing valve can contribute to trapped air, corroded connections, and inefficiencies that raise monthly bills. This guide focuses on practical, safe steps to replace the valve and avoid common mistakes. You’ll learn how to identify the valve type, gather the right tools, isolate the system, install the replacement, and test for leaks. By understanding the valve’s role, you can plan the project, budget wisely, and maintain reliable heat through every season. This is especially important for property managers maintaining multiple units, where consistent comfort matters and downtime must be minimized. The Heater Cost team emphasizes safety first: never work on energized equipment, and consult a professional if you’re unsure about water, gas, or combustion components. With the right approach, a valve replacement can be a straightforward upgrade that preserves system integrity and long-term reliability.
How a heater control valve works
A heater control valve regulates the flow of heated water or air through your heating system. In hydronic (hot-water) systems, the valve opens and closes to control radiator or baseboard heat, balancing temperature and efficiency. In some furnaces, a thermostat signals the valve to modulate boiler output, ensuring the room reaches the desired setpoint. A functioning valve helps prevent unnecessary boiler cycling, reduces wear on pumps, and minimizes energy costs. Over time, seals can wear, threads can corrode, and calibration can drift, leading to reduced performance. Understanding the valve’s location and orientation is key to choosing the correct replacement and ensuring a proper seal and sealant compatibility with your piping.
For homeowners, renters, and property managers, knowing the valve type (straight, angle, or globe) and thread standard (NPT, sweat, or compression) is essential for a successful swap. The replacement valve should match flow direction and connection type. If you’re unsure, consult a plumbing professional or a heating contractor who can verify compatibility and mitigate the risk of leaks or air locks.
Signs you need to replace the valve
Look for these indicators that the valve may be failing:
- Uneven heating or cold spots in zones served by the valve
- Frequent system cycling or boiler short-cycling
- Leaks at valve body, connections, or nearby pipes
- Hard-to-bleed radiators or air in lines after purging
- Unusual noises like banging, clanking, or hissing near the valve
- Increased energy bills without other explanations
If you observe any of these signs, plan a valve replacement or at least a professional inspection. Early replacement can prevent more extensive damage to piping, pumps, or the boiler itself.
Tools and safety preparations
Before starting, ensure you have the right tools and PPE: safety glasses, gloves, adjustable wrench, channel-lock pliers, screwdrivers, Teflon tape or pipe thread sealant, replacement valve compatible with your system, bucket or towels for spills, and a means to depressurize the system. Shut off power to the heating unit and close the main supply valves to isolate the circuit. If you have a gas-fired boiler, verify that you can safely disconnect gas supply according to local codes. If your system uses potable water connections, consider precautionary measures to prevent contamination. Always allow the system to cool before starting and verify there is no pressure in the line before loosening fittings.
Selecting the replacement valve
Choose a valve that matches the valve size, connection type, and flow direction of the existing one. Check material compatibility (brass, bronze, stainless) with your piping and the fluids in your system. If the valve includes an actuator or requires electrical connections, ensure electrical compatibility and wiring compatibility with your thermostat or control board. Consider features like a quick-connect option, minimal flow resistance, and a design that reduces the chance of leaks at threaded joints. If replacing in a multi-unit building, select a valve with reliability and easy maintenance in mind to minimize downtime for residents.
Installation considerations by system type
In a hydronic (hot-water) system, you’ll typically replace the valve where hot water moves through baseboards, radiators, or the boiler loop. In air-heated furnaces, the valve may regulate the flow of hot air or water used for secondary heating circuits. Boilers often require a valve that can withstand boiler pressure and temperature ranges; ensure you have the correct unions, gaskets, and adapters. For closed-loop systems, bleed valves and air vents should be checked or replaced during installation. For older piping, inspect for corrosion and replace any compromised fittings. If you encounter difficult-to-remove fittings, apply penetrating oil and let it sit before attempting again. After installation, inspect all joints for alignment and avoid overtightening that could strip threads or crack fittings.
Testing, maintenance, and next steps
Repressurize the system gradually and check for leaks at every connection. Bleed air from radiators or air vents to eliminate trapped air. Restore power and slowly bring the system to operating temperature, watching the new valve for smooth operation. If you see drips or hear unusual noises, power down and recheck seals and torque. Maintain a regular maintenance schedule: inspect the valve annually, lubricate moving parts if specified by the manufacturer, and replace worn gaskets as needed. Document the service in your property maintenance logs and consider scheduling a professional inspection after the first heating season to confirm long-term reliability.
Tools & Materials
- Replacement heater control valve (matching size/connection type)(Ensure compatibility with your system (hydrionic, boiler, or furnace) and the correct connection type.)
- Adjustable wrench(Choose one comfortable for deep access to valve fittings.)
- Channel-lock pliers(Useful for stubborn fittings and to avoid rounding nuts.)
- Screwdrivers (flat and Phillips)(Needed for removing cover plates or securing clamps.)
- Teflon tape or pipe thread sealant(Seal threads to prevent leaks; use as appropriate for metal threads.)
- Bucket and towels(Contain spills and keep the work area clean.)
- Safety glasses and gloves(Protect eyes from splashes and sharp edges.)
- Penetrating oil (optional)(Loosen stubborn joints without damaging threads.)
- Rags or lint-free cloth(Clean joints and wipe excess sealant.)
- Torque wrench (optional)(Help achieve proper tightness on critical fittings.)
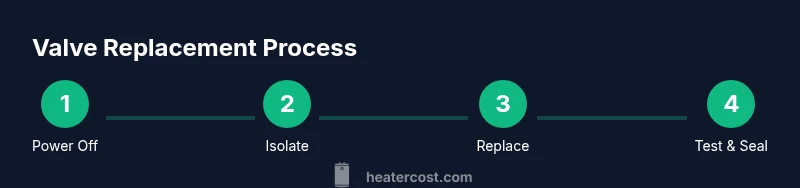
Steps
Estimated time: 60-120 minutes
- 1
Power down and isolate
Turn off the heating unit and shut off downstream and upstream valves to isolate the circuit. This prevents accidental release of hot water or steam during the replacement and minimizes the chance of injury.
Tip: If you can, lock out the energy source or tag out the switch to prevent accidental re-energization. - 2
Relieve pressure and drain
Carefully relieve pressure by opening a bleed valve or radiator vent once the system is isolated. If your system is open-loop, prepare to collect residual water with a bucket. Draining reduces splash and helps you avoid scalding.
Tip: Do not bypass the drain valve; ensure you’ve bled air and drained enough water before removing fittings. - 3
Remove the old valve
Loosen and remove the nuts or unions securing the valve. Note the orientation so the replacement valve can be installed in the same direction. If the valve is soldered or glued, you may need to cut the connections and use a compression or threaded fitting.
Tip: Take photos of the valve orientation before removal to guide reinstallation. - 4
Prepare the new valve
Inspect the replacement for any damage, and apply pipe thread sealant or Teflon tape to threaded connections as needed. Align the valve so flow direction matches the system schematic.
Tip: Only apply sealant to male threads; avoid getting sealant on the valve’s moving parts. - 5
Install the new valve
Thread the new valve into place by hand to avoid cross-threading, then snug with a wrench. Reconnect unions or fittings, ensuring a proper seal without over-tightening.
Tip: Use a torque wrench if the fittings specify a torque value to prevent leaks. - 6
Repressurize and bleed air
Slowly open the supply valve to repressurize the loop. Bleed air from radiators or vents until water runs clear and steady with no air pockets.
Tip: Keep towels handy for drips during the bleed process. - 7
Test and finalize
Power the system back on and run a test cycle. Check all joints for leaks and verify that heating zones respond as expected. If leaks persist, power down and re-tighten or reseal.
Tip: Document the service and monitor for the first few heating cycles; address any leaks promptly to prevent damage.
Got Questions?
Do I need to drain the entire system before replacing the valve?
Draining the entire system is not always necessary, but you should depressurize and drain the loop around the valve to minimize spills and burns. Follow manufacturer guidance and local codes. If in doubt, consult a professional.
Usually you only need to depressurize near the valve and drain that small section to protect yourself from hot water and leaks.
Can I replace the valve myself or should I hire a pro?
If you’re comfortable with basic plumbing tasks and can safely shut off power and water, replacing a valve can be a doable DIY project. Complex systems, gas components, or uncertain valve types warrant a professional.
It’s doable if you’re confident with basic plumbing, but don’t hesitate to hire a pro for gas or complex systems.
What types of systems benefit most from valve replacement?
Hydronic and boiler-based heating systems with poor temperature control, leaks, or frequent air in lines benefit most from valve replacement. Systems with aging components and frequent maintenance issues should be evaluated.
Valve replacement helps hydronic and boiler systems with control issues and leaks.
How can I prevent leaks after replacement?
Ensure threads are properly sealed, use appropriate torque, and verify unions are tightened evenly. Recheck the joints after the first heating cycle.
Seal threads correctly, don’t over-tighten, and recheck after the first cycle.
Will replacing the valve affect thermostat performance?
A properly installed valve should restore consistent heating controllability. If the thermostat seems unresponsive after replacement, check wiring and control signals for compatibility.
If wired right, the valve helps the thermostat maintain stable temperature.
How long does a valve replacement typically last?
Lifespan varies by system, usage, and quality of components. Regular maintenance improves longevity; expect several years of service with proper care.
With good maintenance, you can expect years of reliable performance.
Watch Video
The Essentials
- Identify valve type and connection before replacement
- Isolate, depressurize, and drain safely to avoid burns
- Match replacement valve to flow direction and connection type
- Test for leaks and bleed air after installation
- Document maintenance for future reference