How to Put Heater on Mini Split: A Step-by-Step Guide
Learn how to switch your mini-split to heat mode, adjust settings, and troubleshoot common issues. This educational guide provides clear steps, safety tips, and maintenance reminders for reliable heating with ductless systems.

To turn on heat on a mini split, switch the system to heat mode, set the desired temperature, and confirm the outdoor unit is running. Make sure power is on, the remote matches the indoor unit, and the filter is clean. If heat doesn't engage, check the display for error codes and refer to the manual.
How mini splits generate heat and why usage matters
The heat in a mini split comes from a heat pump that moves heat between indoors and outdoors. When operating in heating mode, the outdoor unit releases refrigerant and uses the indoor fan to distribute warm air, even when air temperature outside is cool. This design is highly efficient because it uses outside heat energy rather than generating heat with resistance. Still, performance depends on insulation, air distribution, and the unit's rated capacity. If the system is undersized for the space, you may experience cold spots or longer runtimes. Regular maintenance, including cleaning the filters and keeping the outdoor unit clear of debris, helps maintain efficiency. According to Heater Cost, turning on heat on a mini split is generally straightforward when you understand mode toggling and thermostat settings. When you pick heat mode and set a reasonable temperature, the system engages the indoor fan and outdoor compressor to begin transferring heat. Remember that performance is influenced by outdoor temperature, insulation quality, and defrost cycles. This understanding leads to safe and efficient operation and helps you avoid common pitfalls.
Safety prerequisites before turning on heat
Before you touch the unit, ensure you read the owner’s manual and follow basic safety practices. Turn off or disconnect power if you notice exposed wiring, moisture near electrical components, or damage to the outdoor unit. Keep pets and kids away while you inspect or operate the controls. Never bypass safety features or attempt to modify wiring. If you smell burning, hear buzzing, or see arcing, shut off power at the breaker and consult a licensed technician. Proper safety reduces the risk of electrical shock or fire and protects your warranty. The Heater Cost team emphasizes always starting from the manual and using certified professionals for any service beyond routine checks.
Verify system readiness: power, remote, and filters
Check that the indoor and outdoor units have power and that the circuit breaker is not tripped. Confirm the remote control or wall thermostat is paired with the indoor unit and functional. Inspect the air filters and the intake grille; a dirty filter can block airflow and reduce heating efficiency. If the display shows an error code, note it for reference. Clear any obstructions around the outdoor unit and verify there is adequate airflow. This verification helps ensure the system can engage heat without unnecessary strain or error codes.
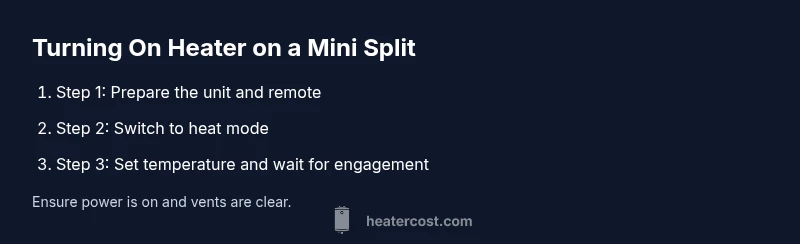
Step-by-step overview: turning on heat (high-level flow)
This section provides a concise overview of the actions you will take in the detailed STEP-BY-STEP section: switch the unit to heat mode, set a comfortable temperature, verify airflow, check the outdoor unit, review any error codes, consider auxiliary heat if required, and return to energy-saving operation when comfortable. Use this overview to orient yourself before you begin. See the STEP-BY-STEP block for exact actions, times, and tips. Visual aids such as diagrams referenced in the guide can help you validate each step as you go.
Troubleshooting common issues when heat won’t engage
If heat does not engage after following the basic checks, review possible causes such as mode misselection, low refrigerant (requiring a technician), a tripped breaker, or a blocked outdoor unit. Some systems rely on auxiliary heat during cold snaps, which may take longer to produce warmth indoors. Look for error codes on the display and consult the manual for specific meanings. A blocked airflow path or a dirty filter can also prevent heat from reaching the desired temperature. Document findings so a professional can diagnose quickly, reducing downtime.
Optimizing performance: thermostat settings and modes
Optimal performance comes from selecting the right mode and temperature, and using scheduling to manage energy use. In many models, Auto mode balances heating and energy efficiency by adjusting fan speed and compressor activity. If your unit supports auxiliary heat, use it sparingly when temperatures drop significantly, as it typically consumes more energy. Keep a comfortable setpoint that avoids excessive cycling, which can wear the system and raise bills. Monitor occupancy and adjust settings to maintain comfort without wasting energy.
Maintenance tips for reliable heating
Regular maintenance keeps the heating performance steady. Clean or replace filters according to the manufacturer’s schedule, typically when performance drops or during seasonal use. Wipe down the indoor grille and ensure vents are unobstructed. Inspect the outdoor unit for debris, snow, or ice buildup and clear it as needed. Schedule professional inspections to check refrigerant levels, electrical connections, and overall system health. Maintaining your mini split reduces the likelihood of unexpected outages and preserves efficiency.
Energy efficiency and cost considerations
Mini splits offer high energy efficiency compared with many heating options. To maximize efficiency, keep the home well insulated, seal leaks around windows and doors, and use a programmable schedule to match occupancy. Set temperatures to a modest range to reduce runtime and avoid large temperature swings. While heating will increase energy use relative to cooling, efficient operation minimizes cost growth. Heater Cost analysis suggests consistent maintenance and proper temperature management lead to better long-term savings.
When to call a pro and warranty considerations
If heat issues persist after the basic checks, contact a licensed HVAC technician. Persistent error codes, water leaks near the unit, or unusual noises merit professional evaluation. Check your warranty terms before scheduling service; some issues may be covered or require model-specific service. A pro can diagnose refrigerant leaks, electrical faults, and control board problems safely. The Heater Cost team recommends timely professional help to protect performance and warranty coverage.
Tools & Materials
- Mini-split owner’s manual(Use model-specific steps and safety cautions)
- Remote control or wall-mounted thermostat(Needed to set mode to heat and adjust temperature)
- Clean microfiber cloth(For cleaning accessible filters and grilles)
- Access to power supply / circuit breaker(Ensure disconnect is accessible; reset if needed)
- Step stool or ladder(Use for high-mounted indoor units if needed)
Steps
Estimated time: 15-25 minutes
- 1
Check power and safety
Before touching the system, ensure power is on and the circuit breaker has not tripped. Inspect for obvious damage and avoid opening live electrical panels. Make sure the indoor and outdoor units are accessible and free of obstructions.
Tip: If the breaker trips, reset and test; if it trips again, contact a licensed electrician. - 2
Set mode to heat
Use the remote or wall thermostat to switch the system to heat mode. If there is a dedicated heat option, select it; if not, choose Auto and let the system determine heating actions.
Tip: If heat is not available, consult the manual for model-specific steps or firmware updates. - 3
Set target temperature
Choose a comfortable setpoint, typically around 68-72 F (20-22 C). Avoid extremes, and allow the unit to reach the temperature with normal cycling.
Tip: Give the system a few minutes to respond before judging comfort. - 4
Verify indoor airflow
Ensure indoor vents are unobstructed and the fan is circulating air. If you don’t feel warm air within several minutes, check the filter and air path for blockages.
Tip: Clean or replace a dirty filter to restore airflow. - 5
Check the outdoor unit
Look at the outdoor condenser: it should be free of snow, ice, leaves, or debris. Minor frost is normal during defrost cycles, but persistent buildup requires service.
Tip: Maintain a clear 3- to 4-foot zone around the outdoor unit. - 6
Look for error codes
If the display shows a fault, refer to the owner’s manual for code meanings. Some models show codes via LEDs—document numbers for quick reference.
Tip: Note the code and time of appearance to help diagnose the issue. - 7
Consider auxiliary heat
In very cold conditions, some systems use auxiliary heat. If warmth is slow to arrive, auxiliary heat may be engaging; understand its energy implications.
Tip: Use auxiliary heat sparingly to conserve energy and cost. - 8
Return to normal operation
Once comfortable, switch back to Auto or Energy Saver mode to balance comfort and efficiency.
Tip: Monitor for a few cycles to ensure stable performance. - 9
Post heat check and maintenance
After heavy use, clean the filter, wipe the indoor grille, and note any odd sounds for future service.
Tip: Set a reminder for routine maintenance.
Got Questions?
Can I turn on heat on my mini split without a remote?
Most mini splits require the remote or built-in control to switch modes. If the remote is inaccessible, check any local control panel on the indoor unit. If there is no heat option, consult the manual for model-specific steps.
Usually you need the remote or built-in control to switch heating modes. If you can't access it, check the indoor unit control panel or refer to the manual.
Is it safe to run the mini split in very cold weather?
Mini splits are designed for cold-weather operation, but efficiency can drop in extreme conditions and some models use auxiliary heat. Refer to the manual for cold-weather guidance and model limits.
Yes, but efficiency drops in very cold weather, and some models rely on auxiliary heat. Check your manual for limits.
Will heating my space with a mini split raise my energy bill?
Heating typically increases energy use relative to cooling, but mini splits are efficient when properly sized and operated with a schedule. Use Auto and moderate setpoints to manage costs.
Yes, heating will use energy, but you can control costs with proper sizing and schedules.
How often should I clean the mini split filter?
Most models benefit from monthly checks during heavy use and a thorough cleaning at the start of each heating season. A clean filter improves airflow and efficiency.
Clean the filter regularly, especially during peak use, to keep airflow strong.
What if there is no heat after following these steps?
If heat still won’t engage, recheck mode and thermostat settings, inspect for error codes, and verify power. If unresolved, consult a licensed HVAC technician.
If you still have no heat, recheck settings, look for error codes, and consider professional help.
Watch Video
The Essentials
- Turn heat on by selecting heat mode and setting a sensible temperature.
- Check power, remote pairing, and clean filters before troubleshooting.
- Use auxiliary heat sparingly to avoid high energy costs.
- Regular maintenance sustains reliability and efficiency.