How to Put Heater on Aurus Mini Split: Step-by-Step Guide
Learn how to safely activate heating on your Aurus mini split, optimize performance, and maintain efficiency with step-by-step instructions, safety tips, and troubleshooting.

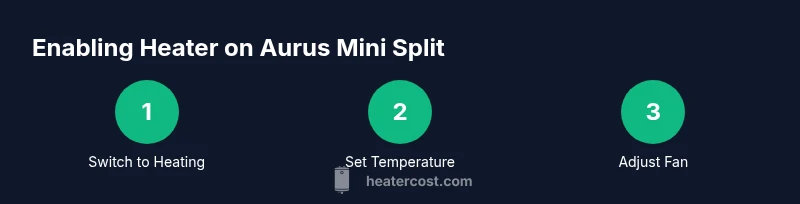
To run the heater on your Aurus mini split, switch the system to Heating mode using the remote, set your desired temperature, and pick a fan speed. Confirm clean filters and outdoor unit airflow, then enable any Eco or Smart features for efficiency. Refer to the user guide if buttons differ.
Understanding heating operation on Aurus mini split
Aurus mini split systems use inverter-driven heat pump technology to provide heating by moving heat from outdoor air into indoor spaces. In Heating mode, the outdoor unit works with the indoor air handler to compress refrigerant and transfer heat, so you feel warmth even when it's cold outside. The Heater Cost team notes that most homeowners can operate the heating function using the included remote, the wall-mounted indoor unit's display, and simple on-screen icons. A basic understanding of how heat is moved helps you optimize comfort and energy use. For practical purposes, think of Heating mode as the default winter option rather than a separate space heater. Keep the air filter clean, maintain clear air pathways, and avoid obstructing the indoor vents—these small steps have a big impact on heat delivery. As you get comfortable, you can experiment with fan speed, temperature settings, and eco features to balance warmth with efficiency.
Safety and prerequisites before turning on heater
Safety and readiness come first. Ensure the unit is powered on a dedicated circuit and that the outdoor condenser has at least several inches of clearance on all sides, free from snow, leaves, or overhanging debris. Check the indoor air filter; a dirty filter reduces airflow and makes the heater work harder. Wipe down the cabinet exterior to remove dust that could drift into vents. Ensure children and pets are out of the room while you test heating mode, and keep the remote away from accidental button presses. If you need to clean the filter, power off the unit first and follow the manual for the proper procedure. Finally, if your system has an app or a wall-control, confirm it is synchronized with the indoor unit before enabling Heating mode. These steps reduce the risk of performance issues and help you get dependable warmth quickly.
Step-by-step: enabling heating mode on your Aurus mini split
Here is a robust sequence to reliably switch to Heating mode:
- Step 1: Prepare by locating the remote and verifying the display is readable from the unit.
- Step 2: Press the mode button until the Heating icon appears; some models label it as 'Heat' or show a sun symbol.
- Step 3: If Heating is not visible, consult the manual for the exact button sequence for your model; button layouts can vary.
- Step 4: Use the temperature arrows to set your target comfort level.
- Step 5: Choose a fan setting (Auto is often best for balance; manual settings provide quicker warmth).
- Step 6: Confirm outdoor unit operation by listening for the compressor or feeling warm air from the indoor vents.
- Step 7: If an error code appears, note it and consult the quick-start guide or contact support. This sequence helps ensure you move the system into heat mode correctly and start transferring heat promptly.
Setting target temperature and timetable
With Heating mode active, aim for a temperature comfortable for your typical routine while avoiding oversized swings that waste energy. Start with a moderate setpoint and let the system gradually establish a stable indoor climate. If your Aurus mini split supports scheduling, enable a heating program during the hours you’re home and asleep to minimize temperature fluctuations and energy waste. Many models also offer adaptive or smart scheduling that learns your patterns over time. If you use an app, syncing the schedule with your phone can simplify control when you’re away. Keep in mind that outside temperatures, humidity, and occupancy influence how quickly warmth is achieved, so adjust expectations accordingly. The goal is steady comfort without prolonged peaks in energy use.
Configuring fan speed and air distribution
The fan controls influence both comfort and efficiency. Auto fan typically balances warmth and noise, but you can switch to a fixed speed if you want more immediate warmth or quieter operation. Direct air away from walls or furniture using the louver controls to prevent condensation on windows and to distribute heat evenly. In heating mode, the system may run the fan longer at a lower speed to maintain consistent warmth, especially on milder days. If you notice cold drafts near seating areas, adjust the louvers or raise the fan speed briefly to circulate warm air more effectively. Regularly check that the indoor vents are clear of dust and obstructions to sustain healthy airflow.
Energy efficiency features and eco settings
Many Aurus mini splits include Eco, Auto, or Sleep modes designed to reduce energy consumption while maintaining comfort. Eco mode may lengthen warm-up time but lowers peak power usage; Auto adjusts the fan to meet the setpoint while attempting to minimize energy draw. Sleep mode gradually reduces temperature support over several hours to minimize heating when you’re sleeping. When possible, pair Heating mode with a well-sealed space, draft protection, and properly insulated windows to maximize efficiency. If you use a timer, it can help align heating with your occupancy without requiring manual intervention. These features help you feel comfortable while minimizing operating costs.
Seasonal considerations and outdoor unit care
Winter conditions pose additional considerations. Ensure the outdoor unit remains clear of ice, snow, and debris, as buildup can block heat transfer and force the system to work harder. Periodically check that the condenser coil remains free of frost; if icing occurs, avoid using the unit until it clears. Shovel light paths around the unit, but avoid piling snow directly on top of it. In setups where snow melts onto the outdoor unit, consider installing a protective housing or a canopy designed for heat pumps. Finally, schedule periodic professional checkups to verify refrigerant levels and overall performance. Proactive care helps you avoid unexpected outages when you need warmth most.
Maintenance and filter care
Maintenance is the cornerstone of reliable heating. Inspect and clean the indoor air filter on a monthly basis during heavy use seasons; a clogged filter reduces airflow and makes the system work harder. Replace filters per the manufacturer’s recommended interval if you notice reduced airflow or visible dirt. Wipe down the interior surfaces and dust the air intake grills to minimize contaminants circulating in your living space. Use a soft cloth and avoid harsh chemicals that could degrade plastics. If you hear unusual noises, see ice or frost formation on panels, or smell burning, power off the unit and contact a professional technician. Finally, keep a record of service dates and any error codes to support future troubleshooting.
Troubleshooting common heater issues
If the Aurus mini split fails to deliver heat, start with the simplest checks. Confirm the thermostat is set to Heating, that the indoor unit is free of obstructions, and that the outdoor unit is receiving power. Check the air filter and replace if needed, and verify there are no tripped breakers. Note any error codes on the display and consult the manual for definitions; common codes may indicate airflow or sensor problems. If warmth is intermittent, ensure the remote battery is fresh and that the device is within range. For persistent problems or confusing codes, contact your installer or an authorized service provider. Regular maintenance reduces the chance of recurring heater issues.
Tools & Materials
- Aurus mini split remote control(Used to switch to Heating mode and set temperature)
- Indoor air filter(Ensure it's clean before enabling Heating mode)
- Dedicated power circuit(No extension cords; ensure circuit capacity)
- Soft cloth or brush(For cleaning dust from vents and cabinet)
- Owner's manual or digital PDF(Keep for model-specific button layout)
Steps
Estimated time: Estimated total time: 20-40 minutes
- 1
Check system readiness
Power the unit on a dedicated circuit, confirm outdoor unit clearance, and ensure the indoor filter is clean. This safeguards against airflow blockages and electrical issues before you begin heating.
Tip: Clear any obstacles near the outdoor condenser and vent openings to ensure efficient heat transfer. - 2
Switch to Heating mode on the remote
Aim the remote at the indoor unit and press the mode button until Heating appears on the display. If your model shows a different label, refer to the manual for the exact icon.
Tip: If Heating isn’t visible, double-check the model’s button sequence in the manual. - 3
Set initial temperature
Use the temperature arrows to set a comfortable setpoint. Start with a moderate value and allow the system to reach a stable indoor temperature before adjusting further.
Tip: Avoid aggressive temperature changes to prevent short cycling and energy spikes. - 4
Choose a fan setting
Select Auto for balanced warmth and noise, or a fixed speed for quicker heat delivery. Adjust louvers to distribute air evenly.
Tip: Direct air away from windows to minimize condensation and drafts. - 5
Enable energy-saving features
If available, turn on Eco or Sleep modes to reduce energy use while maintaining comfort. Decide based on your occupancy and comfort preference.
Tip: Eco can extend warm-up time; plan accordingly during initial warm-up. - 6
Run a quick test cycle
Let the system operate for a few minutes and verify warmth at the vents. Listen for unusual noises and check for consistent air flow.
Tip: If you don’t feel warmth within a few minutes, re-check the setpoint and air path for blockages. - 7
Fine-tune for comfort
Adjust temperature, fan speed, and louvers to optimize comfort. Small profile adjustments can improve perceived warmth and efficiency.
Tip: Record your preferred settings for quick daily use. - 8
Set a schedule or timer
If the unit supports scheduling, program heating periods during peak occupancy and reduce operation when empty. This helps energy efficiency over time.
Tip: Ensure time zones and clock settings are correct to maintain reliable schedules. - 9
Document issues and plan maintenance
Note any error codes, unusual sounds, or inconsistent heating. Schedule professional service if problems persist beyond basic checks.
Tip: Keeping a simple log speeds troubleshooting and future service visits.
Got Questions?
How do I switch to Heating mode on an Aurus mini split?
Use the remote and cycle through modes until Heating is shown on the display. If your model uses different icons, consult the manual for the exact button sequence.
Switch the remote to Heating mode, then set your temperature.
Can I use a space heater with the mini split?
A space heater is generally not needed when the mini split is heating. Using both can create safety and efficiency conflicts. Trust the built-in system for steady warmth.
Rely on the mini split’s heating function; avoid adding space heaters.
Why does heat output sometimes feel weak?
A dirty filter, blocked outdoor unit, or improper thermostat settings can reduce heat. Ensure airflow is clean, outdoor clearance is good, and the setpoint is appropriate.
Check filters, outdoor clearance, and your setpoint.
How often should I service the Aurus mini split?
Follow the manufacturer’s recommendations and schedule periodic professional checks, especially before winter use. Routine maintenance helps sustain performance.
Get a professional checkup at recommended intervals.
What if the unit shows an error code?
Note the code and consult the manual or contact support. Error codes can indicate airflow, sensor, or refrigerant-related issues.
Record the code and check the manual or contact support.
Is there an optimal temperature for energy efficiency?
Choose a comfortable setting and use scheduling features to align heating with occupancy. Avoid drastic temperature swings for better efficiency.
Set a comfortable temperature and use scheduling for efficiency.
Watch Video
The Essentials
- Switch to Heating mode first, then set temperature and fan.
- Keep filters and vents clear to maximize heat delivery.
- Use Eco or Sleep modes to balance comfort with energy savings.
- Regular maintenance prevents common heating problems.