How to Get a Kerosene Heater Started
Learn a practical, safety-first method to start a kerosene heater, including pre-start checks, lighting steps, ventilation tips, and maintenance advice from Heater Cost.

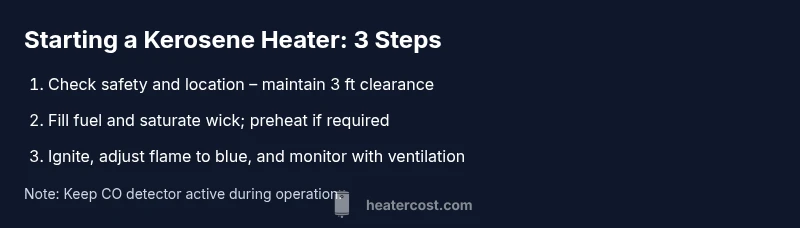
By the end of this guide you will be able to start a kerosene heater safely and effectively. You’ll verify proper ventilation, fuel type, wick condition, and flame height before operation, and you’ll follow a clear lighting sequence with post-start checks. According to Heater Cost, prioritizing safety and using the right fuel minimizes fumes, odors, and fire risk while keeping you warm.
Safety-first: preparing your space
Before you attempt to start a kerosene heater, prepare the space and review safety basics. According to Heater Cost, the foundation of a safe start is good ventilation and a clear area. Set the heater on a stable, nonflammable surface away from curtains, furniture, and clutter. Ensure at least 3 feet of clearance on all sides. Keep a carbon monoxide detector in the same room, test it, and replace batteries regularly. Open a window slightly or use a vent fan to ensure continuous air exchange. If you have children or pets, create a temporary barrier to reduce wandering near the heater. Read the model's manual to understand the specific clearances and fuel recommendations. If your heater includes a tip-over switch, verify it is functioning before lighting. Check the exterior for oil leaks, damaged hoses, or scorch marks around mounting brackets. A cracked or worn wick can lead to uneven burning or smoke, so address any signs of wear before you proceed. These precautions minimize the risk of fire, fumes, or carbon monoxide buildup during startup.
Kerosene fuel and wick fundamentals
Kerosene heaters rely on clean kerosene, a properly sized wick, and a stable flame. Use only grade-1 kerosene from a trusted fuel supplier; avoid gasoline or contaminated fuel, which can cause dangerous fumes. Inspect the wick for fraying, charred sections, or stiff spots; a damaged wick should be replaced following the manufacturer’s instructions. If your model uses a replaceable wick, ensure you have the correct spare on hand. A properly saturated wick is essential for a smooth start and steady burn; allow time for soaking if you’ve just replaced the wick. Keep the wick clean and dry when not in use to prevent crusty buildup. Regular maintenance—like cleaning dust and checking for air leaks—extends heater life and minimizes odor during operation.
Model variations and what that means for starting
Different kerosene heater models handle preheating and ignition in distinct ways. Some require a dedicated preheater cup or glow plug; others use a simple wick and manual lighter. Consult your model’s manual for its recommended startup procedure and fuel flow adjustments. If your unit includes a preheating port, prime the wick according to the manufacturer’s guidance, usually by allowing a short soak time before ignition. Modern radiating heaters may have automatic ignition or push-button starters; in those cases, follow the exact sequence described in the manual. Regardless of model, never bypass safety features or adapt startup steps. Understanding your specific unit helps you anticipate delays, ensures efficient burning, and reduces the risk of smoke or odor.
Pre-start checks and fuel handling
Start by confirming the heater is unplugged or switched off and located away from any clutter. Check that you have the correct kerosene fuel, that the cap and fill tube are clean, and that there are no cracks in the fuel reservoir. Fill to the recommended level only when the unit is cool, and never overfill to minimize spill risk. Inspect hoses, seals, and the wick area for signs of wear or leaks. If you smell fuel when approaching the heater, do not light it—ventilate the room and investigate fuel leaks first. Wipe away any spills promptly and ensure all connections are tight. Keep fuel stored in a proper, clearly labeled container away from heat sources and direct sunlight.
The lighting sequence: preheating and ignition
Begin with a controlled lighting sequence that matches your model. If your heater has a preheater cup, add a small amount of kerosene to it and let it warm for 15–30 seconds; then light using a long-reach lighter or match held at a safe distance. If no preheater is used, briefly warm the wick area by turning the control to a low setting as directed by the manual before ignition. After lighting, observe the flame; a steady blue flame indicates good combustion, while yellow or flickering flames suggest improper wick saturation or fuel issues. Do not leave the lighter near the flame and stay clear of any fumes during ignition. Maintain ventilation during startup to minimize CO buildup.
Flame height, adjustments, and safe operation
Once burning, adjust the flame to the recommended height for your space. A strong, steady blue flame is ideal, while a flickering or smoking flame signals the need to check wick saturation, fuel level, or air supply. If the flame is too high, you risk overheating components; if too low, the heater may fail to maintain warmth. Many models include a wick-height control; use it gradually and avoid abrupt changes. If smoke or unusual odors persist beyond a few minutes, shut the unit down, ventilate the room, and inspect for fuel leaks, wick damage, or contamination. Regularly monitor flame behavior during the first 20–30 minutes of operation.
Ventilation, fumes, and odor control
Kerosene heaters emit fumes that can accumulate in enclosed spaces. Maintain adequate ventilation by keeping a window or door open a crack or by using a fan to circulate air. If you notice a strong odor, leave the room briefly and ventilate before rechecking the heater. A CO detector in the room should alert you to hazardous buildup; test it monthly and replace batteries as needed. Avoid running the heater in small, poorly ventilated areas for extended periods. If you must operate in a compact room, keep the door open to adjacent spaces to ensure a steady air exchange.
Shutdown, storage, and maintenance
When you’re ready to shut down, turn the unit off according to the manual—never snuff out flames with improper methods. Allow the heater and wick to cool completely before touching any components. Recheck fuel levels, clean any soot or dust, and store kerosene in a sealed container away from heat sources. Regular maintenance includes wick inspection, sealing checks, and vent clearance. Schedule periodic professional servicing if your heater shows signs of persistent smoke, unusual odor, or unreliable flame behavior. Proper shutdown and storage preserve safety and extend the life of your heater.
Troubleshooting common starting issues
If your heater won’t start, verify fuel is clean and properly filled, the wick is intact, and the area is well ventilated. Check for a clogged fuel line, a worn wick, or a misadjusted flame knob. For ignition failures, ensure the preheater (if present) is functioning and not empty. If you smell gasoline or other contaminants, stop and inspect the fuel and containers. Persistent issues warrant consulting the manufacturer’s troubleshooting guide or seeking professional service. Remember to never operate a heater that leaks fuel or has damaged wiring or hoses.
Tools & Materials
- Kerosene heater manual(Keep accessible; model-specific steps vary)
- Kerosene fuel (Grade-1 kerosene)(Only use clean, labeled kerosene; do not mix with gasoline)
- Long-reach lighter or long match(Ignition keeps hands safe from the flame)
- Fire extinguisher (ABC rated)(Place within easy reach in case of emergency)
- Nonflammable mat or heat-resistant base(Protects surfaces and prevents fires from spills)
- Carbon monoxide detector(Test regularly and keep batteries fresh)
- Ventilation option (open window or fan)(Ensure consistent air exchange during operation)
Steps
Estimated time: 20-40 minutes
- 1
Move heater to a safe, open area
Position the heater on a stable, nonflammable surface with clear space. Maintain at least 3 feet of clearance from walls, furniture, and curtains. This reduces fire risk and improves airflow around the unit.
Tip: Use a level surface to prevent tipping; keep cords away from the heater. - 2
Inspect fuel and wick condition
Check the kerosene for clarity and absence of contaminants. Inspect the wick for fraying, char, or stiffness; replace if needed. A clean, well-wetted wick promotes a stable burn and minimizes smoke.
Tip: Always follow the model’s wick replacement guidelines to avoid improper ignition. - 3
Fill fuel to the recommended level
If the heater is cool, fill to the manufacturer’s recommended mark. Wipe any spills immediately and allow kerosene to soak into the wick if your model requires pre-soak time. Do not overfill, which can cause spills and flare-ups.
Tip: Use a dedicated kerosene container to prevent fuel cross-contamination. - 4
Preheat the wick (if your model supports it)
If your heater uses a preheater cup or glow port, add a small amount of kerosene and preheat for 15–30 seconds without ignition. This ensures a smoother start and reduces initial smoke.
Tip: Never skip preheating on models that require it; skipping can cause hard starting. - 5
Ignite with a long lighter
Light the wick from a safe distance using a long lighter or match. Keep your body away from the flame and avoid leaning over the opening. Watch for a steady flame as fuel begins to vaporize.
Tip: If there is resistance, pause and recheck wick saturation before continuing. - 6
Adjust flame height to a steady blue flame
Gradually adjust the wick height or flame control to achieve a steady blue flame. A blue flame indicates efficient combustion; a yellow flame suggests incomplete burning and potential odor or soot.
Tip: Make small adjustments and wait 30–60 seconds between changes to gauge effect. - 7
Ventilate and monitor during operation
Keep a window or vent open to ensure fresh air circulation. Use a CO detector and stay alert for smoke or unusual odors. Do not leave the heater unattended for extended periods, especially in enclosed spaces.
Tip: If you notice persistent smoke, extinguish, ventilate, and inspect the wick or fuel quality. - 8
Safe shutdown and cool-down
Turn off the heater according to the manual and allow the unit to cool completely before refueling or moving it. Store fuel in a labeled container away from heat sources and sunlight. Clean the exterior and wipe up any residue to prevent buildup.
Tip: Refuel only after the unit is cool to prevent flare-ups. - 9
Routine maintenance and inspection
Regularly inspect the wick, seals, and fuel lines for wear. Clean dust and soot from vents and surfaces. Schedule professional servicing if you notice persistent odor, smoke, or flame instability.
Tip: Document maintenance dates to track service intervals.
Got Questions?
What safety precautions should I take before starting a kerosene heater?
Always ensure proper ventilation, keep combustibles away, and use a CO detector. Check wick condition and fuel type; read model instructions. Never refuel while hot. Have an extinguisher ready and keep children/pets at a safe distance.
Always ensure ventilation, keep combustibles away, and test your CO detector before starting.
Can I run a kerosene heater in a small, poorly ventilated room?
Running in a poorly ventilated room increases carbon monoxide risk. Use ample ventilation or a dedicated outdoor-rated heater in extreme cases. If in doubt, move to a larger, ventilated area or turn off the heater and ventilate.
Avoid running in a small, closed space; ventilate well before use.
What should I do if there is smoke or a strong odor after lighting?
Smoke or a strong odor often indicates an under-saturated wick or fuel contamination. Turn off the heater, ventilate, and inspect the wick and fuel quality before attempting to restart. If issues persist, consult the manual or a professional.
If you smell smoke, turn it off and ventilate, then inspect the wick.
How often should I maintain my kerosene heater?
Perform a basic weekly check during use (look for soot, flame color, and fuel level) and a thorough inspection monthly. Schedule professional servicing periodically as recommended by the manufacturer.
Do regular checkups and routine maintenance as recommended.
Is it safe to leave a kerosene heater unattended?
No. Never leave a kerosene heater unattended while burning. Extinguish the flame if you need to leave, and ensure it is completely cool before leaving the area. Use a timer or remote monitoring if available.
Don’t leave it burning unattended; extinguish if you must leave.
Watch Video
The Essentials
- Inspect space and equipment before lighting
- Use clean kerosene and a good wick for reliable starts
- Preheat if required, then ignite safely
- Maintain ventilation and monitor flame color
- Refuel only when cool and shut down properly