How to Control Heater: Practical Steps for Homeowners
Learn to control your heater effectively, from thermostats to smart controls, with safety tips and energy-saving strategies for homeowners and property managers.

Learn how to control a heater effectively across common setups, from manual thermostats to smart controls. This guide covers choosing the right thermostat, programming for comfort and savings, safety checks, and when to call a pro. By the end you'll know how to optimize temperature, reduce energy use, and maintain reliable performance.
Understanding Your Heating System and the Role of Control
Your home's comfort starts with understanding how your heater accepts commands, and how you respond to those commands with a thermostat, a zone system, or a simple manual dial. The control layer is where energy efficiency and comfort meet, so choosing the right control method matters. According to Heater Cost, the most effective controls start with accurate sensing, appropriate heat source compatibility, and clear schedules. Start by identifying your heat source (gas, electric, oil, heat pump) and whether your system supports zoning or only a single-zone approach. If you’re unsure, consult your furnace or boiler manual, or contact a licensed technician. The goal is to establish a baseline temperature range that keeps your living spaces comfortable without overspending on fuel or electricity. The rest of this guide walks through practical steps to optimize control across common configurations, from traditional thermostats to advanced smart systems.
How Control Language Differs by Heat Type
Different heating systems respond to control signals differently. A gas furnace uses a thermostat to trigger a burner on/off cycle; an electric resistance heater relies on a thermostat to regulate heat output; a heat pump uses ambient sensing and priority modes to balance efficiency with comfort. Each type has distinct efficiency curves, safety considerations, and integration requirements for zoning. If your home uses multiple heat sources, you may gain efficiency by coordinating controls through a common thermostat or a smart hub. Heater Cost analysis shows that aligning control strategy with your heat source yields the biggest potential savings and reduces wear on equipment over time.
Thermostat Compatibility: What to Check Before You Buy
Not all thermostats are created equal. When choosing a thermostat, confirm compatibility with your heating system type, wiring, and any existing zoning components. Look for a model that supports your heat source (gas, electric, oil, boiler, heat pump), has an appropriate voltage range (low-voltage or line-voltage as needed), and offers the features you value (programmable schedules, adaptive recovery, remote app control). If your furnace or boiler is older, consider a wired, line-voltage thermostat for reliable operation. For homes with a zone system, verify that the thermostat communicates with zone controllers and dampers. In many cases, upgrading feeds for modern control improves accuracy, reduces temperature swings, and makes it easier to implement energy-saving schedules.
Wiring, Safety, and Basic Installation Steps
Safety comes first. Always turn off power at the breaker before touching thermostat wiring or furnace connections. If the old device is still in place, take a photo of the wiring before detaching anything so you can reference color codes. A common low-voltage setup includes red (R), white (W), yellow (Y), green (G), and blue/C (common). Follow the thermostat manufacturer’s wiring diagram and your furnace control board schematic. If you’re uncertain, hire a licensed professional to avoid damaging the control circuitry or creating a hazardous situation. Proper mounting, secure wiring, and clear cable routing help prevent nuisance trips and thermostat errors.
Programming for Comfort and Savings: Scheduling, Modes, and Modes
Programming is where you turn a basic thermostat into a real energy-saving tool. Start with a simple schedule that lowers temperatures during typical absence periods (overnight and workdays) and raises them before occupants return. Use multiple setback and wake times to reduce energy use without sacrificing comfort. For smart thermostats, leverage learning algorithms and occupancy sensing to refine schedules over time. If you’re balancing a two-story home, consider higher living-area setpoints on the upper floor during the day and lower levels at night to minimize temperature stratification. Heater Cost notes that even small schedule tweaks can yield meaningful savings when applied consistently.
Safety, Maintenance, and Common Pitfalls
Regular maintenance keeps controls accurate and prevents failures that waste energy. Clean thermostat rests, replace batteries in wireless sensors, and check wiring for signs of wear. Avoid placing thermostats near heat sources, drafts, or direct sunlight. Common pitfalls include over-reliance on single-room thermostats to balance an entire house, setting temperatures too aggressively high or low, and ignoring zone configurations that could reduce hot-cold spots. If you notice thermostat communication delays, false readings, or unresponsive heating, schedule a service call to inspect sensors, wiring, and the control board.
Advanced Controls: Smart Thermostats, Zoning, and Monitoring
Smart thermostats connect to Wi-Fi and offer remote control, energy analytics, and adaptive scheduling. They can optimize heat delivery by learning occupancy patterns and integrating with weather data. Zoning systems, when correctly installed, separate spaces with individual thermostats and dampers, delivering precise comfort and reducing energy waste. Monitoring tools, including usage dashboards and alert notifications, help homeowners spot inefficiencies, check for leaks, and track energy costs. According to Heater Cost, advancing from a basic dial to a smart, multi-zone setup often yields the best long-term savings and comfort gains for both owners and property managers.
Getting the Most from Your Controls: Everyday Tips
Even without a full upgrade, small changes dramatically affect performance. Calibrate your thermostat to account for local temperature offsets and ensure it reads ambient room temperature accurately. Use programmable schedules to reflect actual occupancy, minimize idle heat, and raise setpoints gradually during shoulder seasons. Pair your thermostat with a well-insulated home and properly sealed ducts to prevent heat loss. For renters and landlords, consider inexpensive upgrades like smart thermostats with guest access to maintain control across units and support energy budgeting. The payoff comes from consistent, intentional control decisions rather than sporadic adjustments.
Tools & Materials
- Programmable or Smart Thermostat(Ensure compatibility with your heating system (gas, electric, oil, boiler, heat pump). For smart models, confirm Wi‑Fi and app support.)
- Screwdriver set(Flathead and Phillips; used for mounting the thermostat base and handling wall terminals.)
- Voltage tester / multimeter(Useful for verifying power when dealing with line-voltage systems; not required for most low-voltage thermostat installs.)
- Wire labels or masking tape(Helpful to label wires before removal so you can re-connect correctly.)
- Level(Keeps the thermostat mounted straight for aesthetic and functional alignment.)
- Instruction manual for your furnace/boiler(Reference wiring diagrams and compatibility notes specific to your system.)
Steps
Estimated time: 60-90 minutes
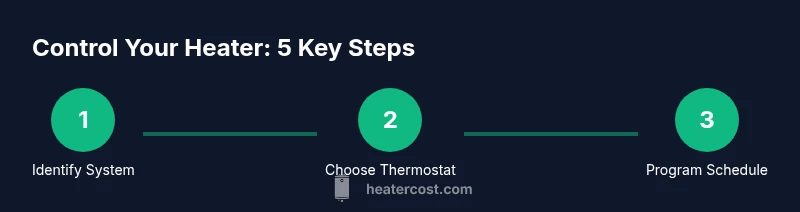
- 1
Assess compatibility and plan
Identify your heating system type and the thermostat options that match. Check voltage requirements, wiring color codes, and whether zoning is present. Plan where the thermostat will be installed for easy access and accurate sensing.
Tip: Take a photo of existing wiring before disconnecting anything to reference during install. - 2
Power off and prepare tools
Turn off the furnace or boiler breaker and the thermostat circuit at the panel to avoid shocks. Gather the tools you’ll need and clear the wall space for mounting the new thermostat base.
Tip: Double-check no power is reaching the thermostat by using a voltage tester on a known live circuit first. - 3
Remove old thermostat and label wires
Carefully detach the old thermostat, label each wire with its terminal letter, and note any wire jumpers. Remove the mounting plate and inspect the wall for damage or loose wiring.
Tip: Keep wires organized to prevent miswiring during reinstallation. - 4
Mount new thermostat base
Attach the new thermostat base to the wall using the supplied screws, ensuring it is level. Align the wall plate with existing holes and allow enough wire slack for connection.
Tip: If you need more wire length, gently untwist and extend the conductors; avoid crimping or pinching them. - 5
Connect wires to the correct terminals
Insert each wire into its corresponding terminal according to the thermostat’s wiring diagram. For heat pump or multi-stage systems, follow the diagram carefully to avoid wrong signals.
Tip: When in doubt, consult the furnace control board or a professional to verify terminals. - 6
Power up and configure basics
Restore power and begin with the basic setup: your system type, current time, and preferred temperature units. Verify that the thermostat communicates with the furnace by testing a heating call.
Tip: If the display shows an error, re-check wire connections and ensure the battery (for battery-powered units) is fresh. - 7
Program schedules and modes
Create a simple daily schedule that lowers temperature during away periods and raises it before occupants return. Enable additional modes such as 'eco' or 'vacation' if available.
Tip: Start with a modest setback (e.g., 2–4 degrees) and adjust based on comfort and savings observed. - 8
Test, balance, and monitor
Test heating performance across rooms, verify no cold spots, and adjust sensor placement if needed. Record energy usage and monitor for a couple of weeks to confirm savings.
Tip: If rooms don’t respond evenly, consider zoning or adding sensor calibrations to balance loads.
Got Questions?
What is the most energy-efficient thermostat type for a typical home?
Smart thermostats with adaptive scheduling and room sensors typically provide the best energy savings for most homes. They learn occupancy patterns and can modulate heat more precisely than basic programmable models.
Smart thermostats often save the most energy because they adjust based on living patterns and outdoor conditions.
Can I install a thermostat myself, or should I hire a professional?
Low-voltage thermostat installs are usually doable for handy homeowners with careful following of the wiring diagram. Line-voltage or complex zoning setups may require a licensed technician to ensure safety and proper function.
If you’re unsure about wiring or your system type, hire a professional to avoid hazards and ensure correct operation.
How do I reset my thermostat to fix odd readings or errors?
Most thermostats have a reset option in settings or a pair of recessed buttons. If the issue persists after a reset, check wiring and sensor placement or consult the manual.
Try a factory reset from the settings menu. If problems continue, inspect wiring and sensor locations.
Will a smart thermostat work with my existing boiler or furnace?
Most modern boilers and furnaces are compatible with smart thermostats, but some may require a common wire or a compatibility check. Always confirm with the thermostat manufacturer and your equipment manual.
Usually yes, but confirm wiring needs before buying.
How often should I recalibrate sensors or service the thermostat?
Calibrate or check sensors if you notice constant temperature drift. Regular professional servicing every few years helps maintain accuracy and reliability.
If readings feel off, recalibrate or have it checked during routine service.
What are common signs a thermostat is failing?
Inconsistent temperatures, unresponsive controls, or constant heating despite a low setpoint indicate potential thermostat failure and warrants inspection.
Look for inconsistent temps and unresponsive controls as red flags.
Watch Video
The Essentials
- Identify your heating type to choose compatible controls
- Upgrade to a programmable or smart thermostat for savings
- Program schedules to balance comfort and efficiency
- Prioritize safety and correct wiring during install