How to Check a Heater Control Valve
Learn how to safely check your heater control valve with a practical, step-by-step approach. This guide covers locating the valve, testing movement, electrical signals, and common fixes—empowering homeowners to diagnose issues confidently.

Learn how to safely check your heater control valve to diagnose overheating, stuck valves, or poor heating response. This step-by-step guide covers locating the valve, testing movement, and verifying electrical signals or actuator operation. Expect to handle basic tools and observe safety precautions to avoid leaks or electrical hazards. By the end, you'll know when to call a pro.
Understanding the heater control valve
A heater control valve regulates the flow of hot water or steam to your heating zones. In most homes, it's driven by an actuator or built into the thermostat loop. According to Heater Cost, knowing the valve design before you begin makes the diagnosis more accurate. Common designs include zone valves, motorized globe valves, and manual valves with a small lever. Each type provides feedback differently: electrical signals from the actuator, or tactile resistance when you turn a knob. If your system is older, you might have a simple on/off valve with a lever. The valve position can determine how quickly rooms heat up and how stable the thermostat readings are. When a valve sticks or fails to move, you may notice delayed heating, uneven temperatures, or zones that won't reach setpoints. In some configurations, a faulty valve can mimic a thermostat or circulator problem, so a careful, staged check is essential.
What you’ll inspect first:
- Valve type and location: Identify whether you’re dealing with a zone valve in the boiler room or a small globe valve near a radiator manifold.
- Actuator or knob: Check for obvious damage, loose screws, or burned connectors.
- Flow path: Look for mineral buildup or corrosion on the valve body that could impede movement.
- Control signals: If you have an electric actuator, inspect the wiring and the controller for signs of wear.
This overview helps set expectations before you start, and it frames how each symptom maps back to the valve versus other components in the system.
Safety and prerequisites content placeholder?Need to ensure another block covers safety.
Safety and prerequisites
Before touching heating equipment, prioritize safety. Shut off power to the boiler or furnace at the main disconnect, and close the water supply to minimize leaks. If your system uses gas, never work on gas lines while gas is present—leave the area if you smell gas and call emergency services. Allow the system to cool completely before handling components. Wear protective gloves and eye protection, and keep towels or a bucket handy for drips. Keep a note of any model numbers, wire colors, and connector types to help with future troubleshooting. If you’re unsure about any step, don’t force parts or pry; a forceful move can damage seals and void warranties. When in doubt, contact a licensed technician—especially for pressurized sections or electrical work.
How a control valve works in typical systems
In most hydronic heating setups, the valve sits between the boiler and the heating zones. The actuator or thermostat's signal moves the valve stem, altering the flow of hot water to the radiator loop. In a zone-valve configuration, each zone has its own actuator, so a single valve can govern multiple rooms. The valve’s position should respond to demand: on heat call, it opens; during idle, it closes or modulates to maintain setpoint. A healthy valve moves smoothly with only minor resistance, and an electronic actuator should click or hum when energized. If you notice stuttering movement, audible clicks, or failure to reach the requested position, the problem could lie with the actuator, the stem packing, or the controller feedback rather than the pipework itself.
When to check your valve vs other components
Sometimes what seems like a valve problem is actually a thermostat, sensor, or circulator issue. Based on Heater Cost analysis, verify the thermostat call for heat is being received by the control board, and that zone valves respond to the signal. Check that the circulator pump is running when heat is requested and that there’s no air trapped in the lines. If you recently replaced a thermostat or control board, recheck wiring harness compatibility and connector seating. A quick, practical test is to manually open the valve slightly and observe whether the zone heats; if heat improves, you likely have a sticking valve or weak actuator. If there’s no improvement after movement tests, the problem could be a leak, a failed seal, or a defective actuator.
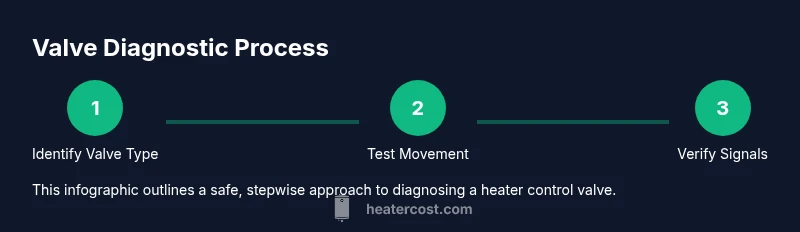
Step-by-step diagnostic approach (overview)
Follow these steps in sequence to systematically assess the valve without unnecessary disassembly. This overview prepares you for the detailed, step-by-step instructions in the next section. Start with a safety checklist, then progress through identification, signal testing, movement checks, and system verification. This approach minimizes risk to you and reduces the chance of creating new leaks. We’ll cover how to isolate power, locate the valve, inspect wiring, manually test movement, check for leaks, and reassemble for a test run.
Common mistakes and troubleshooting tips
Common mistakes include forcing a valve that resists movement, forgetting to depressurize lines, or misreading actuator feedback. Always confirm power is off before touching electronics, and never rely on guesswork when diagnosing valve issues. Clear the work area and document before/after steps. When in doubt, consult the manufacturer’s troubleshooting guide for your valve model, or reach out to a licensed HVAC technician.
Tools & Materials
- Gloves(Protect hands from heat, sharp edges, and potential leaks)
- Flashlight(Inspect dark corners, valve bodies, and actuator housings)
- Flat-head screwdriver(Open covers or adjust screws on some valve actuators)
- Phillips screwdriver(Tighten/loosen screws on control panels or valve bodies)
- Adjustable wrench(Loosen fittings and adapters without rounding edges)
- Digital multimeter(Test electrical signals if you have an electric actuator)
- Bucket and towels(Catch drips and protect the floor from spills)
- Penetrating oil(Loosen stubborn fittings if needed (use sparingly))
- Rags/Shop towels(Clean surfaces and wipe residues)
- Documentation (photos/labels)(Capture wiring and valve connections before disconnecting)
Steps
Estimated time: 30-60 minutes
- 1
Power down and isolate
Shut off power to the boiler and circulator at the main disconnect. If your system has a gas line or fuel source nearby, ensure the area is safe and ventilated. Verify water supply is shut or isolated to minimize leaks. This step reduces the risk of shock and accidental movement while you inspect components.
Tip: Use a lockout/tagout procedure if available to prevent accidental energizing. - 2
Locate valve and identify actuator
Find the valve and determine whether you’re dealing with a zone valve or a globe valve. Note the type of actuator (electric, pneumatic, or manual) and locate the control wires or lever. Photograph or label connections to simplify reassembly.
Tip: Take a quick photo of wiring before disconnecting any cables. - 3
Check electrical signals and wiring
If the valve has an electric actuator, verify that the control signal matches the thermostat or control board output. Use a multimeter to confirm voltage and continuity where safe. Look for damaged insulation, loose connectors, or corroded terminals.
Tip: Only perform electrical tests if you’re comfortable and the power is safely isolated. - 4
Manually test valve movement
If accessible, gently move the valve stem or actuator to test movement. A healthy valve should move with moderate resistance and return to its resting position. If it feels seized or stuck, avoid forcing it and consider lubrication or replacement.
Tip: Don’t force a stuck stem; apply penetrating oil and wait a few minutes if necessary. - 5
Inspect for leaks and wear
Check the valve body, packing, seals, and nearby joints for signs of leakage, corrosion, or mineral buildup. Leaks around the packing can indicate wear that requires maintenance or replacement of the actuator.
Tip: Look for damp spots, mineral crust, or unusual smells that signal leaks. - 6
Reassemble and test the system
Reconnect any removed wires, resecure panels, and restore power gradually. Bleed any trapped air in the system, then run the heating cycle to observe valve response and zone heating. If the issue persists, document findings and plan next steps.
Tip: Monitor the first few minutes of operation; listening for abnormal noises helps detect sticking or valve chatter.
Got Questions?
What is a heater control valve?
A heater control valve regulates the flow of hot water or steam to heating zones, controlled by an actuator or thermostat. It determines how much heat reaches each area.
A heater control valve controls how much hot water or steam goes to the heating zones, based on thermostat signals.
What are common signs of a failing valve?
Common signs include uneven heating, zones that don’t reach setpoints, unusual noises, leaks around the valve, or sluggish movement of the actuator.
Look for uneven heat, leaks, or a valve that won’t move properly.
Can I test the valve without draining the system?
Some checks can be done without draining, but major tests may require depressurizing and re-filling the system. Follow safety guidelines and the manufacturer’s instructions.
You can do some checks safely, but for serious tests you may need to depressurize the system.
Do I need a professional to check the valve?
If you’re unsure about electrical work, working near gas lines, or if leaks are present, it’s best to hire a licensed HVAC technician.
If you’re unsure or see leaks, call a professional.
How long does a valve typically last?
Valve longevity varies with system design and water quality. Regular maintenance and proper operation help extend life, but exact years depend on use and conditions.
Life varies; proper maintenance helps, but there’s no universal number.
Watch Video
The Essentials
- Identify valve type and location before testing
- Power down and isolate system for safety
- Test both mechanical movement and electrical signals
- Call a pro if leaks persist or the valve remains stuck
- The Heater Cost team recommends documenting results and seeking professional help when unsure