Heater Core Repair: A Practical DIY Guide
Learn how to diagnose and repair a car heater core safely with practical steps, required tools, and cost considerations from Heater Cost.

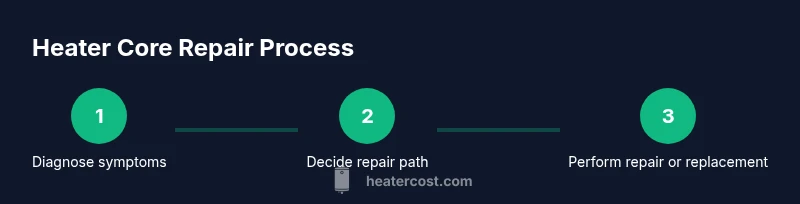
By following this steps-based guide, you will diagnose heater core problems safely, gather the right tools, and perform a repair or planned replacement on most vehicles. It covers common symptoms, diagnostic tests, repair options, and realistic time and cost expectations, helping homeowners decide between DIY approaches and when to seek professional service.
What a heater core is and why repair matters
According to Heater Cost, a functioning heater core is essential not only for cabin warmth but also for proper defogging and visibility in cold weather. The heater core is a small heat exchanger that uses hot engine coolant to warm the air circulated into the passenger compartment. When it leaks or becomes clogged, you may experience weak or no heat, damp carpets, or a coolant smell inside the cabin. A failure can also lead to pressure changes in the cooling system and, in some cases, overheating if the core is compromised. Different vehicles use different heater core designs, but the underlying principle remains: a sealed path for coolant heat transfer. Proper maintenance, an occasional coolant flush, and prompt attention to leaks help protect your investment and minimize the risk of costly, unexpected repairs. For most vehicle owners, understanding the repair landscape—whether patching, replacing, or pursuing a professional service—supports smarter decisions and longer system life. The Heater Cost team emphasizes that planning around cooling system health is part of sound overall vehicle maintenance and cost management.
Common symptoms that indicate a heater core problem
- Reduced cabin heat or inconsistent temperatures
- Fogged windows or a persistent damp feel in the cabin
- A sweet or syrupy coolant smell inside the vehicle
- Coolant loss without obvious external leaks
- Overheating engine or rising coolant temperature gauge
- Visible coolant on carpets near the passenger side floor
- Sluggish heater performance after new coolant has been added
These signs suggest the heater core or its hoses may be compromised. Early detection helps prevent larger cooling system failures and keeps your vehicle operating safely in winter conditions.
Diagnostics and safety basics
Safety first: never work on a hot cooling system. Allow the engine to cool completely and disconnect the battery before removing panels or accessing the heater core housing. Use a cooling system pressure tester to check for leaks and verify flow through the heater hoses when the system is cool. Watch for signs of clogged passages or collapsed hoses, which can mimic heater core failure. A dye-leak test can help pinpoint micro-leaks that are not easily visible. Maintain good ventilation when testing and avoid inhaling any radiator fumes. If you notice coolant loss with no external leak, consider performing a controlled pressure test to differentiate a bad core from a faulty hose or connection. Remember to follow the vehicle’s service manual for any model-specific cautions and torque specs.
DIY vs professional repair considerations
DIY repair of a heater core is feasible for skilled enthusiasts who are comfortable with removing dashboard components and handling the cooling system. In many cars, accessing the heater core requires extensive dashboard removal, which increases the risk of airbag or electrical connector damage if not done carefully. Patching or replacing a core can be expensive and time-consuming; for some models, replacement is the only reliable long-term fix, especially if the core has corroded or cracked. If you are uncertain about your abilities, or if the repair involves dash disassembly beyond your comfort level, professional service can save time and reduce risk. A pro can also ensure proper bleeding of air from the cooling system after completion, which is essential to prevent complications.
Planning the repair: time, costs, and choices
Plan for a repair in a well-lit, ventilated workspace with a clean drain setup. Costs vary by vehicle, core type, and whether you DIY or hire a professional. A DIY route may involve purchasing a replacement core or a repair kit for the core plus compatible hoses, clamps, and coolant. A professional service will provide a more accurate cost estimate after inspecting the vehicle and confirming core condition. In all cases, consider the long-term value: a properly done heater core repair restores cabin comfort, prevents further leaks, and helps preserve overall cooling system health. Keep in mind that vehicles with older heater cores may present additional challenges due to dash mounting and limited access; a plan that includes time for potential contingencies is prudent.
How to get started with a repair plan
Start by listing symptoms, confirming coolant condition, and obtaining a service manual for your specific vehicle. Decide whether a patch, gasket replacement, or full core replacement best suits your needs and budget. Gather all essential tools and safety gear before you begin. Finally, set a realistic schedule that accounts for potential dash removal and reassembly, and arrange for a trusted helper if possible. With this plan in hand, you’ll move through diagnostics, decision points, and subsequent steps with fewer delays and less stress.
Tools & Materials
- Socket and ratchet set (metric)(Includes 8-19 mm sockets; essential for removing dash components and hoses)
- Screwdrivers (Phillips and flat-head)(Magnetic tips help retrieve fasteners in tight spaces)
- Pliers (needle-nose and locking)(For hose clamps and stubborn connectors)
- Torque wrench(Follow manufacturer specs when reassembling)
- Coolant and flush chemicals(Use the correct type/color per your vehicle and dispose of old coolant properly)
- Drain pan and absorbent rags(Contain spills and make cleanup easier)
- Replacement heater core or repair kit(Depends on repair path; consider OEM options when possible)
- Gasket material or RTV sealant(Only if recommended by your repair path)
- Service manual or vehicle-specific guide(Critical for model-specific steps and torque specs)
- Safety gear (gloves, goggles)(Protect hands and eyes from coolant and debris)
Steps
Estimated time: 4-8 hours
- 1
Prepare and safety check
Park on a flat surface and allow the engine to cool completely. Disconnect the battery and set the vehicle on wheel chocks for stability. Gather all tools and reference the service manual for model-specific cautions.
Tip: Wear eye protection; keep a labeled container for used coolant. - 2
Relieve pressure and drain coolant
Place a drain pan under the radiator, remove the radiator cap only after the engine has cooled, and drain the coolant according to your vehicle's procedure. Save the coolant if it is still in good condition for reuse, otherwise dispose of it properly.
Tip: Do not open the cap while hot; hot coolant can cause severe burns. - 3
Access the heater core housing
Remove necessary dash panels or panels around the heater core housing to expose the core and its hoses. Carefully disconnect heater hoses, noting their routing for reassembly. Keep fasteners organized to prevent misplacement.
Tip: Photograph connections before removal to simplify reinstallation. - 4
Inspect for leaks and verify routing
Visually inspect the core for visible leaks or corrosion. Check hoses for cracks, swelling, or softness, and confirm hose clamps are secure. If you see significant damage, plan for replacement rather than patching.
Tip: Use a flashlight and mirror to inspect hard-to-see areas. - 5
Choose repair path (patch vs replace)
Decide whether to patch minor leaks with sealant or gasket material if feasible, or replace the core if leaks are extensive or core integrity is compromised. Consider cost, time, and future reliability.
Tip: Follow manufacturer recommendations; patching is often temporary. - 6
Reassemble and reseal components
Reinstall the heater core housing and dashboard components in the reverse order of removal. Tighten all fasteners to spec using the torque wrench. Ensure all connections are clean and properly seated to prevent leaks.
Tip: Double-check that gaskets are seated before final tightening. - 7
Refill coolant and bleed air
Refill the cooling system with the correct coolant mix. Bleed air from the system following the manufacturer’s procedure to avoid air pockets that can overheat the engine. Start the engine and check for leaks while the system warms up.
Tip: Top off coolant gradually and monitor for bubbles indicating air pockets.
Got Questions?
What are common symptoms of a failing heater core?
Common signs include reduced cabin heat, foggy windows, a sweet coolant smell, damp carpets, and occasional overheating. If you notice several of these together, inspect the heater core and related cooling components.
Common signs are reduced heat, foggy windows, coolant smell, and damp carpets. If you notice these, check the heater core.
Can heater core repair be DIY or should I replace it?
DIY is possible for hoses and clamps, but many cars require dashboard disassembly for core access. Replacement is often more reliable for aged cores. If you’re not comfortable with dash work, hire a professional.
DIY can handle hoses, but dashboard work is risky. Replacement is often best for old cores; consider professional help.
How long does a heater core repair take?
Time varies by vehicle and repair path. A careful DIY job can take several hours, while a full core replacement may span a workday. Plan for contingencies and downtime.
Expect several hours for a DIY job; full replacement can take a full day depending on the car.
What safety precautions should I take?
Let the engine cool before starting. Wear gloves and eye protection, avoid opening the radiator cap when hot, and work in a well-ventilated area to avoid coolant fumes.
Always let the engine cool, wear protection, and work in a ventilated area.
How can I prevent heater core problems?
Regular cooling system maintenance, using the correct coolant, and addressing leaks early can reduce risk. Schedule periodic inspections and address any coolant loss promptly.
Keep up with cooling system maintenance and fix leaks early to prevent heater core problems.
Are there long-term fixes to avoid recurring issues?
A properly performed core replacement or high-quality patch is more reliable than quick fixes. Maintain coolant quality and monitor for early signs of leakage to catch problems before they worsen.
A solid replacement plus good maintenance prevents recurring leaks and heat issues.
Should I flush the cooling system during a heater core repair?
Flushing is common when you replace the core or significantly disrupt the cooling circuit, but follow the vehicle’s service manual. Flushing helps remove debris that could clog new or patched components.
Flush as recommended by your manual to prevent debris from causing new issues.
Is a professional diagnosis always necessary for leaks?
Not always, but a professional can confirm the leak location accurately and perform pressure testing safely. If you notice persistent leaks after a DIY fix, seek professional evaluation.
A pro can confirm leaks and perform safe pressure testing; seek help if in doubt.
Watch Video
The Essentials
- Plan the repair using model-specific guidance.
- Diagnose thoroughly before deciding on patch vs. replacement.
- Bleed the cooling system to prevent air pockets.
- Professional help is advised for complex dashboard work.