Heater Core Flush: A Practical, Budget-Smart Guide
Learn how to perform a safe heater core flush, when it’s needed, and what to expect. This Homeowner-education guide covers DIY vs pro options, tools, step-by-step process, and budget considerations with insights from Heater Cost.

Learn how to perform a safe heater core flush on a typical passenger vehicle. This guide covers when a flush is needed, essential steps, safety precautions, and cost considerations. You’ll understand the equipment, warning signs, and when to hire a professional. Heater Cost provides a practical, budget-aware approach for homeowners and DIY enthusiasts.
Why a heater core flush matters
A heater core flush is a maintenance procedure that helps restore proper heating performance by removing rust, mineral scale, sludge, and coolant residues from the heater core and the surrounding cooling circuit. For many vehicles, heat output drops gradually as deposits build up and coolant flow becomes restricted. According to Heater Cost, a flush can also prevent corrosion-caused leaks later. This is especially important in regions with hard water or long-term coolant neglect. If you notice inconsistent heat or strange smells, a flush is often a good diagnostic step. The flush can also extend the life of the cooling system, reduce strain on the water pump, and improve overall vehicle reliability over time.
How a heater core flush works
A heater core flush uses a controlled flow of coolant and/or cleaning solution to scour the heater core pathways and dislodge deposits that impede heat transfer. The process generally involves circulating a cleaning agent through the heater core in one direction, then flushing in the reverse direction to break up deposits and push them toward the drain. Modern vehicles may require service manuals or special adapters to access the heater core hoses. The goal is to restore unobstructed coolant flow and ensure the heater core can transfer heat efficiently.
DIY vs professional service
A DIY flush can save money, but it requires careful preparation and a solid understanding of your vehicle's cooling system. A pro flush often includes threaded adapters, a pressure-regulated flush, and verified coolant compatibility, plus a disposal plan for used coolant. Heater Cost notes that professional service tends to offer faster turnaround and a warranty on the work, which matters if you lack the tools or confidence to handle pressurized coolant safely. Weigh your comfort level, vehicle complexity, and local shop pricing when deciding.
When to flush your heater core
Consider a heater core flush if you experience reduced heat output, intermittent heat, unusual coolant smells, frequent coolant loss, or visible rust in the reservoir. If your cooling system is overdue for maintenance or you live in an area with hard water, a flush can prevent buildup before it causes more serious heater or cooling issues. Use your vehicle manual as a guide for recommended maintenance intervals and recommended cleaners or flush procedures.
Visible signs your heater core needs a flush
Look for cold or uneven heat in the cabin, foggy windows due to moisture transfer, or a sweet coolant odor inside the car. Another clue is a gradual decline in heater performance during winter or after a coolant service. If you notice these signs, a flush is a prudent diagnostic step to determine whether the heater core or the cooling system requires attention. Remember that some symptoms can mimic other issues, such as a failing blower motor or thermostat, so a thorough check is essential.
Safety and preparation steps
Working on a cooling system involves hot fluids and pressurized lines. Always let the engine cool, wear eye protection and gloves, and work in a well-ventilated area. Disconnect the battery if you will be near electrical components, and have a plan for catching and disposing of used coolant. Ensure you have a stable workspace and a clear path to drain and refill. If you are unsure about the process, consider seeking professional help to avoid injury or damage.
Tools and materials overview
Gather the items you will need before starting: a radiator flush kit or compatible hoses, distilled water, the appropriate replacement coolant, a drain pan, a funnel, protective gloves and glasses, shop towels, a siphon or pump, and a container for used coolant. You may also need screwdrivers, pliers, and hose clamps. Always refer to your vehicle's service manual for specific adapter sizes and recommended cleaners to avoid chemical reactions that could harm the cooling system.
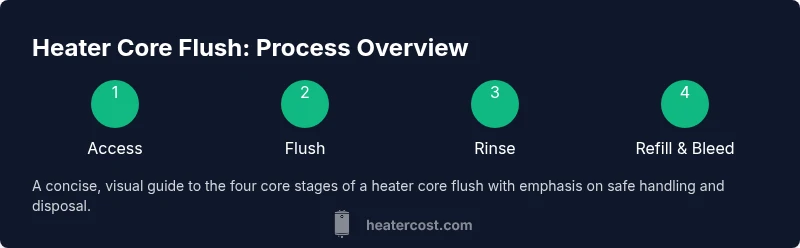
Step-by-step overview
This section outlines the high-level flow of a heater core flush, preparing you to follow a detailed set of steps with your chosen method. The core idea is to safely drain old coolant, circulate a cleaning agent, rinse with distilled water, and finally refill with fresh coolant while removing air pockets. Your exact procedure may vary by vehicle and method, so use this overview as a guide and always follow the product instructions and vehicle service manual.
Common mistakes and how to avoid them
Common mistakes include opening the system while hot, using improper cleaners, not properly sealing hoses, or failing to completely flush debris. Always ensure the engine is cool, use the correct cleaners recommended for your coolant type, and verify that hoses and clamps are secure before starting the flush. Take time to double-check all connections, bleed air from the system, and monitor for leaks during the test run.
Cost considerations and budgeting
A heater core flush can cost anywhere from a modest DIY spend for parts to a service bill that includes labor and disposing of used coolant. Costs vary by vehicle and whether you perform the flush in your driveway or at a shop. Heater Cost analysis shows that the main drivers of cost are labor time, cleaning agent quality, coolant replacement, and the need for any incidental part replacements or system bleed services. Budget for a small contingency to cover unforeseen leaks or additional maintenance.
Post-flush maintenance and checks
After flushing, check for leaks, confirm heater performance in both modes, and ensure the coolant level is correct. Refill to the recommended level, bleed air until steady flow is observed, and monitor the system for several warm-up cycles. Consider scheduling a follow-up check to re-verify temperature consistency and coolant concentration after a few heat cycles. Routine maintenance can help prolong the benefits of a successful flush.
Environmental and disposal considerations
Used coolant is hazardous to the environment; never pour it down the drain or onto the ground. Follow local regulations for coolant disposal and recycling. If your area requires an approved collector or recycling facility, take the old coolant there. After disposal, clean up tools and spill areas with appropriate absorbents and dispose of waste materials per local guidelines.
Scheduling and pro shop options: what to expect
If you choose a shop, call ahead to confirm they perform heater core flushes, ask about the type of cleaners used, and request a written estimate. A professional flush may require diagnostic checks or a coolant system pressure test, and you should expect a service warranty on the cooling-system work. If you prefer DIY, ensure you have the right tools, time, and patience to avoid mistakes that could lead to leaks or engine damage.
Quick recap and next steps
A heater core flush can restore cabin heat and protect the cooling system if done correctly. Decide between DIY and a pro based on your tools, time, and confidence, then prepare with the right materials and safety gear. After the flush, follow up with routine maintenance and monitoring to maximize the benefits and protect your vehicle over the long term.
Tools & Materials
- Radiator flush kit or compatible hoses(Includes adapters and connectors for common hose sizes)
- Distilled water(For both flushing and rinsing)
- Vehicle coolant (new)(Matched to manufacturer spec)
- Drain pan(To catch old coolant)
- Funnel(For pouring fresh coolant)
- Protective gloves(Heat-resistant and chemical-resistant)
- Safety glasses(Eye protection during flushing)
- Shop towels(Clean spills and wipe fittings)
- Waste coolant container(Secure container for used fluid)
- Siphon pump or turkey-baster(Useful for controlled draining)
- Screwdrivers and pliers(For hose clamps and components)
- Hose clamps and replacement hoses(Keep handy for secure connections)
- Chemical radiator flush product (if recommended)(Follow product directions)
Steps
Estimated time: 2-4 hours
- 1
Prepare the vehicle and safety gear
Park on a level surface, let the engine cool, and put on PPE. Gather all tools and materials, and review the vehicle manual for cooling-system specifics. Plan a safe drainage path for old coolant and ensure there is proper ventilation.
Tip: Label hoses before disconnecting to avoid misrouting later. - 2
Drain coolant and relieve pressure
Place a drain pan under the radiator, remove the radiator cap only after the engine is cool, and open the drain valve to empty the system. Collect the old coolant in a labeled container for proper disposal. Do not spill on the ground.
Tip: Keep a second container ready for any incidental leaks during the flush. - 3
Access heater core hoses
Locate and disconnect the heater core hoses at the firewall or corresponding access points. Use label markers to identify each hose direction. If your vehicle requires removing panels, do so carefully to avoid damage.
Tip: Take photos during disassembly to simplify reassembly. - 4
Attach flushing equipment
Connect the flush hoses to the heater core inlet and outlet as per the kit instructions. Ensure clamps are tight and there are no cross-connections that could cause backflow.
Tip: Verify that the flow direction is correct according to the cleaning product instructions. - 5
Circulate flush solution through the system
Run the cleaning agent through the heater core for the recommended time, then reverse flow to dislodge stubborn deposits. Monitor for leaks and keep an eye on pressure indicators if your kit includes them.
Tip: Do not run the engine during the flush if you are using a pressurized kit; follow the kit guidance. - 6
Rinse thoroughly with distilled water
Flush with distilled water in the same direction, then reverse direction to clear residual debris. Repeat until the outgoing liquid runs clear and free of sediment.
Tip: Inspect the water for clarity; trapped debris will appear as murky or rusty color. - 7
Refill coolant and bleed air
Reinstall hoses securely, refill the cooling system with the correct coolant mix, and bleed air until a steady flow is observed from the reservoir. This step prevents air pockets that can cause overheating.
Tip: Tip the reservoir to assist air removal and run the engine to normal operating temperature while monitoring the gauge. - 8
Test and monitor for leaks
Start the engine and let it reach operating temperature. Check for leaks around hose connections, fittings, and the heater core area. Confirm warm air from the HVAC system and correct temperature control behavior.
Tip: Keep a close eye on the first long drive to ensure the system remains stable.
Got Questions?
What is a heater core flush and why is it done?
A heater core flush removes deposits from the heater core and cooling system to restore heat performance and prevent corrosion-related issues. It can improve cabin heat and system reliability when the core is clogged or contaminated.
A heater core flush removes deposits to improve heat in your car and keep the cooling system healthy.
Can I flush my heater core myself, or should I hire a pro?
Both options exist. DIY is possible with the right tools and instructions, but a pro offers specialized equipment and guarantees. If you are unsure about pressure, bleeding, or coolant disposal, a professional may be the safer choice.
You can, but if you’re unsure about the equipment or safety, a professional service is safer.
What are the safety precautions for flushing a heater core?
Always work with the engine cool, wear PPE, and drain coolant properly. Use the correct cleaner and follow the product directions. Keep children and pets away from spilled coolant to avoid exposure.
Make sure the engine is cool, wear safety gear, and dispose of coolant properly.
Will a flush fix a no-heat problem?
A flush can fix heat delivery issues caused by deposits, but other problems like a faulty thermostat, blend door, or blower motor can also cause no-heat symptoms. A diagnostic check helps determine the underlying cause.
A flush might fix heat problems caused by deposits, but other parts could be at fault too.
How often should I flush my heater core?
Frequency depends on driving conditions, coolant quality, and manufacturer guidance. In general, flushes are not annual events unless there are signs of buildup or persistent heat issues. Check your manual and consult a professional when in doubt.
Check your manual and look for signs of buildup to decide when to flush again.
What are typical cost differences between DIY and pro flushing?
DIY costs are mostly materials and coolant, while pro services include labor and disposal fees. Prices vary by vehicle and region. For budgeting, consider the cost of tools, time, and the potential need for a leak test after the flush.
DIY costs are mostly materials; pros add labor and disposal fees. Costs vary by vehicle and area.
Watch Video
The Essentials
- Identify symptoms early to decide if a flush is needed
- Choose DIY or professional approach based on tools and confidence
- Follow manufacturer guidance for cleaners and coolant
- Dispose of used coolant responsibly and verify system bleed