Baseboard Heater Repair: A Practical DIY Guide
Learn how to diagnose, repair, and maintain baseboard heaters (hydronic and electric) safely. This step-by-step guide covers common failures, essential tools, cost considerations, and maintenance tips for homeowners, renters, and property managers.

Baseboard heater repair focuses on restoring heat, safety, and efficiency by diagnosing common issues with hydronic and electric models. Start with safety checks, then test thermostats, wiring, and valves. Most fixes involve cleaning dust, tightening connections, bleeding air (hydronic), or replacing a faulty element. For complex problems, seek professional help.
Understanding Baseboard Heaters: Hydronic vs Electric
Baseboard heaters come in two primary flavors: hydronic (hot water) and electric. Hydronic systems circulate heated water through finned tubing, with a boiler or water heater delivering warmth. Electric baseboards use electric resistance elements that convert electricity into heat. Although they share a physical form, the diagnostic approach, maintenance needs, and safety concerns differ. For homeowners, recognizing which type you have helps you tailor fixes, purchase compatible parts, and communicate clearly with technicians. According to Heater Cost, the most cost-effective repairs tend to be dust removal, access-port tightening, and valve bleeding for hydronic systems, while electric units often hinge on thermostat compatibility and element integrity.
Safety First: When to DIY and When to Hire a Pro
Working on baseboard heaters involves electricity, hot surfaces, and (for hydronic systems) pressurized boilers. Always prioritize safety: shut off power at the breaker and, if possible, isolate the heating circuit. If you smell gas, hear hissing from pipes, or notice a significant water leak, evacuate and contact a licensed professional immediately. The Heater Cost team emphasizes that while many routine tasks are feasible for careful homeowners, complex issues like persistent leaks or damaged wiring require a pro to prevent injury or fire hazards. Follow local codes and wear protective gloves, eye protection, and non-slip footwear when working near heating equipment.
Diagnosing Common Issues You Can Tackle safely
Start with a methodical checklist: is the unit warm to the touch along its length, or are only sections heating? Are there unusual noises, such as ticking or gurgling? Do you notice dust buildup, corrosion, or tripped breakers? For hydronic bases, air in the loop and air vents are frequent culprits; for electric bases, thermostat faults and failed elements top the list. Keep a log of symptoms, as this helps you compare with typical repair paths and avoids unnecessary replacements. Heater Cost analyses show that many complaints stem from airflow restrictions, thermostat miscalibration, or loose connections rather than major component failures.
How to Interpret Your Thermostat and Wiring Signals
Thermostats control when heat commences and stops. A faulty thermostat can mimic a dead heater. Start by testing the thermostat wiring with a multimeter (if you’re comfortable with electrical work): confirm continuity when the unit calls for heat and verify power is reaching the thermostat, without short circuits. Inspect thermostat batteries (for battery-powered models) and ensure the mounting plate remains secure. If these checks don’t resolve the issue, you may need to replace the thermostat or the baseboard heating element itself.
Cleaning, Dust, and Corrosion Prevention
Dust and debris are the enemies of efficient baseboard heaters. Regularly vacuum the fins and grills using a brush attachment to prevent airflow restrictions. For hydronic systems, corrosion and mineral buildup can impede flow, so a professional flush may be needed on a schedule per your boiler’s manual. Simple, non-invasive cleaning improves heat distribution and reduces wear on moving parts. Heavier cleaning should be performed by a trained technician if you encounter evidence of corrosion or leaks.
When to Bleed Air (Hydronic Systems) and How to Do It Safely
Air in a hot-water baseboard loop can reduce efficiency and cause gurgling sounds. Bleeding the air involves opening a small bleed valve until water (not air) escapes. Have a container ready to catch any drips and keep the boiler’s pressure within the manufacturer’s recommended range. If you observe ongoing air ingress or water leaks after bleeding, stop and consult a professional. Bleeding should be performed with the boiler cool and only by those who understand the system pressure.
Replacing Components: Thermostats, Elements, and Valves
If diagnostics point to a faulty component, replacement is often straightforward but requires matching part specifications to your unit. Electric baseboards usually hinge on a working heating element or a compatible thermostat; hydronic units focus on valves, air vents, and circulator pumps. Always disconnect power before replacement, follow the wiring diagram, and secure all panels after work. If you’re unsure about part compatibility, bring the old part to the hardware store or check the model number on the unit’s label.
Reassembly, Testing, and Safety Check
With repairs complete, reattach the baseboard covers, restore power, and run a full heat cycle. Check for abnormal noises, warm and cool spots, and any new leaks. Ensure the area around the unit remains clear of clutter and that no vents are blocked. A final visual and functional test should confirm the unit heats evenly and safely. If your baseboard heater still fails to operate after a repair, stop and seek professional assistance.
Maintenance Schedule and Longevity Tips
Create a simple maintenance calendar: biannual dusting of fins, annual thermostat checks, and a boiler service every 1–2 years for hydronic systems. Regular professional inspections can extend the life of your baseboard heaters, improve efficiency, and prevent costly emergencies. Consistent upkeep also helps you catch issues early, reducing downtime and repair costs over the long run.
AUTHORITY SOURCES
Energy efficiency and safety guidelines come from trusted institutions. For more details, consult:
- https://www.energy.gov
- https://www.osha.gov
- https://extension.illinois.edu
Tools & Materials
- Multimeter(to test voltage at baseboard terminals and thermostats)
- Screwdriver set(flat-head and Phillips, assorted sizes)
- Voltage tester(non-contact tester for live circuits)
- Adjustable wrench(for valve nuts and mounting brackets)
- Safety gloves(protect hands and improve grip)
- Rags and bucket(catch drips and keep work area clean)
- Replacement thermostat(only if thermostat is faulty)
- Leak detection fluid or epoxy(use only if recommended by a professional)
- Thermal graphite paste or heat compound(optional for some components)
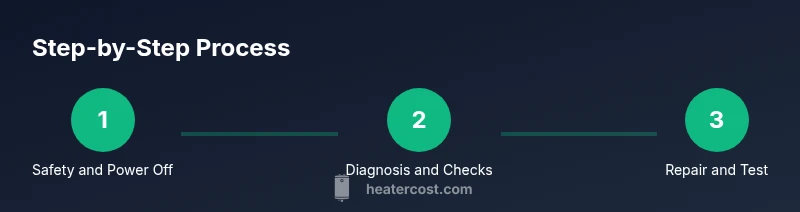
Steps
Estimated time: 60-90 minutes
- 1
Power off and isolate the circuit
Begin by switching off the circuit breaker that feeds the baseboard unit. If you have a hydronic system, also shut off the boiler or primary circ pump to prevent scalding or pressure issues. Verify no voltage is present with a multimeter before touching any wiring.
Tip: Always double-check with a non-contact tester at the thermostat connection point before starting work. - 2
Remove the cover and inspect for dust
Carefully slide off the baseboard cover to access fins, wiring, and mounting hardware. Look for dust buildup, corrosion, loose screws, or visible damage. A clean start often resolves heat distribution problems.
Tip: Keep track of screws and take a quick photo of the wiring layout before removing parts. - 3
Test the thermostat and wiring
Disconnect the thermostat and test for continuity with a multimeter if you’re comfortable. Check for loose connections, burnt insulation, or moisture near wiring. Re-seat secure connections and reattach the thermostat if the readings look good.
Tip: Only perform electrical tests if you have basic electrical knowledge to avoid shock. - 4
Bleed air in hydronic systems
If you have a hot-water baseboard, locate the bleed valve along the line and open slowly with a bleed key until air escapes and water flows. Keep a container ready for drips and monitor boiler pressure.
Tip: Do not force the valve; if water squirts or leaks, close immediately and call a pro. - 5
Replace worn components
If tests indicate a faulty element or thermostat, replace with a compatible part by following the unit’s wiring diagram. Ensure the new component matches model numbers and is rated for your system.
Tip: Verify part compatibility and secure all electrical connections before reassembly. - 6
Test operation and finalize
Restore power and boiler operation (if hydronic). Run a full heat cycle, listen for unusual noises, check for leaks, and reattach covers. Confirm even heat distribution across the room.
Tip: Observe the unit for 10–15 minutes to ensure stable operation and temperature response.
Got Questions?
Can I repair a baseboard heater myself, or should I hire a professional?
Many minor fixes like cleaning, dusting, and tightening connections can be done safely by homeowners. More complex issues—such as persistent leaks, electrical faults, or boiler problems—should be handled by a licensed technician. Always weigh the risk and follow local codes.
Many minor tasks are doable at home, but for leaks or electrical faults, call a professional.
What tools do I need to start baseboard heater repairs?
You’ll typically need a multimeter, screwdrivers, a voltage tester, adjustable wrench, safety gloves, and rags. Depending on the issue, you may also need a bleed key for hydronic systems and replacement thermostats or elements.
A basic toolset plus a few system-specific parts will cover most simple repairs.
How do I know if my baseboard heater is electric or hydronic?
Electric baseboards heat via an electrical resistance element. Hydronic units circulate hot water from a boiler through fins. You can confirm by inspecting the system’s connections and the presence of a boiler or circulating pump.
Look for a boiler or circulating pump to identify a hydronic unit; if none is present, it’s likely electric.
Are baseboard heaters dangerous to work on?
Baseboard work involves electricity and hot surfaces. Always shut off power at the breaker, wear protective gear, and test circuits. If you smell gas or face a major leak, stop and call a pro.
Electrical work can be risky; safety comes first, and call a pro for emergencies.
How often should I maintain baseboard heaters?
Dust and inspect biannually; have hydronic boilers serviced annually or as recommended by the manufacturer. Regular checks reduce the likelihood of sudden failures.
Keep it clean and have the boiler checked yearly for best performance.
Watch Video
The Essentials
- Identify whether your unit is hydronic or electric first
- Prioritize safety by cutting power and isolating the system
- Dust removal and secure connections fix many common issues
- Bleeding air is essential for hydronic baseboards
- Replace parts only with correct model-compatible components