When to Replace Heater Hose: Timing, Signs, and Costs
Discover how to assess when to replace heater hose, learn common failure signs, and follow a step-by-step approach that covers DIY and professional options for home and vehicle systems. Includes maintenance tips, cost considerations, and safety notes.

Learn how to tell when to replace heater hoses, inspect for wear, and perform a safe replacement. You’ll need basic hand tools, a replacement hose of the correct size, clamps, coolant, and protective gear. This guide covers both home heating and vehicle hose scenarios, explaining timing, symptoms, costs, and essential safety tips.
When to replace heater hose: timing across systems
Timing for replacing heater hoses varies by system type, climate, and usage. In vehicles, hoses endure heat, pressure, and chemical exposure that degrade rubber over time. In home heating setups, radiator and boiler hoses face constant temperatures and system pressures that slowly wear them. If you’re asking in plain terms, the question is really: is the hose near the end of its expected life or showing signs of wear? The phrase when to replace heater hose is often triggered by visible signs, leaks, or a drop in system efficiency. Planning ahead during routine maintenance can prevent sudden breakdowns and expensive damage to pumps, thermostats, or the heating loop. By understanding hose material, temperature rating, and the system’s maintenance schedule, you can time replacements with less guesswork and more confidence.
The Heater Cost team emphasizes that proactive replacement is typically more economical than waiting for a failure. Regular visual inspections, keeping the coolant at the correct level, and following the manufacturer’s guidelines help you determine the right moment to replace hose assemblies before a leak or burst occurs. Small cracks or hardening can progress quickly under heat cycles, so scheduling a replacement during off-peak seasons is prudent for most homeowners and vehicle owners.
Tools & Materials
- Replacement heater hose (correct size and rating)(Match inner diameter and temperature rating for your system)
- Hose clamps (spring clamps or screw clamps)(Use the type specified for the hose and system)
- Screwdriver or pliers(To loosen and seat clamps securely)
- Coolant (for vehicles) or appropriate fluid (for hydronic systems)(Maintain system coolant/antifreeze requirements; never mix incompatible fluids)
- Catch pan or bucket(To collect drips and spills safely)
- Rags or shop towels(Clean spills; protect components from debris)
- Gloves and eye protection(Personal protective equipment to prevent burns and splashes)
- Marker or chalk(Label hoses and note routing before removal)
- Funnel (optional)(For refilling or adding coolant neatly)
Steps
Estimated time: 60-90 minutes
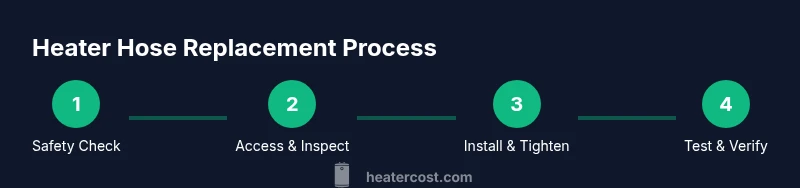
- 1
Safety first: disconnect power and depressurize
Before touching any hose, ensure the system is off and, if applicable, the electrical connection is disconnected. Allow hot surfaces and fluids to cool completely to prevent burns. Put on gloves and eye protection as a precaution.
Tip: Take a photo of hose routing before removal to guide reinstallation. - 2
Access and inspect the hose route
Gain clear access to the hose ends. Check nearby clamps, connectors, and fittings for corrosion, wear, or misalignment. Note where hoses bend to ensure the new hose fits without kinking.
Tip: Wipe away old residue to improve visibility of cracks. - 3
Loosen clamps and remove the old hose
Loosen the hose clamps on both ends, then firmly twist and pull the hose off. If it’s stubborn, gently rotate as you pull to avoid damaging fittings. Place old hose in a disposal container.
Tip: Do not force hoses off; if resistance persists, inspect for pinched clamps or seized fittings. - 4
Compare and cut the new hose to size
Lay the old hose alongside the new one to match length. Mark and cut precisely to avoid excess slack or tight bends. Ensure the new hose will clear all components without rubbing.
Tip: Cut slightly longer if you’re unsure; you can trim later if needed. - 5
Install the new hose and secure clamps
Push the hose onto the fittings until fully seated, then reattach clamps securely. Tighten clamps evenly to prevent leaks. Check clamps for proper alignment with the hose grooves.
Tip: Avoid overtightening, which can damage fittings or hose. - 6
Refill and bleed the system (if required)
Refill coolant or system fluid to the recommended level. For automotive systems, bleed air as per the manufacturer’s procedure to prevent air pockets that cause hotspots or overheating.
Tip: Run the engine to warm up and watch for air bubbles; top off as needed. - 7
Test and check for leaks
Start the system and inspect all hose ends and clamps for leaks. Look for damp spots or seepage after the system reaches normal operating temperature. If leaks appear, reseat clamps and recheck integrity.
Tip: Carry a clean rag to blot minor drips during the test.
Got Questions?
How can I tell if my heater hose needs replacement?
Look for visible cracks, bulges, coolant leaks, swelling, or hardening near clamps. If you can feel a soft spot or observe consistent seepage, replace the hose.
Look for cracks, bulges, or leaks near the ends—these signals mean replacement is due.
Can I drive with a cracked heater hose?
Driving with a compromised hose risks sudden leaks and overheating. If you notice damage, plan a safe replacement rather than continuing to drive.
No—driving with a cracked hose can cause overheating and more damage. Get it repaired promptly.
How much does replacement cost?
Costs vary depending on hose type, length, system design, and labor if you hire a pro. Expect variability across vehicles and home systems; consult local shops for a precise quote.
Costs vary a lot by hose type and labor; check local shops for an exact quote.
Is it safe to replace hoses myself?
DIY replacement is feasible for experienced homeowners with the right tools and manuals. Pay attention to depressurization, coolants, and safety precautions; if uncertain, hire a professional to prevent injury or further damage.
It can be safe for capable DIYers, but don’t hesitate to call a pro if you’re unsure.
What maintenance helps prevent hose failure?
Regular inspections, replace aging hoses at recommended intervals, keep coolant clean, and ensure clamps are tight. Address minor signs early to avoid major failures.
Regular checks, timely replacements, and proper coolant management prevent failures.
Should I replace both hoses at the same time?
If both hoses show wear or are of similar age, replace them in pairs to avoid a repeat failure soon after. If only one shows wear, you can replace just that one but monitor the other for signs of aging.
If both look worn, replacing both is prudent; otherwise monitor the other for signs.
Watch Video
The Essentials
- Inspect hoses regularly for wear and leaks.
- Choose the correct hose size and temperature rating.
- Bleed air after replacement to prevent overheating.
- Tighten hose clamps properly to prevent leaks.
- Monitor the system after startup for early warning signs.