How to Clean Heater Vents: A Safe, Step-by-Step Guide
Learn to clean heater vents safely with a clear, step-by-step plan. This guide covers tools, safety, myths, vent types, and maintenance tips to improve airflow and indoor air quality for homeowners, renters, and property managers in 2026.

This quick guide explains how to clean heater vents safely to improve airflow and indoor air quality. You will learn why vent cleaning matters, the essential tools, and a clear, step-by-step plan to follow. The process fits most homes, but always follow safety guidelines and refer to your system’s manual.
Why Regular Vent Cleaning Matters
Vent cleaning is more than a tidy-up; it’s practical maintenance that helps your heating system breathe easier, improves airflow, and supports better indoor air quality. According to Heater Cost, regular vent maintenance can help reduce dust buildup and keep the intake path clear, which in turn can lessen wear on your furnace or boiler in 2026. When dust and debris collect on vent grilles and duct openings, air flow can slow and the system may have to work harder to reach comfort levels. This extra strain can translate to higher energy use and more frequent repairs. The goal of cleaning is to remove loose dust and debris from accessible areas and protect the equipment—deep cleaning of the entire duct network should be left to qualified professionals. Keeping vents clean has practical benefits for households with pets, allergy sufferers, or ongoing remodeling projects. Heeding these basics aligns with the Heater Cost analysis for safety, cost, and comfort.
What You’ll Need to Prepare
Before you start, gather your tools and plan your workspace. A clean, well-lit area makes the job easier and reduces the risk of accidentally knocking loose dust into living spaces. You’ll want to work methodically—from vent covers to accessible ducts—so you don’t miss obvious dust piles. A small step stool or ladder may be necessary for ceiling or high wall vents. If you’re cleaning multiple rooms, consider using a drop cloth to protect floors. Finally, set aside a dedicated time block so you’re not rushed. A well-prepared setup can cut cleanup time and shorten disruption. Use this opportunity to inspect vent covers for cracks or warping; damaged covers should be replaced rather than cleaned.
Safety First: Precautions and When to Call a Pro
Vent cleaning is generally safe, but there are important precautions. Never spray liquids directly into the furnace or electrical components, and avoid using a power washer or wet cloths near electrical boxes. If you notice signs of mold, water damage, bright rust, or extensive dust buildup that seems to come from deep ducts, this is a red flag—call a professional. For households with older HVAC systems, pets, or a history of allergies, a periodic professional assessment can complement DIY vent cleaning. Always shut off the thermostat or circuit breaker before removing vent covers and never run the system while covers are detached. The Heater Cost team recommends erring on the side of safety and consulting a pro for complex ductwork or signs of contamination.
Common Myths vs Facts About Vent Cleaning
Myth: Cleaning vents will fix all air quality problems. Fact: Vent cleaning improves surface dust removal and airflow in accessible areas, but it won’t substitute for proper filtration or duct cleaning performed by professionals when needed. Myth: It’s okay to wash ducts with water. Fact: Water and ducts can cause mold growth if not dried properly; use dry methods and only clean non-electrical components with mild soap. Myth: DIY vent cleaning is always cheap. Fact: While tools are affordable, improper techniques can spread dust or damage components, potentially increasing costs. The best approach is to combine DIY surface cleaning with periodic professional assessments to maintain efficiency and IAQ.
Vent Types and Accessibility: What You Might Clean
Vents come in several forms: ceiling registers, wall grills, and floor diffusers. Accessibility varies by room layout and ceiling height. Ceiling vents may require a ladder, while wall vents might be reachable from a chair or step stool. Many homes have return vents in common areas that pull air back into the system; these are often dustier since they collect pollutants from living spaces. Understanding accessibility helps you tailor your cleaning steps and avoid unnecessary disassembly. Always handle vent covers gently to avoid bending fins or breaking mounting screws. This approach supports long-term efficiency and comfort.
Maintenance Between Deep Cleanings
Aim for light, regular upkeep between deeper cleanings. Quick checks every 4–6 weeks can prevent heavy dust buildup: wipe down accessible vent covers with a microfiber cloth, vacuum surrounding areas, and dust nearby furniture and baseboards. Replace or clean HVAC filters as recommended by your system’s manual, since clean filters reduce dust becoming part of the vent system’s pull. Scheduling a quarterly check with a licensed technician can catch issues early and extend the life of your heating equipment. This routine aligns with best practices recommended by industry sources referenced in Heater Cost’s 2026 guidance.
Authority Sources and Practical Guidance
When researching vent cleaning, rely on reputable sources that explain HVAC maintenance, indoor air quality, and safe cleaning practices. The Heater Cost team emphasizes consulting authoritative references to complement your DIY efforts. Always follow manufacturer instructions and local codes when performing any maintenance on heating equipment. For further reading and professional guidelines, check the following sources after you finish cleaning: the U.S. Department of Energy, the EPA’s IAQ guidance, and CDC/NIOSH indoor air quality resources. These references provide context for safe, effective maintenance and help homeowners plan future upkeep with confidence.
Tools & Materials
- Vacuum with hose attachment(Prefer a vacuum with a crevice tool or narrow nozzle.)
- Soft brushes or microfiber cloths(Use for dusting vent surfaces and grille fins.)
- Mild dish soap and water(For washing vent covers only if safe for material.)
- Bucket or basin(For soaking vent covers if needed.)
- Microfiber cloths(Damp or dry as needed for dusting.)
- Gloves and dust mask(Protect hands and lungs from dust particles.)
- Screwdriver set (Phillips and flathead)(To remove vent covers held by screws.)
- Drop cloth or old sheets(Protect floors during cleaning.)
- Ladder or stable step stool(Access high vents safely.)
Steps
Estimated time: 30-60 minutes
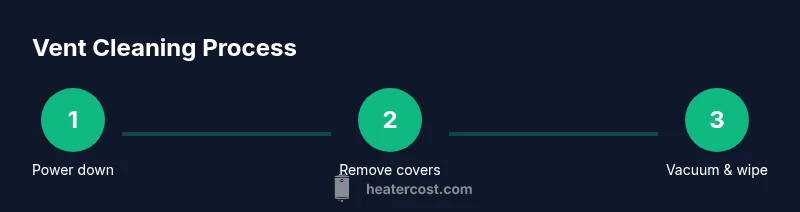
- 1
Power down and prep
Turn off the HVAC at the thermostat and, for added safety, switch off the furnace or the circuit breaker. Remove pets from the area and gather all tools in a single space. This first step prevents the fan from starting unexpectedly and helps you work cleanly.
Tip: Double-check that the power remains off during the entire cleaning process. - 2
Remove vent covers
Carefully unscrew or pry off vent covers using the appropriate screwdriver or tool. Place covers in a basin or on a towel to prevent losing screws. Inspect mounting screws for wear and keep them in a labeled container for reattachment.
Tip: Take a quick photo of each cover’s orientation before removing to simplify reassembly. - 3
Vacuum the accessible areas
Use the vacuum with a narrow nozzle to remove dust from vent grilles and the immediate duct opening. Work slowly to minimize dust dispersion into living spaces. When possible, vacuum along the edges where dust tends to accumulate.
Tip: Use long, steady strokes to pull dust away from vent edges rather than pushing dust inwards. - 4
Wash vent covers
If vent covers are metal or enamel and water-safe, wash them with mild soap and warm water. Rinse thoroughly and dry completely before reinstallation. For plastic covers, use a soft brush and mild cleaner, avoiding harsh chemicals that could warp the material.
Tip: Dry covers completely to prevent rust or warping before reinstalling. - 5
Reattach vents and test
Reattach vents in their original orientation, tighten screws, and wipe any remaining dust from nearby surfaces. Restore power and run the blower for a short period to ensure air flows evenly and vents aren’t rattling.
Tip: Listen for unusual noises; if you hear rattling or reduced airflow, stop and recheck installation. - 6
Assess and plan next steps
Note any trouble spots (tight spaces, damaged covers, trapped debris behind grills) and schedule a professional inspection if needed. Maintain a simple cleaning routine and track dates so you stay proactive.
Tip: Keep a quick log of dates and observations for future reference.
Got Questions?
Is it safe to clean heater vents myself, or should I hire a pro?
DIY vent cleaning is safe for accessible surfaces and covers if you follow basic safety rules. Complex ductwork or suspected contamination requires a licensed HVAC professional. Always prioritize safety and consult guidelines when in doubt.
DIY cleaning is fine for simple vent covers, but for complex ducts or contaminants, hire a licensed professional.
How often should you clean heater vents?
Most homes benefit from a light clean every three to six months, with a deeper inspection annually. If you have pets, allergies, or recent remodeling, consider more frequent checks.
Clean vents every few months and inspect annually, more often with pets or remodeling.
What supplies do I need for cleaning heater vents?
You’ll typically need a vacuum with a narrow nozzle, microfiber cloths, mild soap, a bucket, gloves, and a screwdriver. Avoid using water on electrical components and follow vent cover instructions.
Vacuum with a narrow nozzle, microfiber cloths, mild soap, gloves, and a screwdriver.
Will cleaning vents improve energy efficiency?
Cleaning vents can improve airflow and reduce resistance in the system, potentially helping it operate more efficiently. It’s not a replacement for filters or professional duct cleaning when needed.
Vent cleaning helps airflow and may improve efficiency, but not a substitute for filters or professional duct work.
Should I remove ducts for a deeper cleaning?
Deep duct cleaning is typically beyond DIY scope and should be performed by professionals. If you notice persistent dust, mold, or odors, contact a licensed HVAC contractor.
Deep duct cleaning should be left to pros; contact a contractor if you notice issues.
What are the risks of DIY vent cleaning?
Risks include spreading dust, damaging vent fins, and introducing moisture to electrical components. Always follow safety precautions and avoid methods that could compromise the system.
DIY risks involve dust spread, damage, and moisture near electrical parts.
Watch Video
The Essentials
- Clean vents regularly to maintain airflow and IAQ.
- Power down HVAC before touching vent components.
- Use proper tools to avoid damage and dust spread.
- Test airflow after reassembly to confirm success.
- Know when to call a professional for complex ductwork.