How to Clean Heater Ducts: A Homeowner Guide to Duct Care
Learn how to safely clean heater ducts, improve airflow, and reduce dust with a practical, step-by-step guide for homeowners and renters. Includes safety tips, tools checklist, and maintenance guidance to decide when to DIY or hire a pro.

This guide shows you how to clean heater ducts safely and effectively, improving airflow and indoor air quality. You’ll learn when to clean, what tools to use, and how to perform a careful, partial or full duct cleaning. Safety and proper sealing after cleaning are emphasized to prevent recontamination.
Why Clean Heater Ducts Matters
Keeping how to clean heater ducts in mind is essential for healthy indoor air and efficient heating. Over time, dust, pet hair, and debris accumulate inside ducts and registers, and some of it can be blown into living areas. A thorough cleaning helps maintain airflow, supports furnace efficiency, and reduces the amount of dust circulating through your home. For homeowners, renters, and property managers, staged cleaning paired with good filtration can contribute to more consistent temperatures and lower energy waste. According to Heater Cost, a well-timed cleaning supports better system performance and avoids unnecessary strain on your HVAC. Tailor the approach to your home’s layout and duct age, and consider professional help if you encounter mold, moisture, or obvious damage.
Safety First: Assessing Your System
Before you begin, identify the duct type (metal, flexible, or fiberglass-lined) and locate the main access points. Power to the furnace or air handler should be off during cleaning. Wear PPE (mask, eye protection, and gloves) and set up drop cloths to protect floors. Inspect visible sections for loose joints, moisture, or mold. If you find asbestos-containing insulation or obvious structural damage, stop and contact a licensed HVAC technician. Safety should guide every step, because improper handling can release contaminants or harm ductwork, leading to higher costs later.
When and How Often to Clean
Duct cleaning should be considered when you notice persistent dust buildup near vents, musty odors, after major renovations, or when you experience unexplained allergy symptoms. There is no universal schedule; many homes benefit from periodic checks, especially in older buildings or in households with pets, smokers, or occupants with allergies. If you’re unsure, consult a local HVAC professional for a baseline assessment and a personalized maintenance plan that aligns with your home’s use and air quality needs.
Tools, Materials, and Safety Gear
Collect a dedicated set of tools and materials to minimize cross-contamination. Essential items include a HEPA-equipped vacuum, flexible duct brushes, screwdrivers, microfiber cloths, protective PPE (N95 mask, safety goggles, gloves), drop cloths, and a flashlight. Optional but useful additions are duct sealant or mastic for repairing loose joints after cleaning. Label tools for duct access and keep the work area well-ventilated to protect occupants during the process.
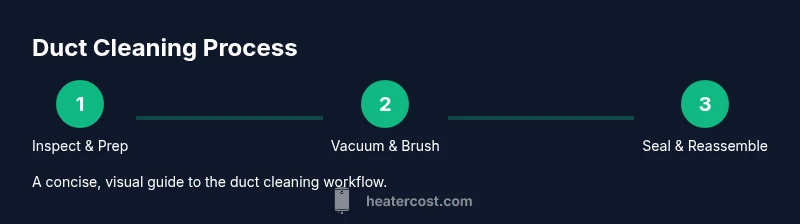
The Cleaning Process Overview
A thorough duct cleaning involves inspecting access points, removing grilles, vacuuming accessible ducts, loosening debris with brushes, wiping surfaces, and resecuring joints. Grilles should be cleaned and reinstalled with care to avoid vibration or rattling. Avoid using harsh chemicals inside ducts, which can linger and irritate occupants. After cleaning, replace or upgrade filters and consider an annual professional inspection to maintain air quality and equipment efficiency.
Maintaining Air Quality After Cleaning
Post-cleaning maintenance is as important as the cleaning itself. Replace HVAC filters with high-efficiency options, keep doors and vents unobstructed, and schedule regular checkups with a qualified technician. Monitor for dust buildup and musty smells, which can indicate moisture or mold. Regular maintenance helps sustain improved airflow and indoor air quality over time. The Heater Cost team emphasizes logging cleaning dates to track maintenance history and plan future checks.
Common Mistakes to Avoid
Avoid over-cleaning or aggressive scrubbing that can damage duct surfaces. Don’t seal joints before the ducts are clean, as trapped dust can worsen air quality. Refrain from using household cleaners inside ducts due to chemical residues. If you encounter mold growth, moisture, or structural damage, stop and call a professional. Finally, never ignore safety warnings when dealing with asbestos-containing materials or high-energy systems.
Professional vs DIY: Making the Right Choice
DIY cleaning is feasible for simple duct layouts and accessible sections, but complex systems, mold, asbestos, or damaged ducts are best handled by licensed HVAC professionals. A pro can verify duct integrity, ensure proper sealing, and provide a thorough cleaning that meets industry standards. The decision should balance cost, risk, and your comfort level with home improvement tasks.
Tools & Materials
- HEPA-equipped vacuum(HEPA filtration to capture fine dust)
- Flexible duct-cleaning brush kit(Reach inside ducts without damaging surfaces)
- Screwdriver set(Remove and reattach grilles securely)
- N95 respirator or higher(Protects from fine dust and contaminants)
- Safety goggles(Eye protection from dust and debris)
- Work gloves(Protect hands during disassembly and cleaning)
- Drop cloths or plastic sheeting(Protect floors and furniture)
- Flashlight or headlamp(Improve visibility inside ducts)
- Microfiber cloths(Wipe down accessible surfaces)
- Duct sealant or mastic (optional)(Seal joints after cleaning if gaps are present)
Steps
Estimated time: 2-5 hours
- 1
Prepare and safety-check the system
Turn off the HVAC system and all power to the furnace. Put on PPE and protect floors with drop cloths. Confirm you know the duct layout and where grilles are located. Why: safety prevents injury and avoids contaminating living spaces during cleaning.
Tip: Start with a quick visual scan to identify any obvious signs of moisture or mold before disassembly. - 2
Access and inspect ductwork
Remove supply and return grilles using the screwdriver. Inspect for loose joints, visible mold, moisture, or pest debris. Photograph problem areas for reference. Why: early detection guides the cleaning approach and helps decide if a pro is needed.
Tip: Work from the farthest accessible section toward the main unit to maximize debris removal. - 3
Vacuum and remove loose dust
Use the HEPA vacuum with attachments to extract loose dust from ducts and plenums, including grilles. Vacuum both along the duct length and at joints. Why: removing loose dust reduces recontamination during brushing.
Tip: Keep the vacuum hose straight to avoid jamming and minimize dust dispersion. - 4
Brush stuck debris and residue
Gently loosen stuck debris with a flexible brush kit; avoid metal scrapers that could damage duct walls. Vacuum again to capture loosened material. Why: mechanical agitation helps dislodge buildup without tearing or puncturing ducts.
Tip: Do not use excessive force; if debris resists, pause and reassess the access point. - 5
Wipe down and seal joints
Wipe interior surfaces with microfiber cloths; check joints for gaps and seal with duct mastic if needed. Why: clean joints improve efficiency and prevent re-entry of dust.
Tip: Only seal after cleaning to avoid trapping dust inside ducts. - 6
Clean grilles and registers
Remove, wash, and dry grilles; reinstall securely. A clean grille can reduce surface dirt entering the system. Why: dirty grilles contribute to re-contamination and decreased airflow.
Tip: If paint is chipped or corroded, consider replacing the grille for better airflow. - 7
Reassemble and test
Reattach all grilles, return power, and run the blower on high for a short period to observe airflow and listen for rattles. Why: testing ensures no loose parts and confirms improved air movement.
Tip: Check for unusual noises and inspect joints again after a test run. - 8
Post-cleaning maintenance
Replace or upgrade the furnace filter, document the cleaning date, and schedule an annual professional inspection. Why: ongoing upkeep sustains IAQ and system efficiency.
Tip: Keep a simple maintenance log in a notebook or app.
Got Questions?
Do I need to hire a professional to clean heater ducts?
DIY cleaning is possible for simple duct layouts, but complex systems, mold, asbestos, or damaged ducts are best handled by licensed HVAC technicians.
DIY is possible for simple ducts, but call a pro for complex cases or if you see mold or damage.
Can cleaning improve indoor air quality?
Cleaning removes accumulated dust and debris that circulate through the system, which can help reduce airborne irritants when combined with proper filtration.
Cleaning can help reduce dust and improve air quality when paired with good filters.
How often should heater ducts be cleaned?
There is no universal schedule; consider cleaning after renovations, periods of high dust, or allergy concerns, and have an HVAC pro assess your home.
There isn’t a fixed interval; assess needs after renovations or if you notice dust or musty odors.
What is the typical cost range for duct cleaning?
Costs vary by home size and system complexity; obtain quotes from local pros to understand what’s included in the service.
Costs vary; get quotes to compare what’s included in the service.
What are signs that ducts need cleaning?
Dust on surfaces, musty odors, excessive debris around vents, and reduced airflow are common indicators you may need cleaning.
Look for dust buildup, musty smells, and weaker airflow.
Is duct cleaning safe around a live furnace?
Yes, with proper precautions and shutdown of power to the unit; avoid working on active electrical components.
Shut off the furnace and power before starting; safety is essential.
Watch Video
The Essentials
- Plan safety first and wear PPE.
- Use a HEPA vacuum and soft brushes.
- Seal joints after cleaning to prevent leaks.
- Consult a pro for asbestos, mold, or damaged ducts.