Clean Heater Coils: A Step-by-Step Guide
Learn to safely clean heater coils to boost efficiency and extend equipment life. This Heater Cost guide covers prep, tools, a detailed cleaning method, safety tips, and ongoing maintenance.

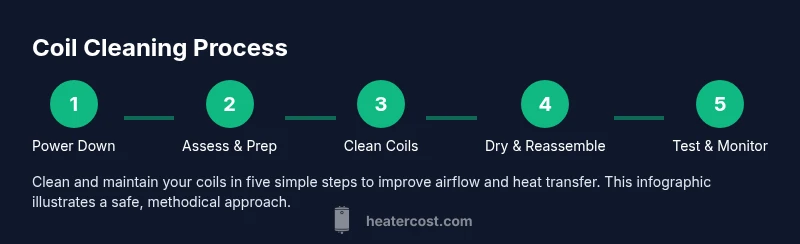
By following this guide, you will safely clean common home heater coils and restore airflow and efficiency. You'll learn how to prep your equipment, choose the right tools, and perform a step-by-step cleaning for electric coil heaters. The article also covers safety precautions, drying times, and maintenance habits to prevent future grime buildup.
Why clean heater coils matter
Maintaining clean heater coils is essential for efficient heating, reliable performance, and longer equipment life. When coils accumulate dust, soot, and grease, heat transfer suffers and the system works harder to reach the same temperature. This increases energy use and can boost wear on motors and fans. According to Heater Cost, cleaning heater coils regularly is one of the simplest ways homeowners can protect their investment and keep bills from creeping up during peak season. In practice, you’ll notice steadier heat output, quieter operation, and fewer erratic temperature swings after a thorough cleaning. This guide explains why coil cleanliness matters, what grime looks like, and how to approach cleaning safely and effectively for common residential heaters.
Understanding coil types and grime patterns
Coils come in several forms depending on the appliance: electric heating coils in space heaters or baseboard units, coils inside some boilers or furnaces, and finned surfaces in older radiators. Dust clogs air pathways; oily residues from kitchen grease or humid environments can stick to metal surfaces; and soot from nearby combustion can deposit on adjacent components. Recognize that different grime types require careful cleaning: light dust can be brushed away, while stubborn grime may need damp cleaning with a mild detergent. The goal is to restore smooth airflow and heat transfer while avoiding damage to fins, coatings, or protective seals.
Safety considerations before you start
Electrical and gas-based heaters pose real risks if mishandled. Always power down and unplug the unit, or switch off the circuit breaker. If you have a gas heater, shut off the gas supply and follow the manufacturer’s instructions. Ventilate the area to avoid inhaling dust, and wear PPE such as safety glasses and gloves. Never clean coils while they’re hot, and never spray water directly into electrical components. If you feel unsure at any point, pause and consult a professional. Safety first protects you and your equipment.
Planning and setup: what you need before you start
Before touching any coil, prepare a clean, well-lit workspace with ample ventilation. Gather your tools and protective gear, and lay down drop cloths to catch debris. Take photos to document the coil layout in case you need to reassemble parts. If the coil assembly is not clearly user-serviceable, consult the manual or contact a licensed technician. This planning reduces surprises and helps you complete the job efficiently and safely.
Cleaning approach: best practices and technique
Adopt a gentle, methodical approach rather than a brute-force scrub. Start by removing loose dust with a low-power vacuum or a soft brush, keeping the nozzle at a slight distance to prevent bending fins. Use a damp microfiber cloth with a mild detergent to wipe surfaces; never saturate the coil or allow liquid to pool in electrical housings. For stubborn grime, a small amount of isopropyl alcohol on a cloth can assist, but avoid harsh solvents that could degrade coatings. Finally, check that surrounding components like fans and housings are free of obstructions that could hamper airflow.
Handling stubborn grime and protecting coil finishes
Stubborn grime requires patience and the right tools. If you encounter sticky residues, repeat light passes with a damp cloth rather than heavy scrubbing, which can bend fins or wear protective coatings. Use plastic or wooden tools if you need to nudge debris loose; metal tools may scratch metal surfaces and create micro-damage. After cleaning, inspect for bent fins and straighten them carefully with a fin comb if needed. Protect finishes by avoiding abrasive chemicals and by drying surfaces promptly to prevent corrosion.
Drying, reassembly, and test run
Allow cleaned coils to air-dry completely before powering the unit back on. If you used damp cleaners, use a towel to blot excess moisture and wait for at least 30 minutes of air-drying, longer for models with rigid housings. Reassemble any removed panels gently, reconnect power or gas supply, and perform a cautious test run. Listen for unusual noises, check for overheating, and confirm even heat delivery. If problems appear, power down and consult a professional.
Maintenance cadence and long-term care
Establish a simple maintenance cadence to keep coils clean without repeated full dissections. Schedule a visual inspection at the start of each heating season, and perform a light cleaning more often in dusty environments. Keep air filters and intake vents clean, and address any moisture or corrosion quickly. Regular maintenance helps maintain efficiency, lowers energy use, and extends coil life according to the Heater Cost analysis shows a clear link between routine upkeep and longevity of heating components.
Troubleshooting common issues after cleaning
If performance does not improve after cleaning, re-check for hidden grime in tight corners, ensure there are no loose electrical connections, and verify that the blower or fan can rotate freely. Dusty ducts, blocked vents, or misaligned components can mimic coil fouling. If in doubt, contact a licensed technician to diagnose underlying problems such as wiring faults or faulty thermostats. Always power down before inspecting.
Tools & Materials
- Vacuum with brush attachment(Dust and debris removal from coil fins)
- Soft-bristled brush(Non-metal; for gentle scrubbing)
- Microfiber cloths(Lint-free for wiping)
- Mild detergent or degreaser (diluted)(Choose gentle, non-corrosive)
- Spray bottle with water(For damp cleaning; avoid soaking)
- Isopropyl alcohol (optional)(For stubborn grime on metal surfaces)
- Safety gear (gloves, goggles)(Protect skin and eyes)
- Flashlight or headlamp(Better visibility)
- Ladder or stable step stool(Only if coils are above reach)
- Drying towels or air-drier(Assist drying)
Steps
Estimated time: 45-75 minutes
- 1
Power down and isolate
Turn off power at the breaker and unplug the unit; if it’s a gas appliance, shut off the gas valve and wait for any pilot lights to go out. This prevents shocks and gas leaks while you work.
Tip: Double-check with a non-contact tester if you’re unsure about live circuits. - 2
Inspect coil area and document
Look for obvious grime, corrosion, or bent fins. Take clear photos of the coil layout to help with reassembly and to track grime patterns for future reference.
Tip: Note any loose panels or screws you’ll need to secure later. - 3
Prepare workspace and safety gear
Put on safety glasses and gloves. Clear the area of clutter, lay down a drop cloth, and ensure adequate ventilation for dust control.
Tip: Keep pets and kids away during cleaning. - 4
Vacuum loose dust from the coils
Use the vacuum with a brush attachment to gently remove surface dust. Hold the nozzle at a slight distance to avoid bending delicate fins.
Tip: Do not press hard into tight spaces; gentle passes work best. - 5
Wipe surfaces with a damp cloth
Moisten a microfiber cloth with a mild detergent solution and wipe the coil surfaces. Avoid soaking the coil or entering electrical housings.
Tip: Finish with a dry cloth to remove residual moisture. - 6
Address stubborn grime carefully
For sticky residues, use a damp cloth and a touch of alcohol if needed, and avoid metal tools that can scratch coatings or bend fins.
Tip: If the grime resists, pause and consult a professional rather than forcing removal. - 7
Dry, reassemble, and test
Allow full drying before powering on. Reattach panels, reconnect power or gas supply, and run a cautious test to check for heat consistency and unusual noises.
Tip: If anything smells off or overheats, shut down immediately.
Got Questions?
Should I unplug the heater before cleaning the coils?
Yes. Always disconnect power and, if applicable, shut off the gas supply. This prevents shocks and gas leaks while you work.
Yes—unplug the heater and note the gas supply if you have a gas model.
Can I use water to clean heater coils?
Use a damp cloth or brush and a mild detergent. Avoid soaking or spraying water into electrical housings.
A damp cloth is enough; don’t soak the coils.
How often should I clean heater coils?
Frequency depends on dust exposure and usage. Inspect seasonally and clean as needed to prevent grime buildup.
Clean as needed based on how dusty your space is.
Is cleaning coils enough, or do they need replacement?
Cleaning helps, but coils or fins can degrade over time. If damage or corrosion persists after cleaning, seek professional advice.
Cleaning helps, but damaged coils may require replacement.
Are there risks cleaning a gas heater with coils?
Gas heaters involve unique hazards; avoid opening sealed components and call a pro if you smell gas or notice leaks.
Gas systems can be dangerous—evacuate and call for help if you smell gas.
What cleaners are safe for heater coils?
Use mild detergents or cleaners labeled safe for metal and coatings; avoid abrasive chemicals or solvents.
Stick to mild cleaners and avoid solvents.
Watch Video
The Essentials
- Identify coil locations before cleaning.
- Power down and isolate the heater to prevent shocks.
- Use gentle tools to avoid coil damage.
- Dry thoroughly before powering on.
- The Heater Cost team recommends seasonal coil cleaning as part of ongoing maintenance.