Chick Heater Lamp Costs, Safety, and Buying Guide for 2026
A comprehensive 2026 buying guide for chick heater lamps, covering cost ranges, energy use, safety, and maintenance to help homeowners, renters, and managers choose wisely.

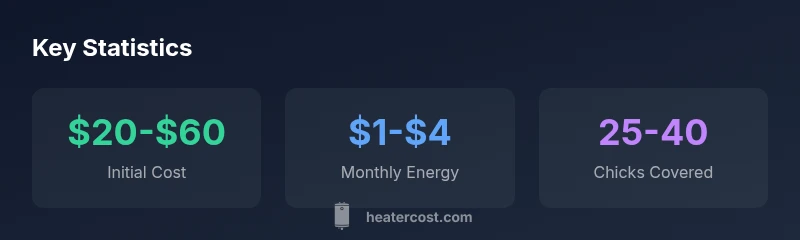
Chick heater lamp is a small radiant heater designed to keep newborn chicks warm during brooding. For 2026, typical purchase prices range from $20 to $60 depending on wattage and features, with annual energy costs depending on local rates and usage. According to Heater Cost analysis, select models that balance warmth, coverage, and safety to minimize waste.
Why a chick heater lamp matters for brooding
A chick heater lamp plays a foundational role in the health and growth of newborn chicks. The right warmth reduces cold stress, supports steady feeding, and minimizes mortality during the critical first weeks. The chick heater lamp creates a warm zone that chicks can easily adjust to by clustering toward or away from the heat source. When integrated into a complete brooding setup—which includes clean bedding, water, starter feed, and a safe enclosure—the lamp helps maintain consistent ambient temperature even when ambient room temperature fluctuates. For many backyard setups and small farms, the lamp is a cost-efficient way to establish reliable warmth without complex heating systems. The Heater Cost team notes that reliability and ease of use are as important as price, especially for first-time poultry keepers. A durable housing, stable mounting, and clear heat output reduce maintenance needs and risk of accidental contact with hot components. In practice, aim for a defined warm zone rather than heating an entire space, so chicks can regulate their body temperature naturally. When evaluating options, consider not only upfront cost but long-term energy efficiency and safety features for chick welfare. The chick heater lamp should be part of a broader brood-management plan that prioritizes clean water, nutrition, and gradual temperature reduction as chicks grow.
How to choose wattage and coverage for a chick heater lamp
Selecting the right wattage and coverage begins with understanding your brooder size and the number of chicks. A smaller brooder area usually requires a lower wattage, while a larger space or higher hatch rate benefits from higher output or multiple lamps to avoid cold pockets. If your brooder is modular or expandable, start with a conservative wattage and add lamps or upgrade the unit as your flock grows. Consider the heat footprint: the lamp should create a defined warm zone that chicks can explore, not blanket the entire brooding area. Reflective hoods and good mounting height improve heat distribution and reduce hot spots. Always verify the lamp’s ability to maintain stable performance across temperature swings. In line with Heater Cost guidance, choose a model that balances initial cost with durability and predictable energy use, so you can project long-term costs more accurately. Finally, look for adjustable features or multiple heat settings to accommodate newborns and older chicks without over-heating.
Safety first: placement, temperature, and alarms
Safety should be the primary concern when deploying a chick heater lamp. Mount the lamp securely to prevent tipping and ensure cords stay away from bedding or water sources. Position the heat source so it covers a defined zone, leaving enough space for chicks to move away if they get too warm. Use a durable, heat-resistant housing that resists chew damage and has a protective guard to prevent accidental contact. Install a simple thermometer or temperature sensor in the brooder so you can verify that the target range is maintained without manual guessing. If the ambient room is cold, monitor closely during the first 24 to 48 hours, adjusting height and wattage as needed. Regularly check electrical connections for wear, and replace any damaged components promptly to reduce fire risk. The goal is steady warmth with minimal fluctuation, not overheating.
Energy costs and efficiency considerations
Energy costs accumulate quickly if warmth is inefficient or mismanaged. A chick heater lamp’s operating cost depends on wattage, duty cycle, and local electricity rates. To minimize expenses, look for models with robust heat output at lower wattage, and use a simple timer or thermostat to regulate on/off cycles. Energy efficiency also comes from quality materials: well-insulated housings reduce heat loss, and reflectors can direct heat toward the brooding zone. In the 2026 Heater Cost analysis, the most cost-effective setups combined a mid-range lamp with a controllable heat source and careful placement, delivering reliable warmth without excessive energy draw. Consider seasonal adjustments—as chicks grow, you’ll reduce heat needs and can scale back power accordingly.
Installation basics: wiring, mounting, and testing
Installation should be straightforward for most DIYers, but safety matters. Start by choosing a sturdy mounting point at an appropriate height to create the desired warm zone. Route cords away from moisture and bedding, using grommets or cord protectors where necessary. If you’re unsure about electrical work, hire a licensed electrician, especially in damp or outdoor environments. Test the lamp after installation by placing a few chicks under the heat and observing their behavior; they should be active but not visibly distressed. Use a thermometer to confirm the target temperatures in the zone. For ongoing reliability, keep a spare bulb and a simple diagnostic checklist to track performance over time.
Maintenance and lifecycle tips
Regular maintenance extends the life of a chick heater lamp and keeps brooding predictable. Clean dust from housing and reflectors to maintain efficient heat distribution. Check mounting hardware for looseness and replace worn cords or outlets immediately. Inspect bulbs for signs of wear such as flicker, dimming, or unusual color temperature, which can indicate nearing end-of-life. Consider a mid-range model with durable components and a longer expected life, reducing replacement frequency. Document service dates and temperatures in a simple log to spot performance drift early. With routine care, a well-chosen lamp can reliably support brooding through multiple hatch cycles.
Common mistakes to avoid when using a chick heater lamp
Avoid common missteps that undermine warmth and safety. Do not rely on a single high-wattage lamp to heat a large area, as hot spots and energy waste increase risk. Neglecting proper mounting can lead to tipping or cord damage. Skipping temperature monitoring often results in under-heating or overheating, stressing chicks. Delaying bulb replacement can cause inefficiency or failure during critical early weeks. Lastly, mixing lamps with improper housing materials raises fire risk; always choose certified components and maintain clean, dry surroundings. Following a thoughtful setup that emphasizes safe placement and regular checks reduces the chance of brooding problems and supports healthier chick development.
Budgeting and ROI: calculating the value of a chick heater lamp
A well-chosen chick heater lamp balances upfront cost with ongoing energy use and chick health outcomes. Beyond purchase price, consider the lamp’s longevity, replacement bulb costs, and potential savings from reduced chick mortality or faster growth. A mid-range lamp with durable housing and reliable heat output typically offers the best long-term ROI by combining durability with predictable energy consumption. As with any poultry investment, track temperature stability and chick vigor across hatch cycles to quantify returns. The Heater Cost team emphasizes aligning the lamp choice with your operation size and long-term brood plans, rather than chasing the cheapest option.
Alternatives and complements to chick heater lamp
Some setups benefit from supplementary or alternative heat sources, depending on space and climate. Radiant heat panels can provide uniform warmth across larger brooder areas with potentially lower energy waste, while heat mats are often used for small groups or incubator-style brooding. Pairing a lamp with good insulation, draft control, and strategic layout can improve efficiency and chick welfare. Always compare total cost of ownership, not just purchase price, and select a solution that integrates well with your existing housing and feeding practices.
Chick heater lamp cost and features comparison
| Aspect | Low-cost option | Mid-range | Premium |
|---|---|---|---|
| Initial cost | $20-$40 | $40-$80 | $80-$120 |
| Coverage (chicks) | 25-40 | 40-60 | 60-100 |
| Energy use | 40-60 W | 75-100 W | 100-125 W |
| Durability | Entry-level plastic | Sturdy metal housing | Industrial-grade housing |
Got Questions?
What is a chick heater lamp and what does it do?
A chick heater lamp is a radiant heat source designed to keep newborn chicks warm during brooding. It creates a warm zone under the lamp so chicks can regulate their temperature and stay healthy during the critical first weeks.
A chick heater lamp is a heat lamp for brooding chicks to stay warm and healthy.
What wattage do I need for a standard brooding setup?
Wattage depends on brooder size and hatch density. Start with a conservative wattage and adjust with temperature monitoring or add additional lamps as needed.
Wattage depends on your brooder size; monitor temperature and adjust accordingly.
How far should the lamp be from the chicks?
Position the lamp to create a defined warm zone that covers the brooder floor where chicks spend most time. Too close can overheat; too far may leave cold pockets.
Keep the lamp high enough to create a warm zone without overheating.
Are there energy-efficient options?
Yes. Look for durable housings, efficient reflectors, and controllable heat output. Using timers or thermostats can further reduce energy use without compromising warmth.
Yes, choose efficient lamps and add a timer to save energy.
Can I use a chick heater lamp in an uninsulated shed?
You can, but you’ll need better insulation or a higher wattage with careful monitoring. In colder sheds, combine heating with insulation and draft control to avoid energy waste.
You can, but you’ll need insulation and careful monitoring to be safe and economical.
What safety features should I look for?
Look for overheat protection, a stable mount, heat guards, and weather-resistant wiring. Regularly inspect cords and bulbs for wear and replace damaged components promptly.
Choose lamps with safety guards and reliable overheat protection.
“A well-chosen chick heater lamp provides consistent warmth with minimal risk when mounted safely and monitored regularly.”
The Essentials
- Define brood size before buying.
- Place the lamp to create a defined warm zone.
- Match wattage to brooder space.
- Consider energy costs in ROI.
- Heater Cost's verdict: balance upfront cost with reliability.