Can You Lay Down a Water Heater? A Practical How-To
Discover if horizontal placement is possible for your water heater, when to DIY vs hire a pro, and safe steps to assess orientation, venting, and clearances.

You can generally lay down a water heater only if the model supports horizontal installation and the venting, clearances, and earthquake/bracing requirements are met. Most residential tanks are designed for vertical mounting, so always check the manufacturer’s manual. If horizontal placement is allowed, prepare by turning off utilities, draining the tank, and ensuring a stable, level surface.
Can You Lay Down a Water Heater? Orientation Basics
If you’re asking 'can you lay down a water heater', this is a topic homeowners encounter when replacing an old vertical unit or fitting a heater into a tight space. In practice, most residential water heaters are designed for vertical mounting, with the tank standing upright to support the burner assembly, venting path, and cold/hot water connections. Some models, particularly certain electric or specialized gas units, may be rated for horizontal installation, but this is not universal. Always consult the owner’s manual and product spec sheet before attempting any lay-down installation. Even when horizontal orientation is permitted, you must adhere to specific clearances, ensure proper venting if it’s a gas unit, and install anti-tip bracing to prevent movement. In short, the decision hinges on your exact model, space, and local code requirements. Heater Cost references emphasize verifying manufacturer guidance and local code implications before proceeding with any orientation change.
Quick Clarification: Horizontal vs Vertical Orientation
Horizontal installation is not a one-size-fits-all approach. Most modern tanks are tested and labeled for vertical operation; placing them on their side can affect the burner assembly, heat exchange, anode rod timing, and warranty coverage. If horizontal orientation is permitted, expect specific requirements such as more robust bracing, alternate venting routes for gas units, and sometimes a different expansion tank configuration. Before proceeding, confirm: (1) the model’s horizontal rating, (2) venting compatibility, (3) available clearances around walls and cabinets, and (4) whether your local building code allows this configuration. For homeowners, this means a careful review of the manual, followed by a decision on DIY or professional installation.
Practical First Steps: Safety and Preparation
Before deciding to lay down a water heater, conduct a quick safety check. Make sure you can access the unit without forcing it through tight spaces. Verify that you have a stable, flat surface that can support the full weight of the tank when full of water. Clear the area of obstructions and disconnect any nearby electrical or gas lines only after turning off the appropriate utility shutoffs. If any doubt remains about the model’s suitability for horizontal orientation, the safest path is to install the unit vertically as designed. Remember, improper orientation can lead to leaks, poor venting, or warranty voidance.
Orientation and Installation Considerations: Gas vs Electric
Gas-fired tanks require a venting path designed for the chosen orientation. Horizontal placement may demand a reconfigured vent run and dedicated draft hood or vent connector to prevent backdrafts. Electric tanks usually lack venting concerns but still require level alignment and solid support to prevent vibration and movement that could stress electrical connections. In all cases, you should verify that pipe fittings, shutoff valves, and strain reliefs remain accessible and meet code. If you notice signs of rust, corrosion, or water staining, stop and reassess the setup before proceeding.
Structural and Space Requirements
Adequate floor support is essential when laying a water heater on its side. The weight of a full tank can exceed several hundred pounds; if the subfloor or framing isn’t rated to carry that load, you risk damage or collapse. Check the space for proper clearance from walls, cabinets, flue piping, and any heat sources. Secure the tank with anti-tip straps if required by code, and consider a seismic bracket in earthquake-prone regions. Finally, ensure you have room to access drain valves, electrical disconnects, and gas shutoffs after relocation.
When to Hire a Pro and When to DIY
If the model is clearly rated for horizontal installation, you might handle the move yourself—provided you are comfortable with heavy lifting, utility shutoffs, and reconfiguring venting (for gas). However, many jurisdictions require a licensed professional for changes to fuel lines, venting runs, and gas connections. If you are unsure about any step or local code requirements, hire a licensed plumber or HVAC technician. A professional can ensure the new orientation won’t compromise safety, energy efficiency, or warranty coverage.
Quick Reference: Do This Before You Move a Tank
- Check the model label for horizontal installation approval.
- Gather essential tools and materials (see Tools & Materials section).
- Shut off the appropriate utility (gas, electricity, water) and relieve pressure.
- Drain the tank to reduce weight and prevent spills.
- Confirm the area is level and has adequate clearance.
- Plan venting/expansion requirements and brace the unit securely.
- If in doubt, consult a professional to avoid safety hazards and warranty issues.
Tools & Materials
- Adjustable wrench(To disconnect water lines and fittings)
- Pipe wrench(For securing larger pipe joints)
- Screwdrivers (Flathead and Phillips)(For vent clamps and cover panels)
- Bucket and towels(Contain residual water and clean up spills)
- Level(Ensure tank sits evenly when laid down)
- Shut-off wrenches for gas/electric(Isolate utilities safely)
- Pipe cut-off tool or tubing cutter(Only if you need to trim lines)
- Anti-tip straps or seismic brace(Required by some codes for horizontal installs)
- Expansion tank (if required)(Check if your configuration needs it)
- Water heater dolly or lifting straps(Assist with moving a heavy unit)
Steps
Estimated time: 60-120 minutes
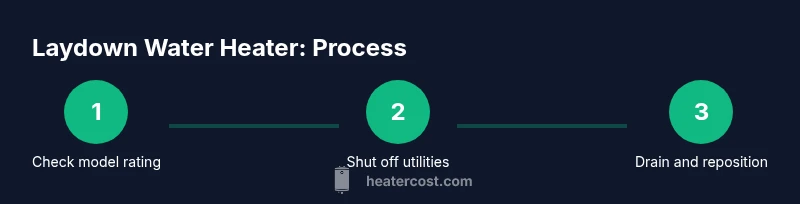
- 1
Verify orientation compatibility
Read the model label and manual to confirm horizontal installation is permitted. If not rated for lay-down orientation, stop and plan vertical replacement.
Tip: If in doubt, prioritize manufacturer guidance. - 2
Shut off utilities
Close the gas shutoff valve and turn off the electrical supply at the breaker. This prevents accidental ignition or shocks during movement.
Tip: Label the breakers to avoid reactivation errors. - 3
Drain the tank
Attach a drain hose to the drain valve and open the valve to release water. This reduces weight and helps avoid spills when repositioning.
Tip: Keep towels handy for any splashes. - 4
Disconnect water and gas/electric connections
Loosen and remove cold/hot water lines, and disconnect the venting (for gas) or electrical connections as applicable.
Tip: Take photos of connections before disassembly for easier reassembly. - 5
Move the tank to its lay-down position
With assistance, carefully reposition the tank so it rests on its side on a stable, level surface. Check for level alignment along its length.
Tip: Do not slam or drop the unit; use moving straps if needed. - 6
Inspect and adjust venting and supports
If horizontal, verify vent connections meet code and install anti-tip braces or seismic restraints if required.
Tip: Ensure no bending or kinking of vent pipes. - 7
Reconnect lines and test
Reconnect water lines, gas/electric supply, and venting as applicable. Refill the tank, bleed air, and test for leaks with soapy water.
Tip: Check for leaks at every connection before powering on. - 8
Validate operation and safe clearance
Restore power or gas and run a full system check. Confirm there is proper ventilation, no gas odor, and adequate clearance around the unit.
Tip: Document test results and monitor for unusual noises.
Got Questions?
Is horizontal installation allowed for all water heaters?
No. Only certain models are rated for horizontal placement. Always check the manufacturer’s manual and local codes before proceeding.
Horizontal installation isn’t allowed for every unit; verify your model’s rating and local codes first.
What are the risks of laying a water heater on its side?
Risks include venting failures on gas units, increased wear on fittings, leaks, and potential warranty voidance if not approved by the manufacturer.
Risks include venting issues and leaks; check the manual before moving.
Do I need permits for orientation change?
Permits depend on local codes and whether the change involves gas lines or venting work. Check with your city or county building department.
Permits depend on local rules; confirm with authorities before starting.
Can I DIY horizontal installation if I’m handy?
If the model is rated for horizontal install and you’re comfortable with shutoffs, venting, and fittings, it may be possible. Otherwise, hire a pro.
DIY is possible only if allowed by the model and you’re confident with a vented system.
Will laying down affect warranty?
Yes, some manufacturers void warranties if horizontal installation is performed without explicit approval. Always verify warranty terms.
Warranty can be voided if horizontal install isn’t approved by the manufacturer.
Is horizontal installation safer in small spaces?
Not necessarily. Small spaces can complicate venting and access; vertical installations often provide easier serviceability.
Small spaces aren’t automatically safer; orientation should follow model specs and code.
Watch Video
The Essentials
- Check model orientation ratings before attempting lay-down.
- Horizontal installation has strict venting and bracing requirements.
- Safety first: shut off utilities and drain the tank.
- When in doubt, hire a pro to protect warranty and codes.