Is a Block Heater Hard to Install? A Practical Guide
Explore whether installing a block heater is difficult, compare DIY vs pro installs, and get step-by-step guidance, safety tips, and maintenance insights for better cold-weather starts.

A block heater is moderately hard to install for most drivers and typically best handled by a professional. If you have basic automotive skills, you can attempt a DIY install, but you should expect wiring tasks, coolant handling, and potential warranty considerations. Before you start, check your vehicle’s manual, heater kit compatibility, and local regulations.
What a block heater does and who benefits
Block heaters warm the engine coolant to help with cold-start reliability and quicker warm-up. They are common in cold climates and can reduce wear on your engine. So, is a block heater hard to install? The answer depends on your vehicle, your kit type, and your comfort with DIY electrical work. According to Heater Cost, compatibility varies by engine block design and kit type, so read the product instructions closely and confirm with your vehicle's manual before purchasing.
Assessing compatibility and kit options
Block heater kits come in several types: freeze-plug, coolant-line, and dip-stick variants. The first two require access to the engine bay and may involve draining coolant. Before buying, verify your engine block's access port and confirm the kit matches your vehicle's year, make, and model. Heater Cost analysis shows that compatibility is a key driver of installation success and warranty safety.
DIY vs pro install considerations
Installing a block heater can be a straightforward weekend project for some, but it often involves delicate electrical connections and coolant work. If you’re not comfortable with wiring or coolant handling, hiring a certified automotive technician reduces risk and protects warranties. The Heater Cost team notes that pro installs tend to be quicker and come with warranty coverage.
Common install challenges and solutions
Space constraints, wiring routing, and cooling-system leaks are the most frequent hurdles. Use a tray to catch coolant, and plan route paths that avoid hot components and moving parts. If you encounter a snug fit, consider an alternative kit type or seek professional advice before forcing components.
Maintenance after installation and winter readiness
Test the heater before winter by starting the vehicle in a dry, safe area and verify that the engine warms up within a few minutes. Check the power cord for signs of damage and store it properly when not in use. Regular coolant checks and a quick inspection in autumn can help maintain performance.
Tools & Materials
- Block heater kit compatible with your vehicle(Includes heater, power cord, and mounting hardware)
- Vehicle manual(Check for kit compatibility and warranty implications)
- Coolant(Used if coolant line is opened; keep track of type)
- Drain pan(For catching coolant during draining)
- Socket wrench set(For removing panels and mounting)
- Screwdrivers (flathead and Phillips)(General fastener work)
- Pliers(Grip hoses and clamps)
- Hose clamps(Secure hoses after install)
- Wire cutter/stripper(Prepare wiring if needed)
- Electrical tape or heat shrink(Insulate connections)
- Safety gloves and eye protection(Personal protection)
- Multimeter (optional)(Check voltage at cord if desired)
- Drain/bleed tool or funnel(Air bleed and coolant refill)
Steps
Estimated time: 90-150 minutes
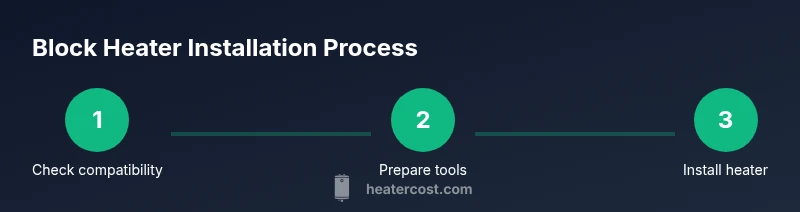
- 1
Confirm compatibility and prep tools
Review your vehicle's manual and the heater kit instructions. Gather all required tools in a clean workspace so you won't have to search mid-install.
Tip: Lay out tools in order of use to reduce time spent searching. - 2
Power down and cool engine
Disconnect the negative battery terminal and allow the engine to cool if recently run. This prevents electrical shorts and burns.
Tip: Wear gloves and safety glasses during disconnect. - 3
Access block and drain coolant as needed
Locate the installation site and prepare to drain coolant if the kit requires opening the cooling system. Place a drain pan and have rags ready.
Tip: Keep coolant in a safe container; dispose properly. - 4
Install block heater and hoses
Install the heater according to the kit's mounting method (freeze plug, coolant line, or dip-stick variant). Tighten mounting bolts to spec and connect hoses securely.
Tip: Do not overtighten to avoid cracking the block. - 5
Route power cord and protect wiring
Route the power cord away from hot components and moving parts. Use grommets or protective sleeves to prevent chafing.
Tip: Seal entry points to prevent moisture intrusion. - 6
Refill coolant, bleed air, and test
Refill coolant, bleed air from the system as needed, reconnect battery, and start the engine to verify operation. Check for leaks and proper heater warm-up.
Tip: Watch for leaks in the first 10 minutes of operation.
Got Questions?
Is installing a block heater difficult for a beginner?
For beginners, installation can be challenging due to electrical wiring and coolant work. A careful reading of the kit instructions helps; for many, hiring a professional is a safer option.
Installing a block heater can be tough for beginners because of wiring and coolant work. Consider professional help if you're unsure.
Do I need to drain coolant before installation?
Some kits require draining or partially draining the cooling system. If you must drain, capture coolant safely and refill once the installation is complete.
Some kits need draining the cooling system. Make sure to capture and properly dispose of old coolant.
Can I install a block heater myself, or should I hire a mechanic?
If you have solid mechanical skills and follow the kit instructions, a careful DIY install is possible. Many drivers opt for a professional to protect warranties and ensure correct wiring.
If you’re confident with mechanics, you can do it yourself. Otherwise, a professional helps protect warranties and wiring.
Will installing a block heater affect my vehicle warranty?
Warranty coverage varies by manufacturer and region. Using a certified installer often minimizes risk to warranty and ensures correct installation.
Front-line advice is to check with the dealer; professional installation often preserves warranty.
What signs indicate a failed block heater after installation?
If the engine struggles to start in cold weather or the dash indicator shows an electrical fault, inspect the heater wiring and cord for damage and consult a pro.
If startup is hard in cold weather or you see a fault light, check the heater wiring and cord.
Are there safety concerns with block heater cords near the engine?
Yes. Keep cords away from hot surfaces and moving parts, use weatherproof connectors where applicable, and unplug before service work.
Keep the cord away from hot components and unplug before maintenance.
Watch Video
The Essentials
- Evaluate compatibility before buying a kit.
- DIY installs are possible but carry warranty risks.
- Plan routing and cooling-system steps to avoid leaks.
- Test thoroughly and inspect after first cold start.