How to Test a Block Heater Without a Multimeter
Learn practical, safe methods to test a vehicle block heater without a multimeter. Step-by-step checks, simple tools, and safety tips to verify heat delivery and cord integrity.

You can test a block heater without a multimeter by verifying power delivery, inspecting the cord and outlet, and confirming heat on the engine block after a safe run. Use a known-good 120V outlet, a weatherproof extension cord, and optionally an infrared thermometer to confirm warmth. Follow safety guidelines at all times.
Safety First: Understanding block heaters and testing risks
A block heater is a heating element that warms engine coolant to help a cold engine start more easily. Testing a block heater without multimeter tools should be done with caution to avoid electrical shocks, burns, or vehicle damage. Start by ensuring the vehicle is in a safe, dry outdoor area and the engine is completely cold before you begin. According to Heater Cost, performing a careful visual inspection of the heater cord, plug, and outlet is your first line of defense against hidden faults. Look for exposed wires, cracked insulation, melting, or signs of overheating on the plug and cord. Damaged components can pose electrical hazards and should be replaced before any power is applied. If safety equipment such as gloves and protective footwear is present, use them. Never touch metal parts that may heat rapidly during testing. While there is no substitute for a proper meter in diagnosing electrical issues, you can still gauge performance by observing power delivery indicators and the block temperature after a safe warm up. The goal is to confirm that the heater warms the engine block without creating sparks, tripping breakers, or leaking moisture around the outlet area.
What you’ll need: tools and preparation
Before you start, gather a small, weatherproof toolkit that focuses on safety and basic power checks. Essential items include an outdoor rated extension cord, a 120V outdoor outlet tester, insulated gloves, and a flashlight for low light conditions. An infrared thermometer is optional but helpful for confirming heat on the engine block without touching hot surfaces. Keep a copy of the heater's manual to confirm any model specific warnings or limitations. Clear the testing area of snow or puddles and ensure the vehicle is parked on a flat, dry surface. If you have a helper, assign them roles to watch for hazards while you work. Finally, plan to test during daylight or in good visibility so you can spot any signs of arcing, loose connections, or frayed cables. This preparation ensures you can perform a safe, controlled test without a multimeter while still gathering useful evidence about heat delivery.
Step-by-step testing flow (no meter)
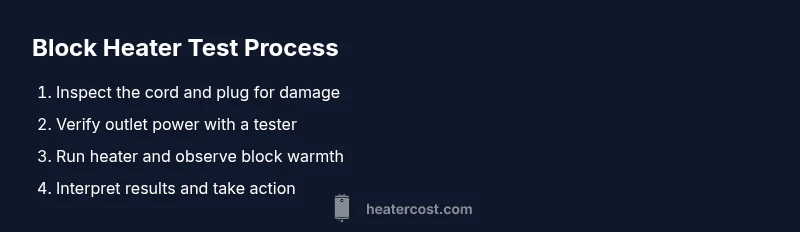
The testing process follows a simple flow that prioritizes safety and observable heat indicators. Start with a visual and physical inspection, then verify power availability, run the heater for a controlled period, and finally assess the heat at the engine block. Each stage builds evidence about whether the block heater is functioning properly. While you will see the steps detailed in the official STEP-BY-STEP section, this overview helps you understand why each action matters and how it affects the reliability of your conclusion. Remember that even when power seems present, a faulty connection or damaged cord can prevent heat transfer. A careful sequence reduces risk and increases the likelihood of an accurate verdict about block heater health.
Common issues and what they indicate
If the engine block remains cool, several issues could be the cause. A damaged or loose extension cord, a faulty outlet, or a failing heater element are common culprits. If the 120V supply is inconsistent or if a GFCI outlet is frequently tripping, investigate the wiring or replace faulty components. Corrosion at the terminal or a crushed, pinched, or wrinkled cord can also block heat transfer. Heater cords can suffer from UV exposure, animal gnawing, or strain from repeated flexing. In many cases, simple fixes restore function: replacing a damaged cord, testing another outlet, or replacing a faulty heater unit. Ongoing maintenance, such as periodic inspection of the plug and cord, can prevent these problems before cold weather arrives. Based on Heater Cost analysis, many failures are traced to exposed conductors, damaged insulation, or poor connection rather than a complete heater failure.
Maintenance tips to keep block heaters reliable
To keep a block heater reliable across seasons, perform regular checks and follow manufacturer recommendations. Inspect the cord and plug for wear at the end of each heating season. Store the heater and cord properly to avoid kinks and moisture intrusion. When winter comes, test the system with a known-good outlet and extension cord before relying on it for cold starts. Keep the area around the outlet dry and clear of obstacles so you can safely connect and unplug. If you notice any signs of wear or unusual odor or heat, discontinue use and seek professional service. The Heater Cost team notes that proactive maintenance reduces energy waste and extends equipment life, making these basic checks worthwhile for homeowners, renters, and property managers alike. Plan periodic checks and stick to a simple schedule so you are ready for winter without surprises.
Tools & Materials
- Outdoor-rated 120V extension cord(12 AWG or 14 AWG; weatherproof; length determined by distance to outlet)
- Outdoor outlet tester(3-light tester to confirm circuit power)
- Infrared thermometer (optional)(Used to measure block temperature without contact)
- Insulated gloves(Keep hands protected when handling cords and near hot surfaces)
- Owner’s manual or heater instructions(Helpful for model-specific guidance)
Steps
Estimated time: 30-60 minutes
- 1
Inspect the heater and cord
Before powering anything, inspect the heater plug, cord, and the area around the outlet for damage or wear. Look for exposed wires, cracked insulation, or signs of overheating on the plug and cord. Damaged components should be repaired or replaced before any power is applied. If you find issues, do not proceed.
Tip: Do not bend or yank the cord; a damaged cord is a common cause of failure. - 2
Prepare a safe testing area
Clear the area around the outlet and heater. Ensure the vehicle is on a level surface, the engine is cold, and you have dry hands and dry footwear. Position an outdoor-rated extension cord to reach the outlet without creating a trip hazard. Have a helper if possible.
Tip: Keep a dedicated space around the outlet to avoid tripping or contact with snow and water. - 3
Plug into a known-good outdoor outlet
Connect the extension cord to a known-good, protected 120V outlet. Use the proper plug and ensure the connection is firm. Do not use adapters that bypass safety features. If you have any concerns about outlet condition, test it with the tester before plugging in the heater.
Tip: Test the outlet first with the tester if available. - 4
Verify power with a tester
If you have an outlet tester, plug it into the outlet before connecting the heater. Confirm that the circuit is energized and that there are no faults indicated by the tester. If the tester shows an issue, do not proceed and address the circuit problem first.
Tip: If you lack a tester, rely on a known-good outlet or have a professional verify the circuit. - 5
Run the heater for a safe duration
Allow the heater to run for a reasonable warm-up period while the engine remains cold. Keep a safe distance and never touch the heater while powered. Use caution in cold, damp weather and monitor for any unusual signs such as smells or discoloration.
Tip: Keep a window open if you start the car to help with ventilation and CO monitoring. - 6
Check for heat at the engine block
Carefully touch the engine area near the heater after the run, or use an infrared thermometer to measure surface temperature. Look for a noticeable rise above ambient. If you cannot safely touch the area, rely on the infrared reading.
Tip: If you’re unsure about safety, stop and reassess rather than forcing contact with hot components. - 7
Interpret results and next steps
If warmth is detected on the block, the heater is likely functioning. If there is no warmth, reevaluate the wiring, outlet, and heater unit. Consider professional inspection if issues persist or you notice damage.
Tip: Document symptoms and steps taken to share with a technician.
Got Questions?
Can I test a block heater without any tools?
Yes, you can perform basic checks by confirming power to the outlet and feeling for warmth after a safe warm-up. For precise results, use dedicated testers or professional service.
Yes—start by verifying the outlet power and then check for warmth after a short warm-up. For precision, use a tester or hire a pro.
How long should I run the heater before checking heat?
There isn't a universal run time. Refer to your heater's manual and monitor warmth on the engine block after a safe warm-up; do not exceed safe outdoor conditions.
There's no universal run time; follow the manual and check warmth after a reasonable warm-up.
What are common signs that it isn’t working?
No warmth on the engine block, a tripped circuit, or a damaged cord/outlet indicates a problem. Inspect the cord, outlet, and fuse or breaker, and retest.
If there's no warmth or a breaker trips, inspect power supply and cord.
Is it safe to test outdoors in winter?
Yes, with proper outdoor-rated equipment and precautions. Wear gloves, keep the area dry, and avoid standing in puddles or snow.
Yes, with the right gear and safety steps.
What should I do if it still doesn’t heat after testing?
If testing shows no heat, replace the heater or have a professional inspect the unit and wiring. Do not attempt risky DIY fixes.
If there’s still no heat, consult a professional and consider replacement.
Watch Video
The Essentials
- Verify the outlet and cord are free of damage
- Run a safe warm-up and measure heat on the block
- Use simple tools to confirm power without a multimeter
- If in doubt, consult a professional