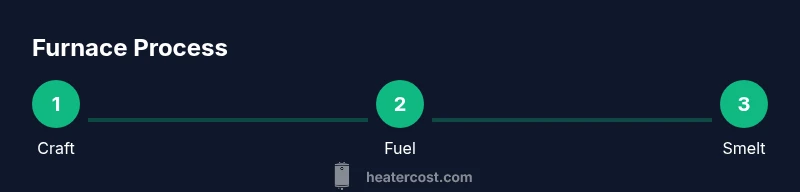
How to Furnace in Minecraft: Craft, Fuel, and Smelt
Learn how to craft a furnace in Minecraft, fuel it efficiently, and smelt ores and food. This step-by-step guide covers the crafting recipe, fuel options, automation tips, and common mistakes to avoid.

You will learn how to craft and use a furnace in Minecraft, including the crafting recipe, fuel options, and the smelting basics. You’ll also discover tips for automating furnaces and avoiding common mistakes. This guide covers the exact crafting pattern, practical fuel choices, how to start smelting items efficiently, and common pitfalls to avoid. By the end, you'll be able to smelt ore, cook food, and set up simple furnace workflows in survival and creative modes. Whether you're new to Minecraft or returning after a long break, this step-by-step approach keeps things clear and actionable.
Minecraft Furnace: Fundamentals and Purpose
In Minecraft, a furnace is your first real smelting device, turning raw ore into usable ingots and cooking food. Understanding its purpose helps you plan efficient mining expeditions and base logistics. According to Heater Cost, thinking about a furnace in game mirrors real-world heating logic: fuel drives heat output and productivity. This analogy isn’t perfect, but it emphasizes one core idea: better fuel management leads to faster results and less waste of resources. A furnace is a compact, reliable tool for transforming resources you gather through mining and farming into items you can use immediately or trade with others. As you gain experience, you’ll learn to pair furnaces with multiple stacks of fuel and chain smelting for large-scale projects.
Crafting the Furnace
To craft a furnace in Minecraft, you’ll need 8 cobblestone blocks. In the 3x3 crafting grid, place cobblestone in every slot except the center. This yields a single furnace. Place the furnace in your world and right-click (or use your interaction button) to open its UI. The furnace UI has three slots: the top slot for items to smelt, the bottom-left slot for fuel, and the right slot for the finished product. Keeping a clear supply of cobblestone and fuel will make your early game far less tedious. As you play, you’ll discover that building multiple furnaces in a row speeds up production and makes cooking and smelting more efficient.
Placing and Using Your Furnace
Once you’ve crafted a furnace, choose a central, accessible location near your mining area or farm. Place the furnace on the ground or against a wall for easy access. To smelt, put your ore or food item in the top slot, then add fuel to the bottom slot. The furnace will begin smelting automatically, showing a burn progress bar and the resulting item in the output slot on the right. For quick crafting sessions, store common fuels (coal, charcoal, lava buckets) and frequently smelted items in adjacent chests. In Survival and Creative modes, this setup helps you manage resources efficiently and keep important tasks moving without interruption.
Fuel Options: What Works Best
Fuel is the lifeblood of a furnace. In Minecraft, any burnable item can be used as fuel, with coal and charcoal offering longer burn times than many alternatives. Wood-based fuels are plentiful early on, making them a practical choice for beginners. Lava buckets provide a large burn time but consume a bucket that may be needed elsewhere. If you’re aiming for rapid, cost-effective smelting, prioritize coal or charcoal and supplement with wood planks or saplings when coal is scarce. Layer fuel planning with your ore or food inventory to minimize downtime and keep smelting flowing during long sessions.
Smelting Basics: Ore, Food, and Output
A furnace can smelt a variety of items. Common early-game tasks include turning iron ore into iron ingots, smelting sand into glass, and cooking raw meat into steaks or cooked porkchops. Each smelted item requires one fuel-use per batch, and you’ll see a progress bar indicating how long the process takes. The key is to queue up batches so you don’t waste fuel waiting for a single item to finish. As you expand your base, you can channel items from chests into the furnace with simple piping or hoppers to automate repetitive smelting tasks.
Efficiency Tips: Maximizing Output
To maximize furnace efficiency, stockpile fuel and smelt in batches. Group similar ores to minimize fuel per item, and avoid wasting fuel on low-value items when you could smelt higher-value ores instead. In addition, use the right size of smelt: a single item heats evenly at a steady rate, but larger batches can utilize fuel more efficiently. If you’re bartering or trading, consider that finely-tuned furnaces save time, which translates into more builds and explorations completed in a single game session.
Automation 101: Hoppers and Furnaces
Automation is a natural step as your base grows. Hoppers can feed items into the top slot and pull finished products from the output slot, while a second hopper feeds fuel into the furnace. This setup allows you to run continuous smelting lines without manual input. Implement basic guard rails: a chest with fuel, a chest with ore, and a furnace in between. In survival play, test your system in a controlled area to avoid item loss and ensure your hoppers align with the furnace’s slots. For creative builds, you can expand the chain by adding additional furnaces and powered rails to transport items automatically.
Common Mistakes and How to Avoid Them
A frequent mistake is forgetting to bring fuel or leaving the furnace empty after finishing a batch. Another pitfall is placing a furnace far from your mining or farming area, forcing you to make extra trips for each smelt. Some players separate fuel from inventories, causing delays when a furnace runs out of fuel mid-smelt. Keep a dedicated fuel chest, pre-load your furnace with a batch of items, and plan basic layouts that allow quick access to inputs and outputs. By anticipating demand, you’ll reduce downtime and keep your operations smooth.
Survival vs Creative: Differences in Furnace Usage
In Creative mode, you have unlimited resources and can experiment with furnace layouts without resource constraints. In Survival, you must manage inventories and logistics, which makes efficient furnace placement and fuel management even more valuable. The core mechanic—placing items in the top slot, fuel in the bottom slot, and collecting outputs—remains the same, but the surrounding strategies differ. Use Creative to prototype designs, then replicate them in Survival with careful resource planning and redundancy built into your system.
Quick Reference: Recipes and Tips
- Crafting: 8 cobblestone in the crafting grid around the center.
- Fuel: Coal, charcoal, wood, and lava buckets are common options.
- Use: Smelt ores, cook food, and upgrade materials for tools and armor.
- Automation: Hoppers enable continuous smelting lines.
This quick reference should be kept on hand near your base to speed up future builds and keep your workflow efficient.
blockData.noteOnlyForFormatUpdates":null}
toolsMaterials
stepByStep
tipsList
keyTakeaways
videoEmbed
faqSection
mainTopicQuery
Tools & Materials
- Crafting Table(Needed to craft a furnace)
- Cobblestone x8(Placed around the edges of the 3x3 crafting grid)
- Fuel (coal/charcoal/lava bucket)(Any burnable fuel can be used to smelt items)
Steps
Estimated time: 15-25 minutes
- 1
Gather resources
Collect cobblestone, iron ore, and any fuel you plan to use (coal, charcoal, wood, or lava bucket). Having a small stockpile ensures you can craft and fuel without constant trips back to your base.
Tip: Always carry a basic pickaxe and a few torches to keep mining efficient. - 2
Craft the furnace
Open the crafting table, place 8 cobblestone around the edges leaving the center slot empty, and take the furnace from the result. Place it in a convenient spot near your work area.
Tip: Place your furnace in a well-lit area to avoid mob spawns around your workshop. - 3
Open the furnace UI
Interact with the furnace to open its UI. You’ll see three slots: input, fuel, and output. This is where you’ll manage smelting tasks.
Tip: Keep your input items organized to speed up smelting batches. - 4
Add fuel
Place fuel in the bottom-left slot (or bottom slot, depending on your UI). A steady fuel supply keeps smelting uninterrupted.
Tip: Coal is a reliable long-lasting fuel; avoid wasting fuel on non-smeltable items. - 5
Add items to smelt
Put ores or food into the top slot. The furnace will start heating as soon as fuel is present.
Tip: Smelt in batches to maximize fuel efficiency and reduce downtime. - 6
Collect outputs
Retrieve the finished product from the right-hand output slot. Move newly smelted items into a storage chest for easy access.
Tip: Keep a separate chest for finished products to prevent clutter. - 7
Consider automation
If you’re building a larger base, connect hoppers to feed items and fuel, creating a continuous smelting line.
Tip: Test your hopper alignment on a small scale before expanding. - 8
Optimize for efficiency
Queue multiple smelts and balance input vs. fuel to minimize waste. Use higher-value items when possible.
Tip: Plan ahead for ore drops from mining runs to keep the line productive. - 9
Expand gradually
Add additional furnaces or combine them with blast furnaces and smokers for specialized smelting tasks.
Tip: Start with a simple two-furnace setup before scaling to a full refinery. - 10
Document your setup
Create a simple map or note of your furnace layout and fuel routes so you can reproduce or upgrade later.
Tip: Keep a blueprint handy to speed up future builds.
Got Questions?
What materials do I need to craft a furnace in Minecraft?
You need 8 cobblestone blocks and a crafting table to craft a furnace. Place cobblestone around the edges of the 3x3 crafting grid, leaving the center empty, and you’ll get one furnace.
To craft a furnace, gather eight cobblestone blocks and use them in the crafting grid around the center. Then place the furnace in your world to begin using it.
Can I use a furnace in Creative mode, and does it differ from Survival?
Yes, you can use a furnace in Creative mode. The functional mechanics are the same, but you won’t need to gather resources in Creative. The main difference is resource availability and how you manage automation during large builds.
Furnaces work the same in Creative and Survival; the only difference is resource constraints in Survival.
What fuels work best for fast smelting?
Coal and charcoal provide reliable burn times, while lava buckets offer very long burn times but consume a bucket that could be used elsewhere. Choose based on your current resource pool and project scale.
Coal and charcoal are great for steady smelting; lava buckets last longer but are more valuable for other tasks.
How do I automate a furnace using hoppers?
Place a hopper in the input slot to feed items, another hopper for fuel, and a third for the output. Connect chests to supply inputs and accept outputs, then test the flow to ensure smooth operation.
You can automate a furnace with hoppers by feeding inputs and fuel and collecting outputs into chests.
Why isn’t my furnace smelting anything?
Check that you’ve placed fuel in the fuel slot and that the input slot contains items to smelt. Also ensure the furnace isn’t blocked or facing a bug in your game version.
If nothing smelts, verify fuel and input are present and that there are no obstructions in the furnace UI.
Watch Video
The Essentials
- Craft a furnace with 8 cobblestone around the center
- Fuel selection directly affects smelting speed and efficiency
- Automate with hoppers for continuous smelting
- Smelt in batches to minimize fuel waste and maximize output