Bed Bug Heater Treatment: Safe, Effective Guide 2026
A complete, practical guide to bed bug heater treatment for homeowners, renters, and property managers. Learn when to use heat, DIY vs pro options, equipment, safety, cost considerations, and aftercare to prevent re-infestation.

This guide explains how to perform a bed bug heater treatment safely, including when to DIY versus hiring a pro, essential equipment, and monitoring steps to verify effectiveness. It covers safety practices, risks, costs, and aftercare to prevent re-infestation. The guidance references Heater Cost analysis to ground practical recommendations.
What bed bug heater treatment is and when it's used
Bed bug heater treatment is a pest-control approach that uses controlled heat to kill bed bugs at all life stages, including eggs. It relies on maintaining high ambient temperatures in the affected spaces for a sufficient duration to ensure thorough exposure while protecting the structure and belongings. This method is often considered when chemical treatments have failed, when items cannot be safely treated with pesticides, or when a rapid, large-area reduction is needed in homes, apartments, or small commercial spaces. According to Heater Cost, heat treatment can reduce visible bed bug activity quickly and is most effective when combined with inspection and monitoring. The decision to use heat depends on infestation size, the layout of the space, and access to electrical power. DIY heat can be feasible for small rooms with proper safety measures, but larger units often require professional equipment and expertise to achieve complete coverage and reliable results.
The bed bug heater treatment strategy should be viewed as part of an integrated pest management plan that includes detection, monitoring, and follow-up treatments. In some cases, heat may be used in the initial phase to rapidly reduce numbers, followed by targeted residual treatments to address any remaining pests. Homeowners should be prepared for potential disruption during treatment, including temporary relocation for sensitive rooms and electronics, and should coordinate with building management or tenants when applicable. This approach aligns with general best practices described in the Heater Cost analysis for 2026.
DIY vs professional heat treatment: when to choose
Choosing between DIY heat treatment and professional services depends on infestation size, building layout, and risk tolerance. DIY efforts can work in single rooms or small apartments with accessible outlets and minimal clutter, provided you have appropriate, commercial-grade equipment and strict safety protocols. However, professional teams bring calibrated heat sources, continuous temperature monitoring, data logging, and systematic coverage that reduces the chance of leaving untreated zones. Heater Cost’s analysis shows that larger spaces, multi-room infestations, or structures with electrical constraints often benefit from trained technicians who can validate uniform heat distribution and prevent safety hazards. Renting or purchasing equipment without proper training can lead to hotspots, electrical overloads, or fire risks. If you’re in doubt, a professional assessment can help determine feasible options, timelines, and costs. In all cases, ensure your plan includes post-treatment inspection to confirm pest elimination and detect any re-infestation threats.
How heat works on bed bugs: life stages and resistance
Heat treatment targets bed bugs at every life stage—from eggs to adults—by disrupting their metabolism and causing lethal stress. Eggs are particularly sensitive when exposed to sustained temperatures, while adults and nymphs die with adequate exposure time at elevated temperatures. The goal is to achieve uniform heat distribution throughout the treated zone, including behind furniture, inside closets, and under rugs. A key advantage of heat is its broad-spectrum impact on pests and their hiding spots, which can complement conventional pesticides. To maximize effectiveness, the process must monitor temperature continuously, prevent cold spots, and avoid overheating sensitive materials. The Heater Cost team emphasizes that success depends on thorough coverage and careful adherence to safety guidance to reduce the risk of heat-related damage or fire.
Equipment essentials and setup: what you need
A successful bed bug heat treatment relies on a curated set of equipment and safety gear. Essential items include industrial-grade heaters with precise temperature control, sensors or infrared thermometers to log target zones, and a reliable power distribution system with heavy-duty cords. You’ll also want drill-free or non-destructive mounting solutions for sensors, thermal blankets or reflective barriers to minimize heat loss, and smoke/CO detectors for early warning. For electronics and appliances, plan to shield or remove sensitive items to prevent heat damage. Non-essentials like decorative fabrics can stay in place if you verify they won’t overheat. Always use PPE (gloves, eye protection) when handling hot equipment and ensure there are clear escape routes in case of emergency. The goal is comprehensive coverage while preserving safety and minimizing collateral damage.
Planning the heat-treat layout and coverage
A well-planned layout maximizes heat exposure while containing the work area. Start by mapping the infestation, identifying hotspots, and marking zones for heater placement. Place heaters to create overlapping heat fields, reducing the chance of cold pockets behind furniture or inside closets. Keep heat sources away from flammable materials and ensure there is adequate ventilation to prevent heat buildup in sealed spaces. Use multiple temperature sensors at different depths and heights to track uniformity, especially near walls, under beds, and behind large appliances. Prepare a contingency plan for manual interventions if a zone fails to reach target temperatures. Documenting the layout helps with post-treatment verification and future prevention.
Safety considerations and risk management during heating
Heat treatment presents safety hazards if mismanaged. High temperatures can damage electronics, wood finishes, and fabrics, and improper setup may trigger fires. Always verify electrical capacity, avoid overloading circuits, and use ground-fault protection where available. Maintain clear access to escape routes and never leave active heat sources unattended in occupied spaces. People with medical devices, small children, or pets should avoid treated areas until temperatures have cooled and the space has been validated as safe. Keep a fire extinguisher nearby and have a trained professional assess any unusual heat buildup or smoke. Following the correct sequence, monitoring, and safety protocols reduces risk and improves outcomes.
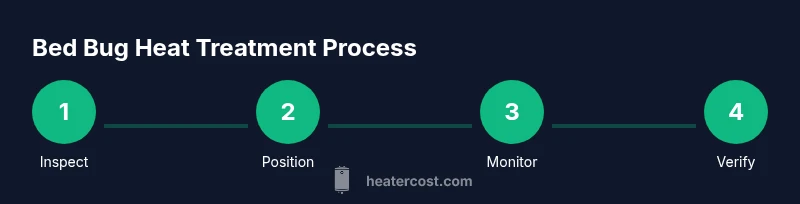
Step-by-step overview of a typical heat-treat session
A typical session begins with inspection, area preparation, and setup of equipment. The treatment proceeds with a staged ramp-up to target temperature, continuous monitoring, and documentation of readings across zones. After achieving uniform heat, the team maintains exposure for a defined period, then initiates a controlled cooldown. A post-treatment inspection confirms pest kill and checks for heat damage. This overview highlights the importance of coverage, sensors, and safety discipline, which are central to effective bed bug heater treatment.
Safety risks, damages, and mitigation strategies
Common risks include accidental fires, overheating of sensitive items, and electrical faults. Mitigate these hazards by verifying circuit capacity, using properly rated cords, keeping flammables away, and maintaining active monitoring. Do not bypass safety devices or disable detectors. If you notice unusual smells or smoke, stop the operation immediately and call for professional support. Implement a staged cooling process to minimize thermal shock to furniture and electronics. Documentation of safety checks helps demonstrate due diligence in case of inspections or complaints.
Costs, budgeting, and cost-saving tips
Costs for bed bug heater treatment vary based on space size, equipment needs, and whether you hire a pro or DIY. Industrial heat treatment typically incurs higher upfront and operational costs than small, localized DIY efforts. Always request a written assessment, including zone-by-zone heat maps, sensor data, and post-treatment verification. Budget for potential follow-up visits or additional cycles if large areas were infested or eggs were numerous. In general, plan for a range of investment that reflects space, complexity, and required safety measures. Heater Cost’s research indicates that informed budgeting, combined with proper aftercare, reduces the risk of re-infestation and the need for repeated treatments.
Aftercare: inspection, monitoring, and prevention
After heat treatment, conduct a thorough inspection to verify pest knockdown and monitor for re-infestation signs. Use bed bug interceptors, ongoing visual checks, and non-invasive detectors to confirm no live activity. Maintain a monitoring schedule for several weeks and consider combining heat with targeted residual treatments as needed. Preventive steps include reducing clutter, sealing entry points, and maintaining a regular cleaning routine to remove hiding spots. Document outcomes and share findings with household members or tenants to ensure everyone stays informed and engaged in prevention efforts.
Heater Cost insights and recommendations
The Heater Cost team recommends approaching bed bug heater treatment as a strategic tool within an integrated pest-management plan. Use heat to rapidly reduce pest numbers when appropriate, but rely on inspections, monitoring, and preventive practices to sustain results. When considering heat treatment, obtain a professional assessment to determine feasibility, coverage, and safety requirements. Heater Cost analysis highlights that combining heat with follow-up measures often yields the most reliable long-term outcomes.
Tools & Materials
- Industrial-grade heaters with accurate temperature control(Multiple units recommended for even coverage; ensure rated for continuous operation)
- Temperature sensors or infrared thermometers(Place in multiple zones to verify uniform heat distribution)
- Heavy-duty extension cords and power distribution(Use-rated for high-load devices; avoid daisy-chaining)
- Smoke/CO detectors and a fire extinguisher(Install or verify functional detectors; keep extinguisher accessible)
- Protective barriers or reflective insulation(Minimize heat loss and shield sensitive items behind furniture)
- Personal protective equipment (PPE)(Gloves, eye protection; heat-resistant footwear)
- Plastic sheeting or containment barriers(Control airflow and limit heat spillover into adjacent rooms)
Steps
Estimated time: 6-12 hours
- 1
Inspect and prepare the space
Survey the infestation, identify hotspots, remove clutter, and seal cracks or openings that could harbor bed bugs. Document room layouts and note where electronics or heat-sensitive items are located. This preparation reduces heat loss and helps ensure consistent exposure.
Tip: Mark zones on a floor plan and plan sensor placement before starting. - 2
Position heaters and sensors
Place heaters to create overlapping heat zones and install sensors in the center of each zone and near potential cold spots. Ensure cords won’t trip occupants or get damaged by heat. Verify that nothing flammable is within the heaters’ vicinity.
Tip: Create a test run in a small area to confirm even heat distribution before expanding. - 3
Set safety devices and verify power
Check detectors, ensure alarms are functional, and confirm circuit capacity. Prepare a clear exit path and communicate the plan to occupants. Have a plan for rapid shutdown if temperatures exceed safe limits.
Tip: Always have a secondary power source or backup plan in case of outage. - 4
Begin controlled heat cycle
Gradually raise temperatures to target levels while monitoring readings from all sensors. Maintain target exposure for the recommended duration in each zone. Avoid abrupt changes that could damage items.
Tip: Log temperature readings at least every 30 minutes. - 5
Maintain coverage and verify
Ensure uniform heat across all zones with continuous monitoring. If any area lags, extend exposure or reposition heaters. Use a second pass if necessary to cover hidden crevices.
Tip: If a zone fails to reach target, pause and reassess airflow and insulation. - 6
Cool down and assess
After exposures, gradually cool the space and inspect for signs of residual activity. Verify that all zones returned to a safe, livable temperature before occupants re-enter. Remove equipment and clean up.
Tip: Document final temperatures and duration for records. - 7
Post-treatment inspection and prevention
Conduct a thorough post-treatment inspection or hire a professional to verify kill and identify any remaining harborage. Implement prevention measures such as decluttering, sealing entry points, and establishing a monitoring plan.
Tip: Schedule follow-up checks at 2–6 weeks to catch delayed activity.
Got Questions?
Is bed bug heater treatment safe for my home?
Heat treatment can be safe when performed by trained professionals or with strict protocols for DIY. It requires careful planning, proper equipment, and continuous monitoring to prevent heat damage or fires.
Heat treatment is safe when done correctly and with proper equipment and monitoring.
How long does a heat treatment take?
Total time depends on space size and equipment, but a typical session ranges from several hours to a full day, including setup, heating, and cooldown. Always build in extra time for verification and post-treatment checks.
Most sessions take several hours to a full day depending on space and equipment.
Will heat treatment kill bed bug eggs?
Heat can kill many eggs with sufficient exposure, but eggs occasionally require longer or repeated cycles in some environments. An integrated approach with inspection and follow-up is often needed.
Eggs can be killed with enough exposure; sometimes a second cycle is needed.
Should I hire a professional or DIY?
For small, accessible areas, DIY can work with proper equipment and safety. Large spaces or complex layouts typically benefit from professional teams that guarantee coverage and provide data-driven verification.
DIY works for small spaces, but professionals offer better coverage and verification.
How can I tell the treatment was successful?
Successful treatment shows no live bed bugs during post-treatment inspections, stable temperature logs across zones, and a reduced number of sightings during monitoring in the following weeks.
No live bugs and stable monitoring results indicate success.
What are the main safety risks during heat treatment?
Key risks include overheating, fires, electrical faults, and damage to heat-sensitive items. Mitigate by following safety protocols, using detectors, and keeping ignition sources away from flammables.
Fire hazards and heat damage are the main safety concerns; follow protocols.
Can heat treatment damage electronics or furniture?
Yes, excessive heat can harm electronics, wood finishes, and fabrics. Use protective barriers, monitor temperatures, and avoid directing heat at fragile items.
Yes, protect electronics and furniture with barriers and monitoring.
What maintenance is needed after treatment?
Continue monitoring for several weeks, declutter spaces, seal entry points, and consider periodic checks to catch any re-infestation early.
Keep monitoring for weeks and maintain prevention steps.
Watch Video
The Essentials
- Use heat strategically as part of an integrated pest plan.
- Ensure uniform heat distribution and ongoing monitoring.
- Balance safety with effective exposure to kill bed bugs.
- Plan for post-treatment inspection and prevention to avoid re-infestation.