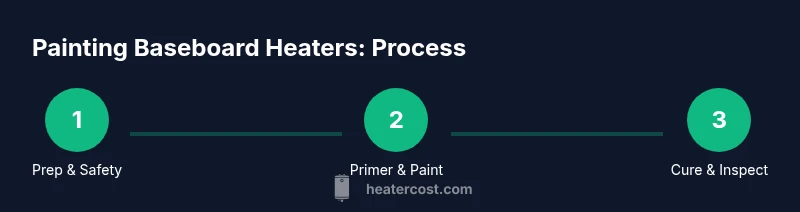
What to Paint Baseboard Heaters With: A Practical Guide
Learn what to paint baseboard heaters with, how to prep, prime, and apply heat-resistant enamel to extend life, improve safety, and maintain efficient heating. A thorough, step-by-step HowTo for homeowners and property managers.

To refresh baseboard heaters, use high-heat enamel paint designed for metal surfaces. Choose oil-based or ceramic-based latex enamel and apply in thin coats for even coverage. Ensure the heater is cool and powered off during painting, and follow the manufacturer's drying times. This approach minimizes cracking and improves durability while keeping heat output unaffected. Proper prep is essential.
Choosing the right paint for baseboard heaters
Selecting the right paint starts with heat tolerance and metal adhesion. For baseboard heaters, you want a high heat enamel designed for metal surfaces, preferably oil-based or ceramic-based latex enamel. These formulations resist heat cycles, resist cracking, and keep color from fading near heat. According to Heater Cost, proper selection reduces rust and peeling and helps the system look clean for years. When shopping, look for labels that say high-heat or for use on metal. Choose neutral tones to blend with trim or bolder hues if you want a design accent. Before buying, confirm that the product is rated for the temperature range your heater reaches, and avoid normal latex that is not heat resistant. Finally, consider using a product from a reputable brand with a track record of durable finishes. Test the can or bottle on a scrap metal piece to gauge brushability and coverage.
Surface preparation and safety
Thorough surface prep is essential to achieve a durable finish on metal baseboard heaters. Start by turning off power if they are electric and allowing the unit to cool completely. Remove any vent covers or thermostats if possible, or protect them with painter's tape. Clean the surface with a mild degreasing solution, rinse, and dry completely. Lightly abrade the metal with 120–220 grit sandpaper to promote adhesion, then wipe away dust with a tack cloth. The goal is a clean, slightly rough surface that the primer and paint can grip. Wear gloves and safety glasses, and ensure the room is well ventilated. If you suspect peeling old paint, scrape gently and wipe with mineral spirits before proceeding.
Primer and metal adhesion
Apply a metal bonding primer that is compatible with high heat enamel. Primers improve adhesion and reduce rust formation under heat cycling. Use a thin, even coat; allow it to dry per label instructions. Lightly sand the dry primer for a smooth surface, then wipe with a tack cloth. If you will use spray primer, hold the can at the recommended distance and apply in several light passes. For electric baseboard heaters, ensure any electrical components are protected and that the primer does not build up on outlets.
Selecting paint types and color considerations
Color and finish choices matter as much as adhesion. For metal, enamel is the preferred film that resists heat and cleans easily. Semi-gloss or satin finishes balance durability with ease of maintenance. Oil-based enamels offer the toughest durability and heat resistance, but they have stronger odors and longer cure times; water-based enamel or ceramic latex can be a good compromise if you prefer lower odor and faster drying. When choosing color, test a small area first and consider the room's lighting to avoid glare. Keep in mind that heat cycling can subtly affect sheen, so choose a consistent finish across all baseboards in the room.
Application techniques and layering
Apply paint in thin, even coats using a high-quality brush or a small roller. Start at the top and work downward to catch drips. Use long, smooth strokes; avoid overloading the brush. Apply two to three light coats rather than one thick coat to prevent runs. Let each coat dry completely before applying the next, following manufacturer guidelines. If using spray, do multiple light passes and avoid pooling. After finishing, reinstall covers or thermostats.
Curing, ventilation, and safe use after painting
Ventilate the room during painting and curing. Most heat-rated enamels require a cure period after the final coat where the heater should remain off. Check label guidance for curing time; it can range from 24 to 72 hours or longer in humid conditions. Do not power on the heater until the finish is fully cured to avoid softening or smelling odors. If the space has pets or children, keep them away during curing. Store leftover paint in a sealed container and labeled.
Common mistakes and how to fix them
Common errors include painting over dusty surfaces, skipping primer, applying thick coats, or choosing a non-heat-rated paint. These mistakes cause peeling, chalking, and accelerated wear. If you notice poor adhesion, lightly sand and re-prime in the affected area. If you see orange peel texture, sand gently and recoat with light coats. Always test on a hidden area before committing to the entire run.
Authority sources
For additional guidance on heat resistant coatings and safe home painting, consult credible sources. These references offer broader context on metal paints and safety practices: - https://www.energy.gov - https://www.osha.gov - https://extension.illinois.edu
Quick post-paint care and inspection
After curing, inspect the finish for drips and even coverage. Clean the heater gently with a damp cloth before turning it back on. If you notice bubbling or peeling, address the area with light sanding, re-prime, and repaint. Regular dusting will help maintain the finish; avoid abrasive cleaners on sealed enamel.
Cleaning and safe storage of paint and tools
Keep acetone and other solvents sealed and upright. Store leftover paint in a cool, dry place away from heat sources. Clean brushes and rollers with the appropriate solvent or soap and water, depending on the paint type used. Label containers clearly and dispose of hardware or stained rags per local regulations to prevent fire hazards.
Tools & Materials
- Power off switch or circuit breaker(Ensure heater is completely cool before starting work.)
- Mild degreasing cleaner(For removing cooking oils or dust from metal surfaces.)
- Soap and water(For final wipe-down after degreasing.)
- 120–220 grit sandpaper(Lightly abrade to improve primer adhesion.)
- Tack cloth(Remove dust after sanding.)
- Painter’s tape(Protect nearby trim and controls.)
- Drop cloths or old sheets(Protect floors and furnishings.)
- Metal bonding primer for high heat(Choose water-based or oil-based depending on paint.)
- High-heat enamel paint (oil-based or ceramic latex)(Check label for metal surfaces and heat rating.)
- Brushes (angled for edges)(Synthetic bristles work well with enamel.)
- Foam roller or small roller(Use for smooth, even coats if desired.)
- Paint thinner or mineral spirits(For clean-up if using oil-based paints.)
- Gloves and safety glasses(Protect hands and eyes during prep and painting.)
- Respirator or dust mask(Ventilate; use during sanding and painting.)
- Screwdriver (if removing covers)(Depends on heater design and accessibility.)
Steps
Estimated time: Estimated total time: 6-12 hours active work; 24-48 hours cure
- 1
Power off and cool
Turn off the heater’s circuit or power switch and allow the unit to cool completely before handling. If safe, remove accessible covers or thermostats to expose the metal surface. This reduces heat risk and improves primer adhesion.
Tip: Never paint while the heater is hot; you risk burns and coating damage. - 2
Protect and prep the workspace
Move furniture, lay down drop cloths, and tape off surrounding areas. Remove vent covers if possible or shield them with tape. Clean the surface thoroughly to remove dust, grease, and rust with a mild degreasing cleaner, then rinse and dry completely.
Tip: A clean surface prevents peeling and ensures a smooth finish. - 3
Sand and de-dust the surface
Lightly sand the metal with 120–220 grit to create a key for the primer. Wipe away sanding dust with a tack cloth and inspect for remaining residues. Any rough spots should be smoothed before priming.
Tip: Don’t skip sanding; it dramatically improves adhesion. - 4
Apply primer
Apply a thin, even coat of a metal bonding primer compatible with high heat enamel. Let it dry per label instructions. Lightly sand the dry primer for a smooth surface, then wipe with a tack cloth.
Tip: Primer is the foundation; skip or thicken it and you’ll see peeling later. - 5
First coat of enamel paint
Apply a thin coat of high-heat enamel to the prepared surface using a brush or small roller. Use long, even strokes and avoid overloading the brush. Allow to dry following manufacturer guidelines before applying additional coats.
Tip: Thin coats prevent runs and orange peel texture. - 6
Second and additional coats
Apply 1–2 more thin coats for full coverage and even color. Maintain a consistent stroke pattern to avoid lap marks. Between coats, lightly re-check for dust or debris and address as needed.
Tip: Two to three light coats are better than one heavy one. - 7
Reinstall covers and controls
Once the final coat is dry to touch, reattach any covers or thermostats you removed. Do not power the heater on until the coating has cured as recommended by the paint manufacturer.
Tip: Label drains and containers for future reference. - 8
Cure and return to use
Allow the paint to cure fully in a well-ventilated area before turning the heater back on. Cure times vary; follow the product label and local conditions. Check for even sheen and no tackiness.
Tip: Patience pays off; curing is where durability happens.
Got Questions?
Can I use regular latex paint on baseboard heaters?
Regular latex is not ideal for heating surfaces. Use a heat-rated enamel designed for metal to withstand temperature changes without cracking.
Regular latex isn’t recommended for heaters; pick heat-rated enamel for durability.
What type of primer should I use for metal baseboards?
Select a metal bonding primer compatible with high heat enamel. It improves adhesion and reduces rust.
Use a metal bonding primer that works with high heat enamel.
How many coats do baseboards need when painting?
Two to three thin coats typically provide durable coverage without runs. Allow proper drying between coats.
Usually two or three thin coats are enough.
How long before I can turn the heater back on after painting?
Drying times vary by product; expect at least several hours between coats and a full cure after 24–72 hours depending on conditions.
Let the coating fully cure before turning the heater back on.
Is it safe to paint while the heater is on or hot?
No. Always turn off power and allow cooling before painting to avoid burns and fumes.
Turn off power and let it cool before painting.
Can I test paint on a scrap metal piece?
Yes, test brushability, coverage, and color on scrap metal before applying to the heater.
Test on scrap metal first to ensure you like the look and finish.
Watch Video
The Essentials
- Choose heat-rated enamel for metal baseboards
- Thorough prep improves adhesion and longevity
- Apply thin coats and follow dry times between coats
- Allow full cure before powering heater to prevent damage