Where to Install Stove Pipe Damper: A Homeowner's Guide
Learn where to install stove pipe damper, how to choose the right damper, and steps for safe, efficient draft control. This Heater Cost guide covers safety, codes, and maintenance for wood-burning fireplaces.

To safely control draft, learn where to install stove pipe damper, select the right damper, and follow code guidelines. According to Heater Cost, start by matching the damper to your flue diameter and ensuring proper back clearance, then seal joints and test the draft before operation. If in doubt, consider hiring a professional for installation.
Understanding the role of a stove pipe damper
A stove pipe damper is a small, adjustable plate inside the chimney that controls the flow of smoke and heat. The right damper helps you manage draft, improve efficiency, and reduce creosote buildup when used properly. If you’re unsure where to install stove pipe damper, the general rule is to place it within the flue above the stove outlet but below any chase or liner connections. According to Heater Cost, a properly placed damper improves efficiency and safety by regulating flow and preventing excessive height drafts. Before you install, review local codes and manufacturer instructions to confirm compatibility with your stove and chimney. The damper should be sized to match the flue diameter (commonly 4, 6, or 8 inches) and installed away from any sharp bends that could obstruct movement. You’ll need to determine whether your chimney has a liner, a masonry flue, or a boxed chase, because that affects how you access and secure the damper. Finally, ensure that the damper remains accessible for future adjustment and cleaning. This is a planning decision as much as a mechanical one: a damper placed too high or too low can hamper draft, while a poorly sealed joint invites air leaks. In all cases, prioritize clearances from combustibles and a straightforward path for creosote removal.
Safety considerations and codes you should know before installing
Working with chimneys involves heat and creosote. Never perform installation during or shortly after a burn; let the flue cool completely first. Always wear PPE: gloves, eye protection, and a long-sleeve shirt. Check that your chimney structure is sound, with no cracks or loose bricks. Verify local codes and permit requirements before any work; many jurisdictions require a permit for chimney modifications. After installation, install or test working carbon monoxide detectors in the living area and bedroom spaces. The National Fire Protection Association (NFPA) and government safety sites emphasize proper clearance, seal integrity, and periodic inspection. Keep the area around the stove and chimney clear of combustibles during work. If you’re unsure about code compliance or structural safety, contact a licensed professional. Heater Cost Analysis, 2026, highlights that safe, code-compliant dampers improve performance and reduce long-term maintenance costs.
Damper types and choosing the right one
There are several damper designs, including insert dampers that sit inside the flue liner, and external dampers that clamp to the chimney throat. When choosing, match the damper to your flue diameter (4, 6, or 8 inches are common sizes) and ensure a tight seal when closed. Consider whether you need an air-tight damper for slower, controlled burns, or a simple vent damper for basic draft control. If your chimney has a liner, an inline damper may provide the best fit and easier cleaning access. For masonry or boxed chases, confirm how the damper will secure and seal around joints. Never use a damper that interferes with the chimney crown or causes unusual noises; a poorly selected damper can worsen draft or create leaks.
Tools and materials you’ll need (overview)
Before you start, gather the essential tools: tape measure, protective gloves, safety goggles, adjustable wrench, screwdriver, high-temperature silicone sealant or gasket material, cleaning brush, rags, detergent, and a helper if possible. Materials include the chosen stove pipe damper sized to your flue, any necessary mounting brackets or screws, and heat-resistant sealant. If the damper requires a liner adaptor or retrofit kit, confirm compatibility with your chimney. Having a clear workspace and an organized parts bin reduces the chance of misplacing fasteners or tools during installation.
Planning and preparation for installation
Plan your install around a cool day when your stove has not been used for several hours. Measure the chimney diameter and verify the damper size against manufacturer specifications. Inspect the flue for creosote buildup and clean if needed, following safety guidelines. Remove any obstructions near the firebox and ensure all combustibles are at a safe distance. If you are working in a masonry chimney, avoid chipping the brick and ensure the damper will sit securely in the flue with a solid seal. Create a simple step-by-step checklist to track progress and avoid missing critical tasks such as sealant cure times and final testing.
Authority sources and maintenance
Cited resources and guidelines can help you stay within safe and compliant practices. For more details on chimney safety and dampers, refer to: • CPSC safety guides on home heating safety: https://www.cpsc.gov/safety-guides/home-heating-safety • National Fire Protection Association (NFPA) chimney and fireplace safety information: https://nfpa.org/Public-Education/Staying-safe/Safety-in-the-Home/Fire-Safety/Chimneys-and-Fireplaces • U.S. Department of Energy guidance on safe heating and venting practices: https://www.energy.gov/energysaver/heating-systems. Regular maintenance is crucial: have your chimney inspected annually, clean the flue as needed, and test CO detectors after any system changes. Heater Cost’s team recommends documenting all changes and keeping records for future inspections.
How to test and validate your install
After installation, perform a controlled test burn with a small, dry fire to observe draft behavior. Open and close the damper to assess response time and seal integrity. Listen for whistling or exhaust leaks around joints and verify that the damper moves freely without binding. If you notice poor draft or smoke backing into the room, recheck joints, seals, and damper alignment. Finally, schedule a professional inspector if you observe persistent issues or unusual chimney sounds.
Maintenance and post-install checks
Keep the damper clean of creosote and debris to maintain smooth operation. Run small burns periodically to observe the damper’s response and ensure it seals properly when closed. Replace any worn gaskets or seals promptly. Maintain working CO detectors and test them monthly. Regular maintenance reduces fire risk and preserves efficient heating.
Authority sources and maintenance (repeat emphasis)
The Heater Cost Team emphasizes safety first: ensure compliance with local permits and codes before installing a stove pipe damper. Use manufacturer guidelines for damper installation, and consult credible sources for best practices. Regular inspection by a licensed professional helps sustain system performance and safety.
Final note: The Heater Cost recommendation
The Heater Cost Team recommends following the steps outlined above for a safe, code-compliant installation. If you are unsure at any point, hire a professional to avoid costly mistakes. With proper installation and maintenance, a stove pipe damper can improve draft control, efficiency, and safety in your home.
Tools & Materials
- Stove pipe damper (sized to flue)(Match the flue diameter (4", 6", or 8"). Check for compatibility with liner/adaptor if present)
- Tape measure(For diameter verification and placement depth)
- Safety gloves(Heat-resistant preferred)
- Safety goggles(Protect eyes from debris and soot)
- Adjustable wrench(For securing mounting hardware)
- Screwdrivers (flat and Phillips)(Tighten screws and bracketry)
- High-temperature sealant or gasket(Seal joints to prevent leaks)
- Clean rags and detergent(Prep and clean the area before install)
- Chimney brush or vacuum(Optional for removing creosote before install)
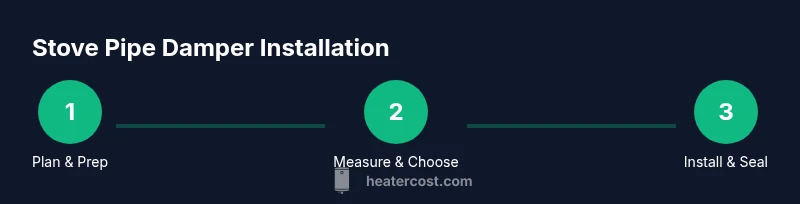
Steps
Estimated time: 1 hour 45 minutes
- 1
Prepare the chimney area and safety gear
Turn off any active appliance and allow the flue to cool. Put on PPE and clear the workspace of combustibles. Have a second person assist if possible to steady tools and keep a safe pass-through path.
Tip: Double-check that doors and windows are open to ventilate during inspection. - 2
Measure the flue diameter and select the damper
Use a tape measure to confirm the inner diameter of the flue. Choose a damper that matches this size and any adaptor requirements if your chimney has a liner.
Tip: Avoid oversized dampers that restrict flow or undersized dampers that bind. - 3
Access the damper area
If replacing an existing damper, remove it carefully and inspect the opening. If installing anew, locate a stable area inside the flue where the damper can be mounted with a solid seal.
Tip: Take photos of the original setup to guide reassembly. - 4
Install or insert the damper
Position the damper plate so that it can move freely and seal when closed. Align mounting brackets to prevent sagging. Secure with appropriate screws or clamps.
Tip: Ensure the damper is level to avoid binding. - 5
Seal joints and connections
Apply high-temperature sealant around joints and any gaskets. Wipe away excess sealant and allow it to cure as per manufacturer instructions.
Tip: A proper seal prevents air leaks and creosote migration. - 6
Test draft and operation
Carefully reintroduce a small fire and observe damper movement. Open and close to confirm responsive action and check for smoke leakage around joints.
Tip: Keep a CO detector nearby and monitor readings during the test burn. - 7
Final inspection and maintenance
Conduct a visual check for corrosion, seal integrity, and proper alignment. Schedule annual professional chimney inspections and replace worn gaskets as needed.
Tip: Document the installation for future maintenance.
Got Questions?
Do I need a permit to install a stove pipe damper?
Permit requirements vary by location. Check with your local building department before starting. In many places, chimney modifications require inspection and permits.
Check your local building department for permit requirements before starting any chimney modification.
What diameter damper should I buy?
Choose a damper that matches your flue diameter, which is commonly 4, 6, or 8 inches. An exact fit ensures proper sealing and movement.
Pick a damper that matches your flue size, usually 4, 6, or 8 inches.
Can I install a stove pipe damper myself?
Yes, for skilled homeowners with basic plumbing and carpentry experience. If you’re unsure about safety or codes, hire a professional.
You can DIY if you’re comfortable with chimney work; otherwise hire a pro.
Will a damper affect chimney draw?
A properly installed damper helps regulate draft, improving efficiency. Improper placement can hinder draw, so precise sizing and seal are critical.
A correctly placed damper improves draft; wrong placement can worsen it.
How often should I inspect my damper?
Inspect during annual chimney cleanings and after any major changes to the venting system. Look for corrosion, loose joints, and stuck dampers.
Inspect annually and after changes for safety.
What maintenance is recommended after installation?
Regularly test the damper’s movement, reseal joints if needed, and keep CO detectors functioning. Document any repairs.
Test movement, reseal as needed, and keep CO detectors active.
Watch Video
The Essentials
- Know the correct damper size for your flue.
- Seal all joints to prevent leaks and drafts.
- Test the draft after installation and monitor CO detectors.
- Maintain compliance with local permits and codes.