Heater for Outdoor Dog House: A Practical Guide
A practical guide to selecting, sizing, and maintaining a heater for an outdoor dog house with safety, energy efficiency, and cost guidance.

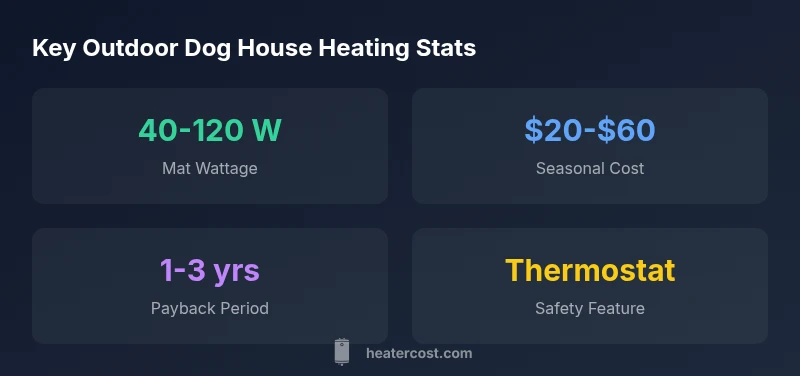
A heater for outdoor dog house should be sized to maintain a safe temperature inside the shelter, typically using 40-120 watts for heat mats or 100-400 watts for small space heaters, depending on climate, insulation, and dog size. Install a thermostat or temperature-controlled switch to prevent overheating, and choose outdoor-rated equipment with weatherproofing.
Why a heater for outdoor dog house matters
In cold climates, dogs left outdoors face drafts, frost, and damp bedding that can affect health and comfort. A properly sized heater can help maintain a safe interior temperature, reduce shivering, and support digestion and energy during harsh winter nights. However, heating an outdoor shelter is not a simple add-on: it requires weatherproof equipment, safe mounting, and correct sizing to avoid overheating or energy waste. When planning a heater for an outdoor dog house, consider the shelter’s volume, insulation quality, wind exposure, and the dog’s size and coat. Real-world results show that a modest, thermostat-controlled heater can keep the interior at a stable temperature during subfreezing nights, while poorly insulated or undersized systems waste energy and may pose fire risks. According to Heater Cost, the goal is to balance safety, comfort, and operating costs by selecting equipment with weatherproof ratings and reliable temperature control.
Design considerations for a heater for outdoor dog house
A durable heating setup starts with the enclosure itself. Choose a shelter with solid flooring, weatherproof walls, and a door that reduces heat loss when open. Install the heater in a location that minimizes exposure to direct rain and snow, and keep it away from bedding that could trap heat or catch fire. Weatherproof ratings, IP ratings, and outdoor-rated cords are essential. Elevating the heater above the floor reduces moisture exposure and helps with air circulation. If possible, insulate the walls and floor to cut heat loss; even modest insulation can dramatically lower the wattage needed. Finally, plan for safe power delivery: use a dedicated outdoor circuit with GFCI protection and choose equipment that has protective covers to keep dust and moisture out. A thoughtful setup minimizes running costs and protects your dog’s wellbeing.
Heating options: radiant heat mats, ceramic heaters, and space heaters
There are several approaches to heating an outdoor dog house, each with trade-offs. Radiant heat mats sit beneath bedding and deliver gentle warmth with low air movement, reducing the risk of overheating but requiring careful cord management to avoid chewing. Ceramic space heaters provide stable warmth and quick response times, but you must ensure they are mounted securely and have a sturdy guard to prevent contact with paws or bedding. Infrared/heat lamps offer direct warmth over a small area and can work well in larger, wind-exposed shelters, yet they require proper distance from flammable materials and regular veterinary oversight. Whichever option you choose, pairing it with a thermostat or temperature controller is critical to preventing overheating. Market options range from low-wattage mats to compact heaters rated for outdoor use, and the right choice depends on the dog’s size, the shelter’s insulation, and local winter conditions.
Sizing and insulation fundamentals for the heater for outdoor dog house
Size and insulation determine how much heat you’ll actually need. Start with the shelter’s interior volume (length × width × height) and estimate heat loss based on typical winter temperatures in your area. Insulation dramatically reduces required wattage: a well-insulated floor, walls, and roof keep more heat inside and less escaping through gaps. Simple steps include adding foam board under the floor, sealing cracks around the door, and upgrading to insulated door flaps. Remember that wind exposure increases heat loss, so consider a windbreak or sheltered location if the dog house sits in an open yard. In practical terms, a well-insulated, small space might work with lower wattage, while larger, uninsulated structures in windy climates may need higher output. Thermostats should be used to hold a comfortable range rather than blasting heat non-stop, and regular checks during cold snaps help confirm the setup meets your dog’s needs.
Safety and energy efficiency best practices for outdoor heating
Safety tops the list when heating outdoor shelters. Use only outdoor-rated equipment with weatherproof housings and cords, and include a thermostat or temperature controller to avoid overheating. Important safety features include an automatic shut-off on tipping or overheating, proper guards around heating elements, and protective shelving to keep the heater from contacting bedding. Position heaters away from direct contact with the dog and from potential combustibles; never run a heater inside a closed, unventilated space if using gas or fuel-based units. For electrical options, ensure a GFCI-protected circuit and weatherproof outlet cover. Maintaining energy efficiency means combining insulation, draft prevention, and smart controls to reduce running time. On cold nights, it’s worth monitoring interior temperatures and adjusting wattage to balance comfort with cost. The Heater Cost team emphasizes routine safety audits and using the lowest effective wattage in consistently cold climates.
Installation tips: wiring, weatherproofing, and mounting for the heater for outdoor dog house
A proper installation keeps equipment secure and accessible for maintenance. Mount the heater on a stable, non-flammable surface, away from the door, and protect cords with weatherproof conduit or a dedicated outdoor outlet. Route cables through weatherproof grommets and seal any penetrations with silicone. Use outdoor-rated mounting brackets and ensure there is space for air flow around the heater to prevent overheating. If you hire an electrician, insist on a dedicated 120V circuit with GFCI protection and a weatherproof outlet. Keep a drip loop in cords to shed water and use a power cord that’s rated for exterior use. Install a simple thermostat or temperature controller near the inside of the dog house so you can verify the actual interior temperature. After installation, test the system during several cold nights and adjust settings as needed. Documentation of the installation and a maintenance schedule will help sustain performance.
Maintenance and troubleshooting for the outdoor dog house heater
Regular maintenance extends heater life and protects your dog. Schedule annual inspections to check wiring, seals, and mounting; inspect the exterior housing for cracks or moisture ingress. Clean dust and pet hair from grills and vents, and ensure cords are not chewed or frayed. Verify thermostat accuracy by comparing the interior temperature with an independent thermometer. If temperatures drift or the heater turns on and off irregularly, recalibrate the thermostat and inspect connections. Look for warning signs like unusual smells, smoke, or warm surfaces beyond normal heat; shut off power immediately if you detect a problem. For power outages, have a backup plan—such as a secondary heat source or a weatherproof sleeping area—so your dog isn’t left in the cold. A simple, proactive maintenance routine reduces risk and improves energy efficiency over time.
Cost considerations, ROI, and budgeting for the heater for outdoor dog house
Upfront costs vary by heater type and shelter setup. A basic heated mat can be relatively inexpensive but may require replacement more often; a compact space heater or infrared option costs more initially but may deliver stronger, more uniform warmth. Ongoing energy costs depend on climate, insulation, and the heater’s duty cycle; thermostat control is essential to keep bills reasonable. In very cold regions with poor insulation, you should expect longer run times and higher energy use, but strategic insulation can dramatically reduce this. When evaluating ROI, compare total costs over multiple winters: purchase, installation, energy usage, and potential reductions in winter-related vet visits or stress on the dog. From Heater Cost’s perspective, the most cost-effective approach often combines modest wattage with solid insulation and a reliable thermostat. By starting small and expanding if needed, homeowners can minimize upfront risk while ensuring a warm, safe shelter for their dog.
Quick-start installation checklist for a heater for outdoor dog house
- Determine shelter volume and insulation level; choose a heater with thermostat.
- Select an outdoor-rated heater and weatherproof installation.
- Install on wind-protected, raised surface.
- Ensure a dedicated GFCI circuit.
- Seal doors and add draft protection.
- Test in cold nights and monitor temps.
- Create a simple maintenance schedule.
Comparison of heater options for outdoor dog houses
| Option/Component | Typical Wattage | Estimated Running Cost (Winter) | Key Considerations |
|---|---|---|---|
| Heated mat under bedding | 40-120 | $20-$60 | Low-profile, quiet, requires cord management |
| Ceramic space heater (outdoor-rated) | 100-400 | $40-$120 | Good warmth, needs secure mounting |
| Infrared/heat lamp | 150-400 | $60-$140 | Direct heat, maintain distance from flammables |
| Thermostat-controlled unit | Varies | Varies | Essential safety feature |
Got Questions?
What is the safest heater option for an outdoor dog house?
Choose an outdoor-rated heater with weatherproof housing and a thermostat. Install guards and keep the unit away from bedding. Regular checks reduce risk.
For safety, select outdoor-rated equipment with a thermostat and protective guards, and perform regular checks.
How many watts do I need for cold climates?
Wattage depends on space, insulation, and climate. Typical ranges are 40-120 W for mats and 100-400 W for compact heaters.
Wattage depends on climate and shelter; common ranges are 40-120 watts for mats or 100-400 watts for compact heaters.
Can I use an indoor heater outside?
No. Indoor heaters lack outdoor safety features and weatherproofing. Use equipment rated for outdoor use.
Avoid indoor heaters outdoors—use models designed for outdoor use with weatherproofing.
How do I size the heater for a dog house?
Assess interior volume, insulation, and climate. Start with a small, thermostat-controlled unit, monitor temperature, and adjust as needed.
Start small with a thermostat, monitor the temps, and adjust based on observations.
What maintenance is needed for outdoor heaters?
Inspect wiring, seals, and vents annually. Clean dust, check for chew marks, and verify thermostat accuracy.
Regular checks of wiring, seals, and thermostat help prevent failures.
Are permits or codes required for installation?
Outdoor electrical work may require GFCI protection and local permits. Check your local codes and hire a licensed electrician if needed.
Check local codes; outdoor electrical work often needs GFCI and possibly a permit.
“Size and safety go hand in hand when heating an outdoor shelter; a properly controlled heater protects your dog's health while keeping energy use reasonable.”
The Essentials
- Prioritize safety with outdoor-rated equipment.
- Size your heater to climate and insulation.
- Install a thermostat to prevent overheating.
- Budget for upfront costs and running costs.
- Regularly inspect wiring and cord protection.